Where the tool is not able to penetrate the plate in a single pass, either because it is too short or because it would require too much force, or if a particularly high surface finish is required, then it will be necessary to perform a roughing cut.
When you perform a roughing cut you have the option of using another cutting process such as plasma, or to use the same milling bit that will be used for the finishing cut.
The illustration below shows the normal procedure when using a milling tool to perform the roughing operation. A number of roughing cuts are performed in order to penetrate the plate, and then a finishing cut is used to clean up the face. The finishing cut is used to remove the 'stepped' appearance created by the roughing cuts.

The nature of the roughing cut is determined by the settings selected in the Processing Options.
As milling processes are often used to clean up a burn, and do not normally require the machine to use Finishing Pass settings, for this normal cut settings will be in effect even if a roughing cut has been selected. The milling process option Use Finishing Settings for All Passes should be checked if you want the machine to use finishing settings.
Using the Mill for Cleaning up a Burn
A common application of a roughing cut is to use the milling to "clean up" a burnt face (cut with plasma or flame). In these scenarios the burning pass is considered to be the Roughing Cut and the Milling cut the Finishing Cut. This is usually done on internal cuts; if done on an external cut it is likely the workpiece will move during edge machining unless it is very large or fixtured in place.
If plasma or flame is to be used as the roughing tool, then you will need to make the operator aware that a slug may need to be removed before the milling operation is commenced. Ideally you should insert a pause using the sequencing editor.
When cleaning up a plasma cut, you should mill at least 2mm (0.080") deep (Roughing offset at least 2mm deep) so that the teeth of the milling bit cut beneath the plasma Heat Affected Zone (HAZ), which is a hard surface layer produced by the heat of the plasma, especially if Nitrogen is present in the process.
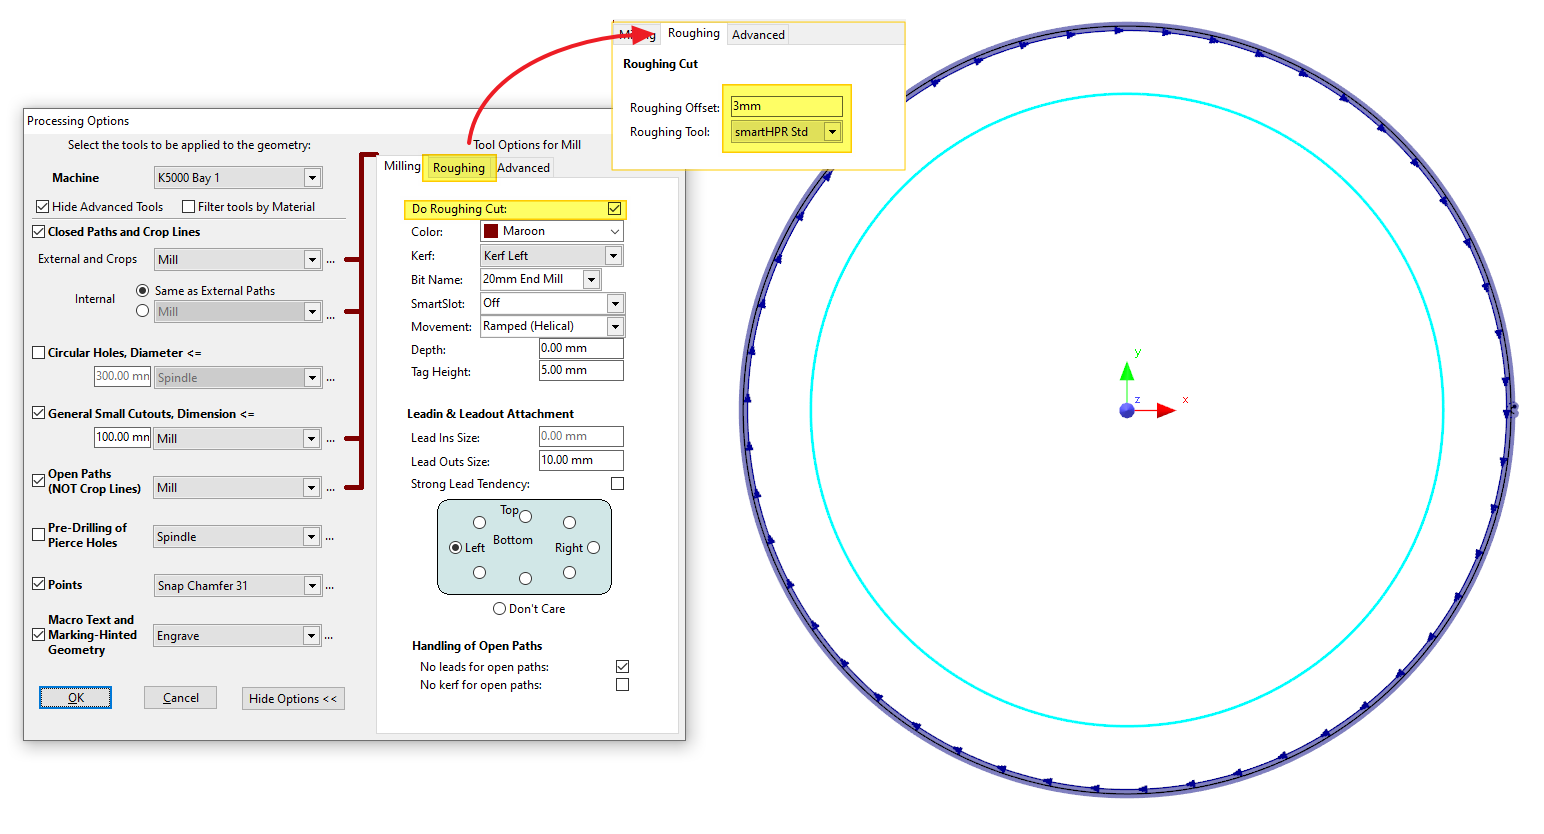
Example: Cleaning up a Plasma Cut
Here we want a machined finish on the internal 10" hole in a ring. We processing the hole with a milling tool, with Do Roughing Cut checked, which makes the Roughing tab visible. On the Roughing tab, set the Roughing Offset and Roughing Tool to plasma. PrimeCut will add the offset roughing geometry automatically.
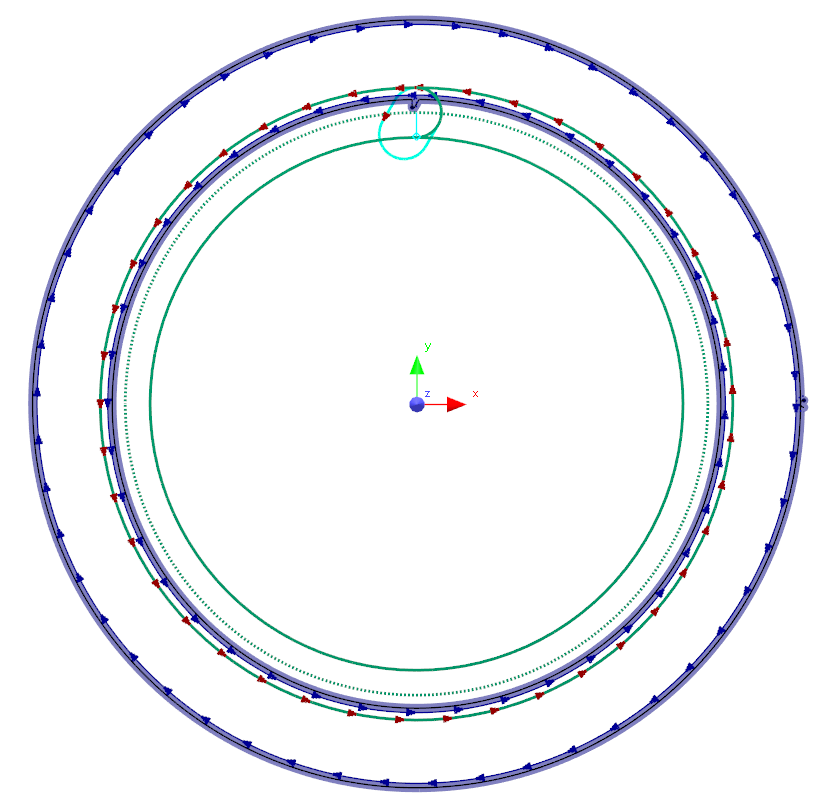
The finished product shows the plasma roughing cut in blue, offset inwards and the milling cleanup cut in green (centerline is dotted, solid green lines are the extents of the mill geometry as it sweeps around, the arrows are on the edge of the drawn geometry. As we selected helical milling, there are no leads on the mill path, but there are of course leads on the plasma roughing cut.