Available in Release 131
To share Workorders or Quotes between different Primecut servers and/or databases there is the Import/Export functionality shown below. This allows complete workorders (with processing etc.) to be transferred to another server or database.
When a workorder is exported, the relevant workorder items, plates, parts etc. are exported from the database and saved into a .nejob file.
When a workorder is imported the process is a little more complex. The tutorials database is cloned (if not already exisitng) to create a 'workorder import temporary' database, which is then wiped of data. The workorder and all its associated components are imported to this temporary database. The items are then all loaded into a new hidden workspace so that they can be saved to the current database once they are configured to work with the existing database. the 'keys' of a lot of the items need to be updated to be compliant with the current database as having duplicates would be very problematic, also certain items need to be 'mapped' to local versions, for example tooling - a part will be cut with a different torch on another site/controller this change over is 'mapped'. Some data is also overwritten such as the user, site id etc. Once all the items are updated to be compatible to the local database, they are saved.
Export Workorder or Quote
To export a workorder or quote it needs to be loaded into the explorer and be in a saved state. Select and right click the workorder you want to export, right click and select export workorder from the popup menu.
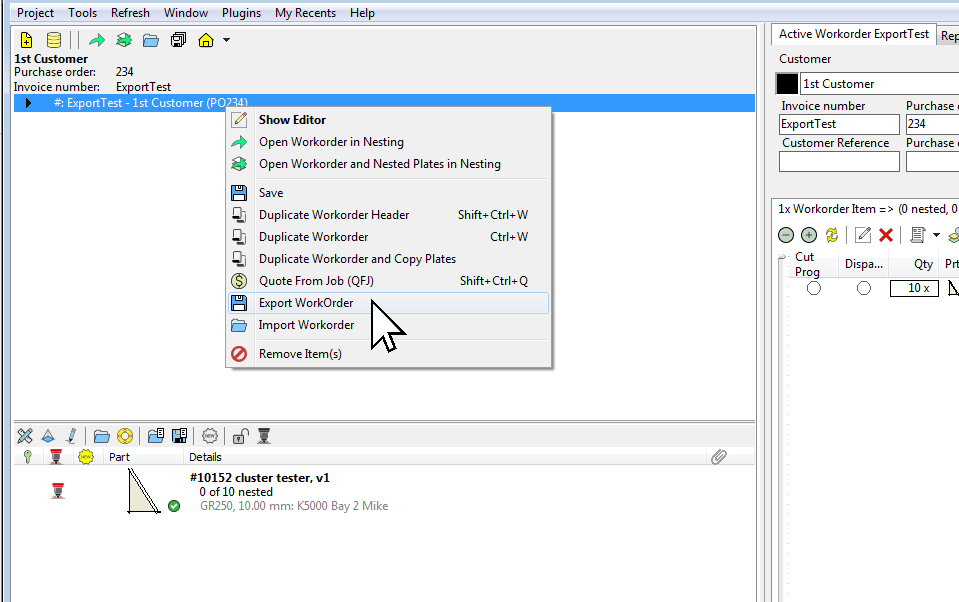
A Save dialog will open where you can change the filename that you want to save as - the default will be based on information from the workorder.
Importing a workorder is a bit more involved than exporting as we need to map all the relevant items to local values (customers, tools etc.).
To import a workorder or quote press the blue folder icon in the workorder or quote explorer. A dialog will be shown, navigate to and select the file you want to import from.
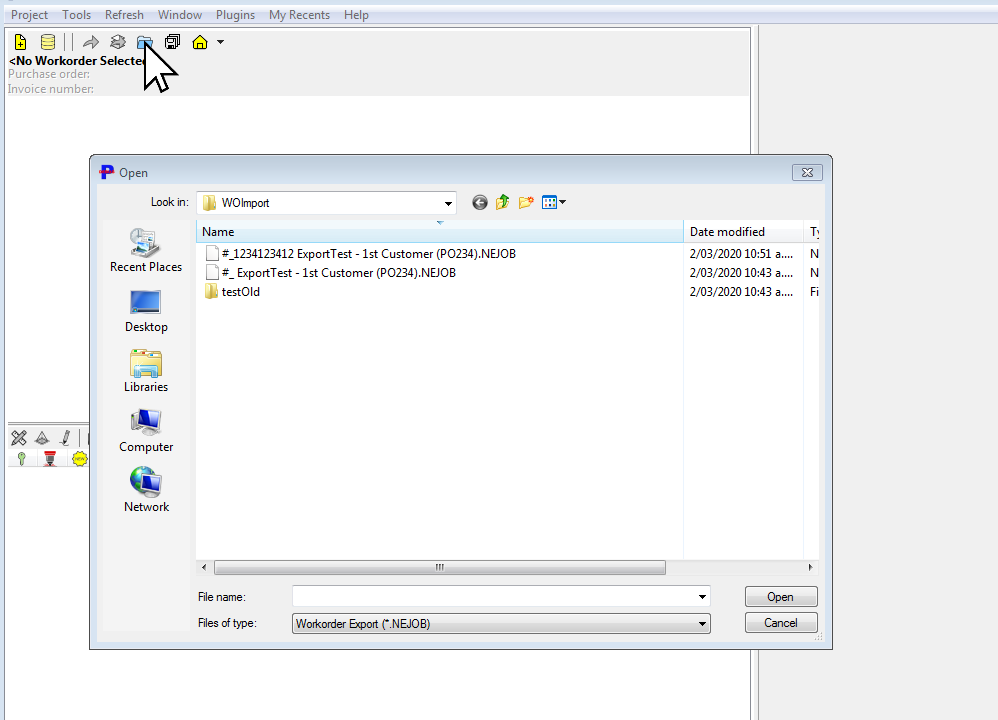
After selecting a workorder or quote file to import a Workorder Importing Settings window will be displayed
A machine or controller from the importing database needs to be selected as well as how nests and plates in the workorder should be handled.
If Transfer nests to matching empty plate(s) already in stock is ticked PrimeCut will search for in stock empty plates that are as large or larger than plates on the original workorder. If any are found it will then transfer nesting onto the smallest of these.
If PrimeCut is unable to transfer any of the nests onto preexisting stock plate it will then look at the Additional plate import/creation options to decide on what to do with the remaining nests.
You can tell PrimeCut to create pre-order plates, stock plates or if you want to import workorder and parts without using preexisting nests you can select No new plate creation
If importing a quote the additional options will only allow No new plate creation or Create new dummy quoting plates to be selected.

Mapping of Materials, Customers, Tools etc
The next dialog maps items from the workorder to options that are available on the local database, these include customers, materials and tools etc.
Primecut will try to match items and where it can find a match an 'auto' mapping will be applied. Hot tip: If you are importing and regularly encounter materials that don't auto link, edit your materials and add aliases to them.
To manually link an item, select it and then double click on the appropriate entry in the Destination Options To Link list.
All mapping items must have an auto or manual link applied to be able to continue.
At least one matching material thickness must exist for mapping and importing. If no Destination Option is available for a material, exit out of importing and add the material thickness to one or more of your materials.
Some items, for example, Customers, can be imported as well, if this is available the Import Selected Item button will be enabled and the item can be directly imported.
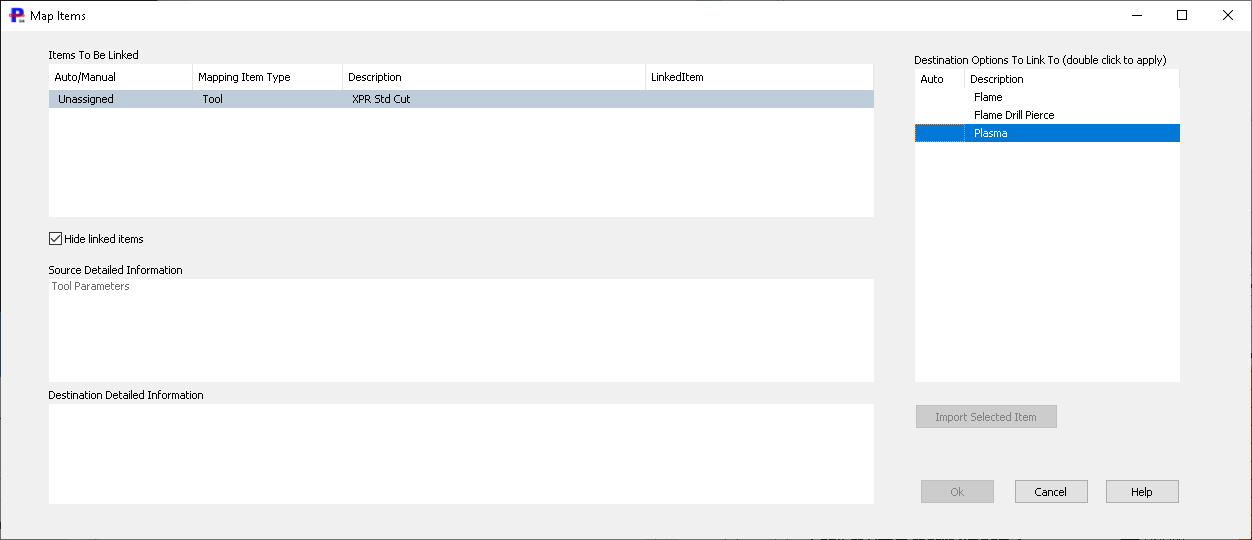
In normal usage you would tick the Hide linked items check box to just see what outstanding items you have left to link.
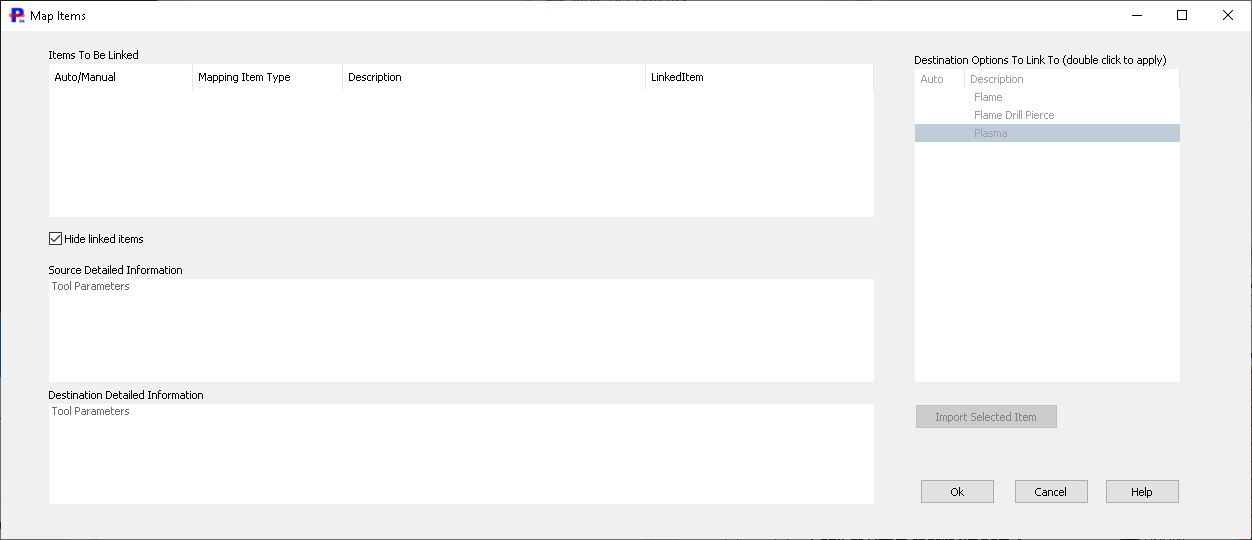
If Hide linked items is not ticked you can view and verify all the mappings that are to be applied and adjust them if necessary, simply select the item and then double click on a new destination option.
Once every item has a mapping, the Ok button will be enabled.
Viewing and discarding nests
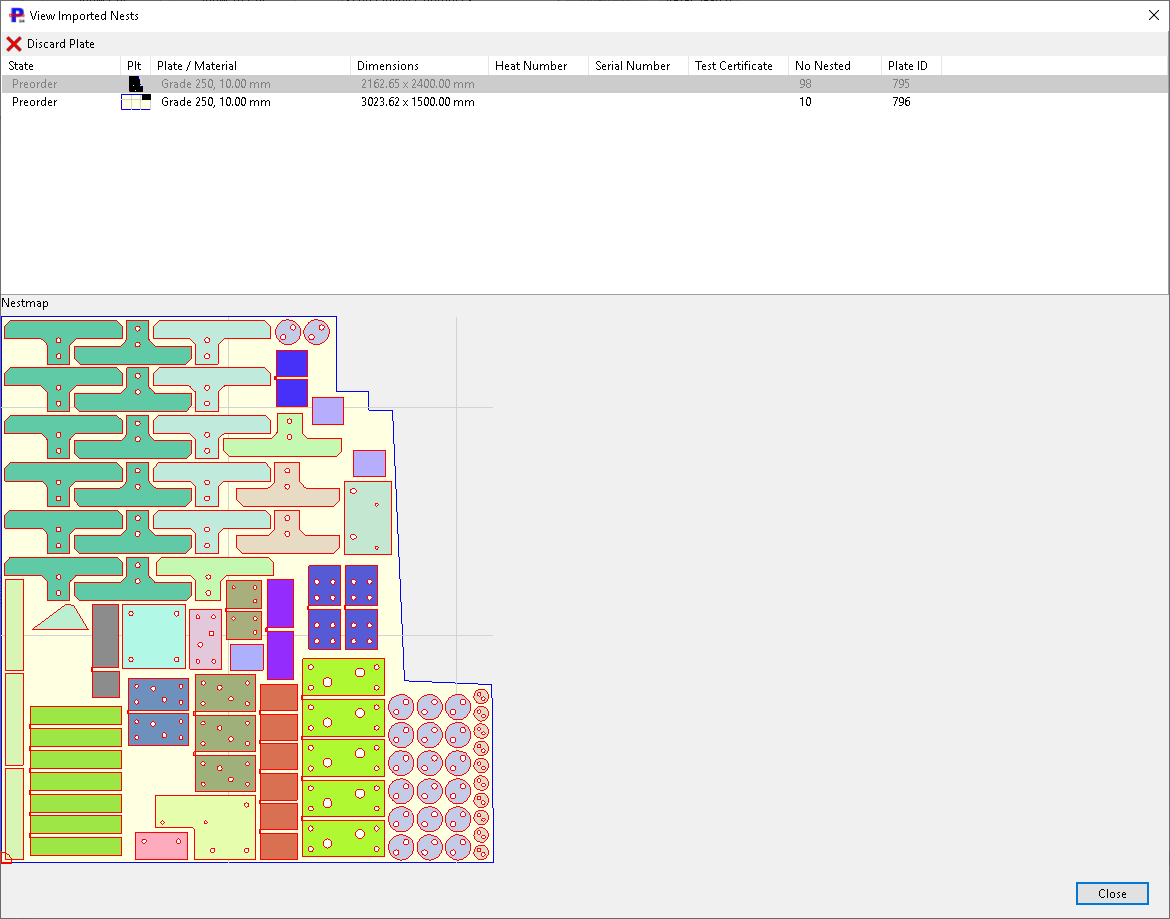
The workorder will then be imported and if any nests have been transferred onto plates you will be shown a list of the nests and given the option to discard the plates if you desire.
If nests are transferred onto existing stock plates crop lines will be removed.
All parts will be remain on the workorder regardless of whether or not you discard any plates.
After this the workorder, parts and plates will be saved to the local database. A dash number will be appended to the workorder if it is being imported a second time or matches the details of an existing workorder.