Sometimes in cutting a plate, you will have many of the same part to nest, and you will be able to simultaneously cut more than one instance of a part in a row along the length of the beam, with multiple torches. The Kinetic term for this is MultiBox cutting.
1Open the workorders mode.
2Search for and open the workorder with Multibox as its Invoice number. If no match comes up, make sure to select the "Show All" and "All Cut By Dates" options in the drop boxes and click refresh.)
3Right click on the workorder in the workorders explorer, and click Open Workorder in Nesting.
4Click the open plate button ![]() .
.
5Click on the create new plate button on the right ![]() . Enter the following details:
. Enter the following details:
Plate Material |
GR250(A36), 25.00mm |
Width |
1600mm |
Length |
3500mm |
6Click Add to Stock and Close
7Double click the newly added pate in the left window to show the plate editor.
8Click the 1 Box, Auto ![]() button. The following dialog should open.
button. The following dialog should open.
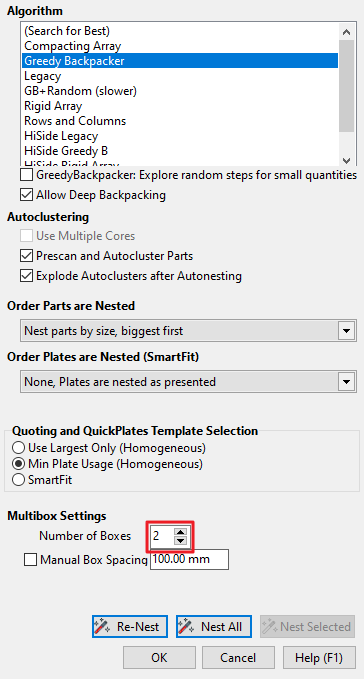
9Change the Number of Boxes setting to 2.
This means that we will be cutting simultaneously with two torches. For example, you might use your Plasma Bevel at the same time as your normal plasma torch. With Gas Cutting, you can sometimes have up to 8 torches in parallel.
Remember to change this back to 1 box for future tutorials.
10Click OK.
11Drag the MultiBox Part 2 part onto the plate, Notice how there is a second part insert copied below the one you are dragging.
12Place it so that the second part insert is two thirds of the way along the bottom edge.
13Drag the MultiBox Part 1 part onto the plate. Place it in the right corner, above the first part., as shown.
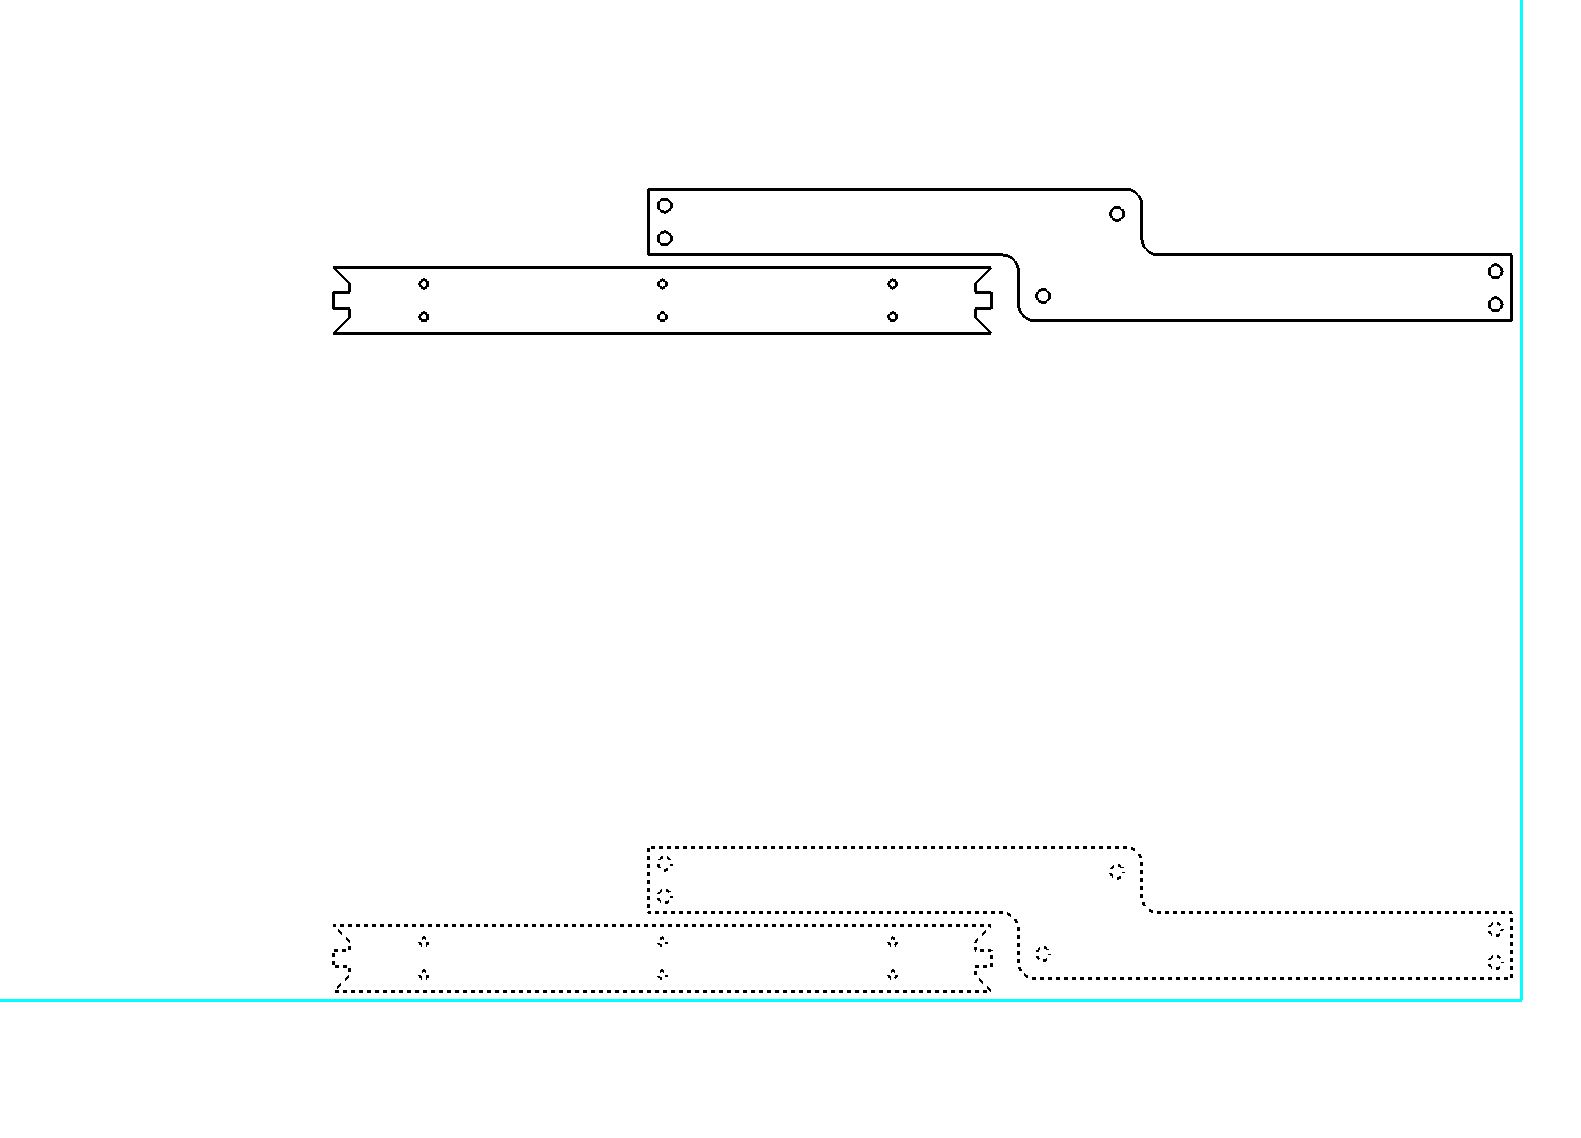
14Drag another copy of the MultiBox Part 1 onto the plate.
15In the properties box in the bottom left corner tick Flipped, and click Apply.
16Drag another copy of the MultiBox 2 part onto the plate and rearrange to achieve this nest:
17Select the top 4 parts, right-click and click Quick Cluster.
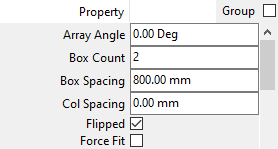
18Drag the Array handle to create four such rows in each of the two boxes.
You will notice that the box spacing is just too large for each array to fit on the plate, so we need to change the box sizing.
19With the array selected, in the properties window, under the Box Spacing criteria enter '785' to make a spacing of 785mm.
20Click on the square drag handle of the array, and click again for it to nudge and verify it is on the plate.
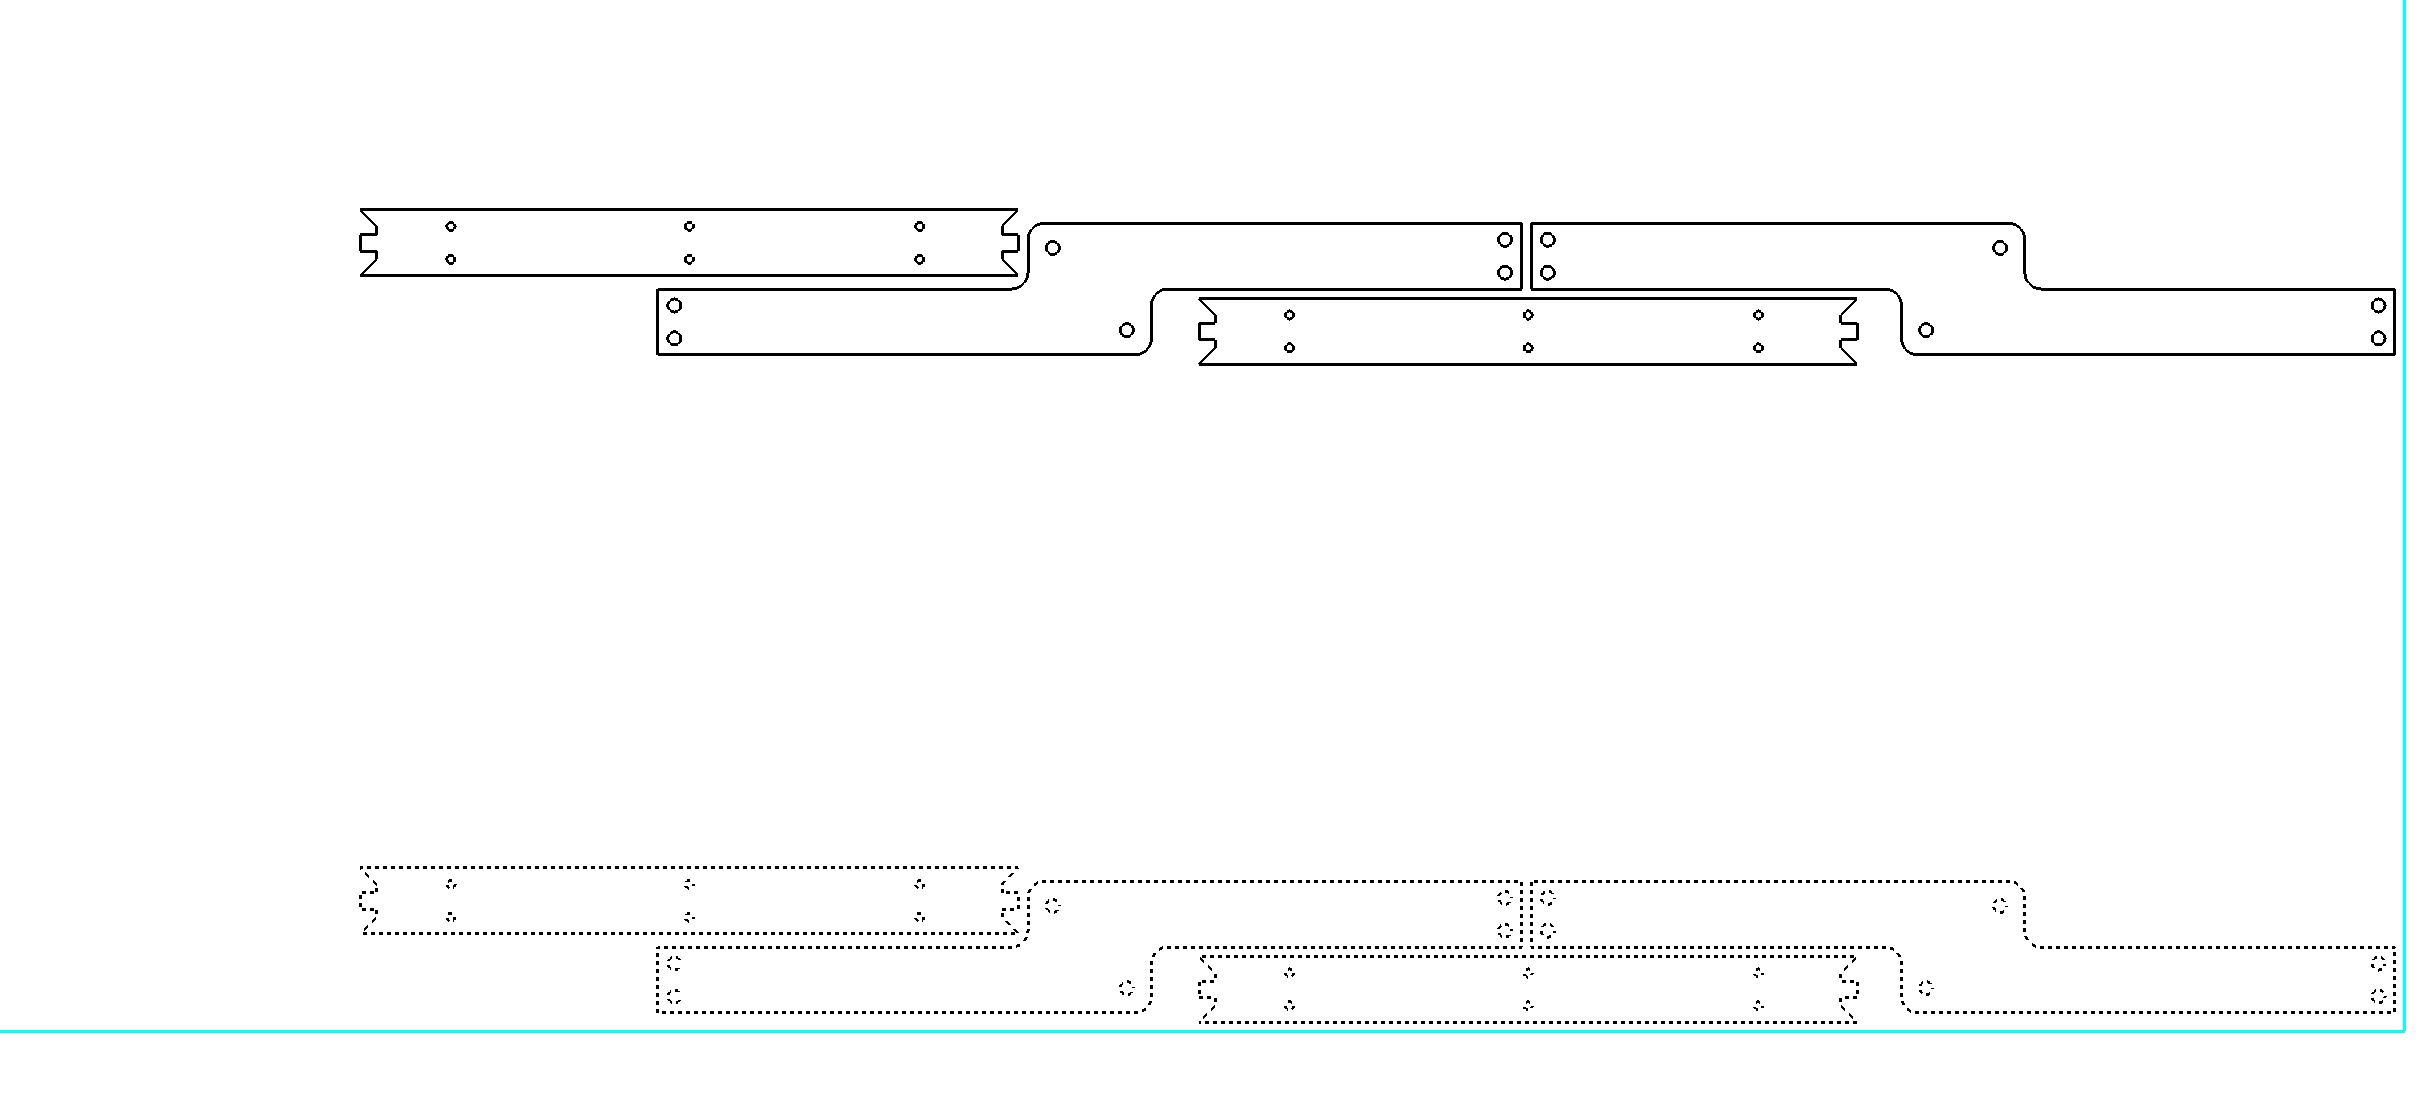
21Select the MultiBox Part 3 part and drag it onto the plate.
22Drag another MultiBox Part 3 part and rotate it 180 degrees ( Use SHIFT and the rotate handle)
23Arrange them so that your nest looks as shown:
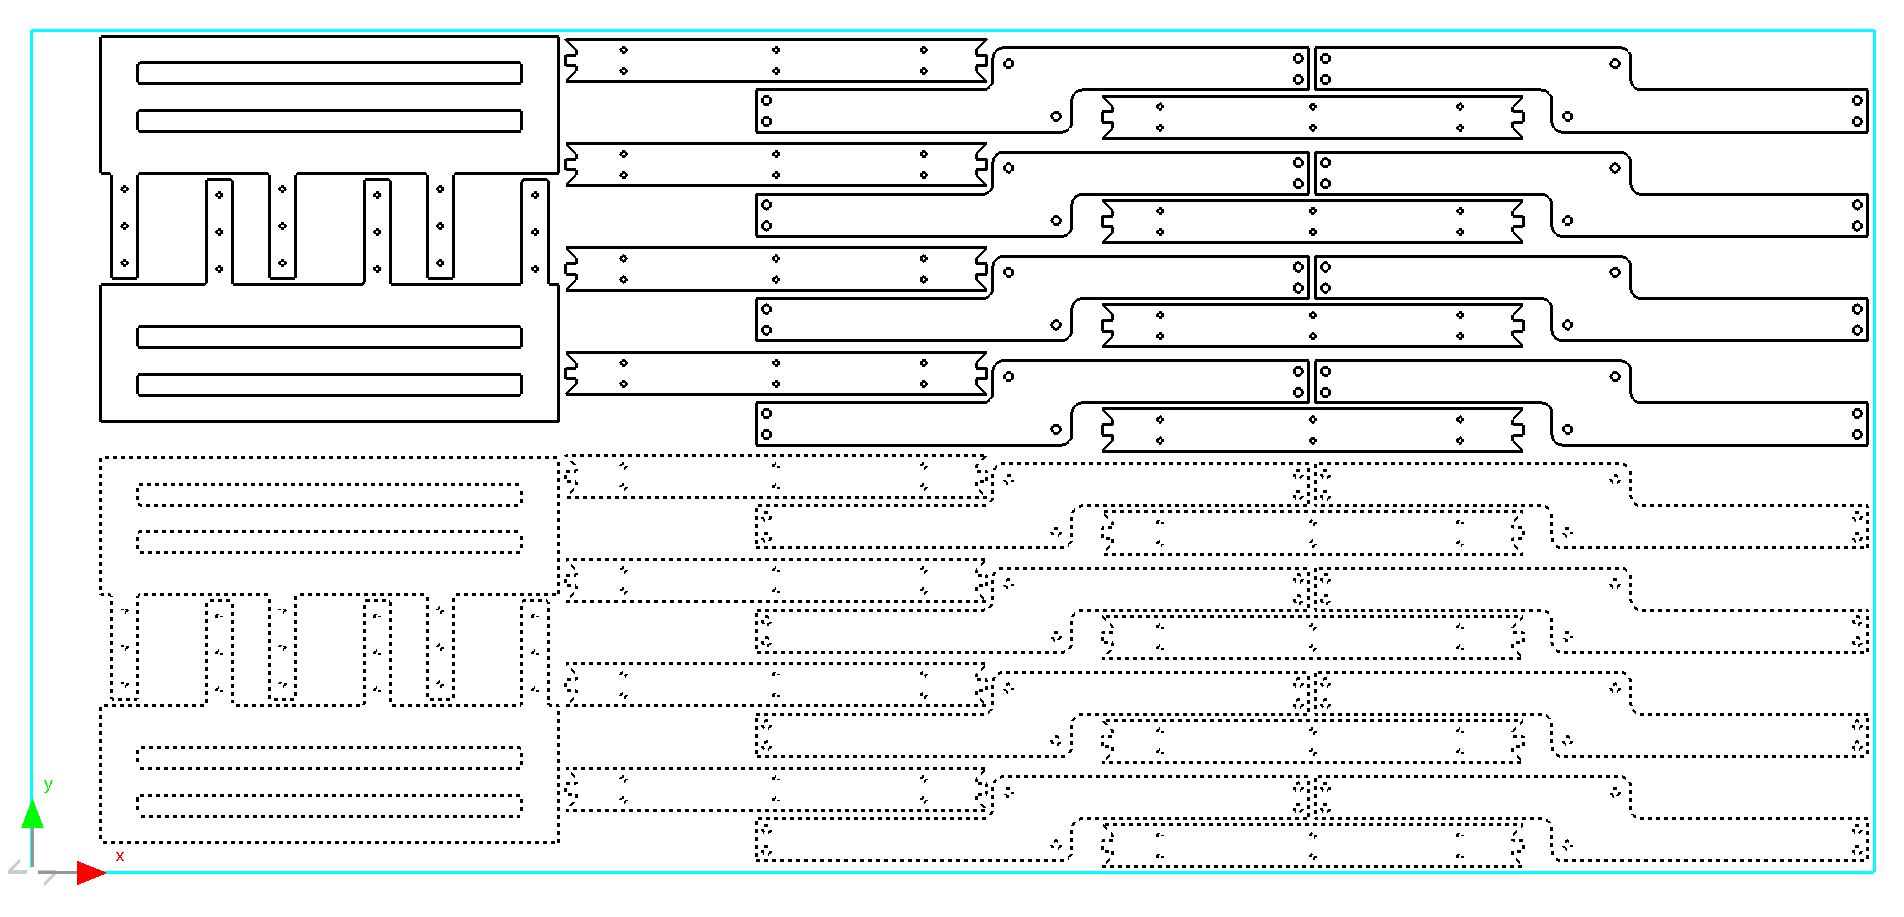
We have successfully nested our parts for Multibox cutting with two torches. Which torches are used will be determined by TouchCut and the machine operator.
24Close the mode without saving so the tutorial is ready for reuse.