When nesting in primecut it is useful to be able to plan how to cut a remnant, before the remnant has been separated from the plate. Examples of when this can be useful is when the remnant is to be cut on a different machine, or the plate has already begun to be cut, or you don't want to unschedule the plate.
First we will need to make sure this feature is turned on for our database.
1From the start screen, click on Global Settings.
2Click the Plate tab, and check the Allow Nesting on Expected Remnants checkbox.
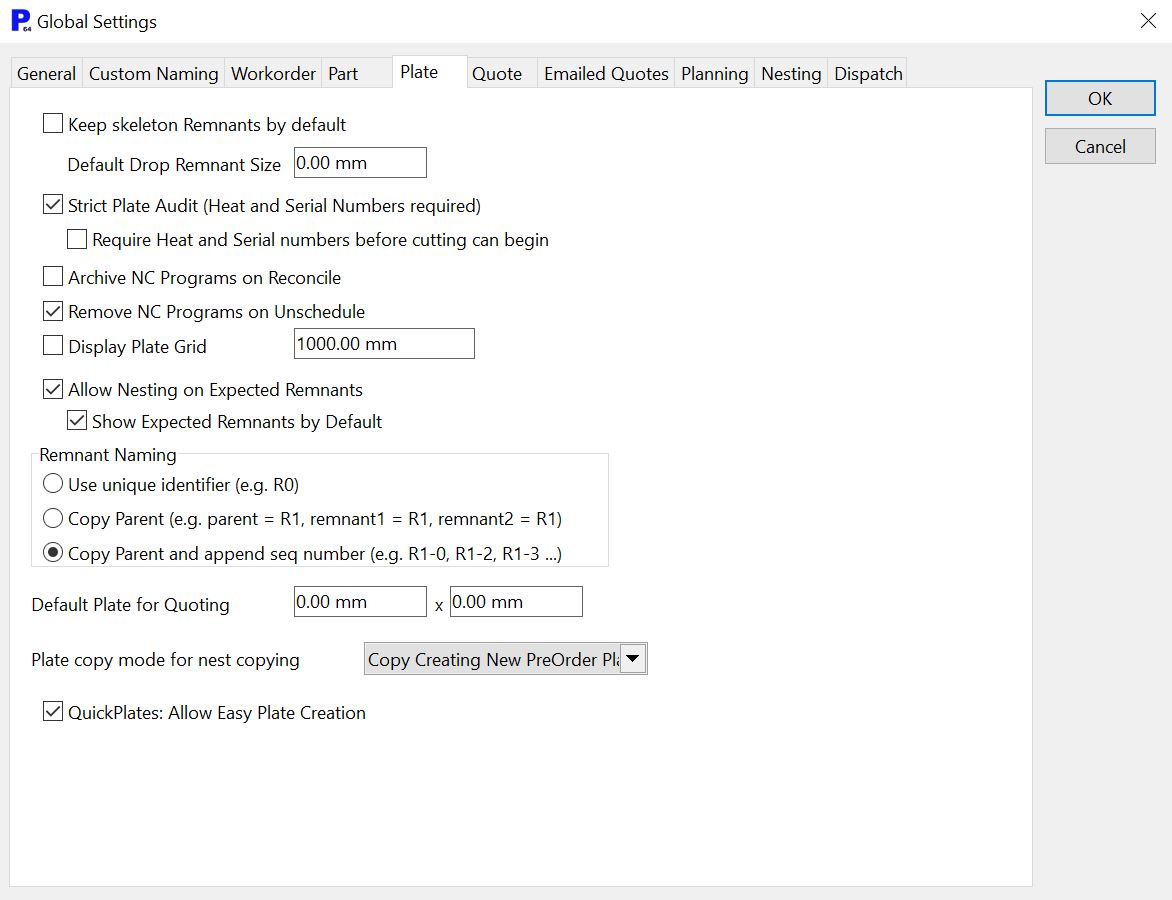
While we are here we will take this opportunity to see different naming options available for remnants.
At the bottom of this window, note the three options for naming remnants.
The top option, "Use unique identifier" is to have the remnant called by a new plate id, with an R for Remnant inserted at the front
The second option, "Copy Parent" uses the same plate ID as the parent plate but with R inserted at the front, for all remnants.
The third option, "Copy Parent and Append Seq Number" will use the plate ID of the parent plate, but append -0 if it is a skeleton, or -1 -2 -3... etc for which remnant number it is out of the remnants being created in that job. Remnants of remnants have longer remnant numbers.
3Select the bottom radio button "Copy Parent and Append Seq Number". Then click OK.
4Click Yes when it warns about all users being affected.
5Open the Workorders mode. Search for and open the workorder with the invoice number "Expected Rem Tut". Right Click the workorder in the workorders explorer in the top left window, and click Open Workorder and Nested Plates in Nesting.
6Select our already nested plate in the plates explorer on the left and click the ![]() schedule button just above the window.
schedule button just above the window.
7Check Ask for Filenames, and click OK. Enter "ExRem1" and click Save.
At this point we have a scheduled plate with a remnant that we would like to nest on.
8Click the Open Plate button ![]() at the top left hand corner of the screen.
at the top left hand corner of the screen.
9In the top left dropdown box in the plate selector select Remnants. Also tick the Show expected remnants checkbox (useful for hiding expected remnants when looking for actual remnants). Click Refresh.
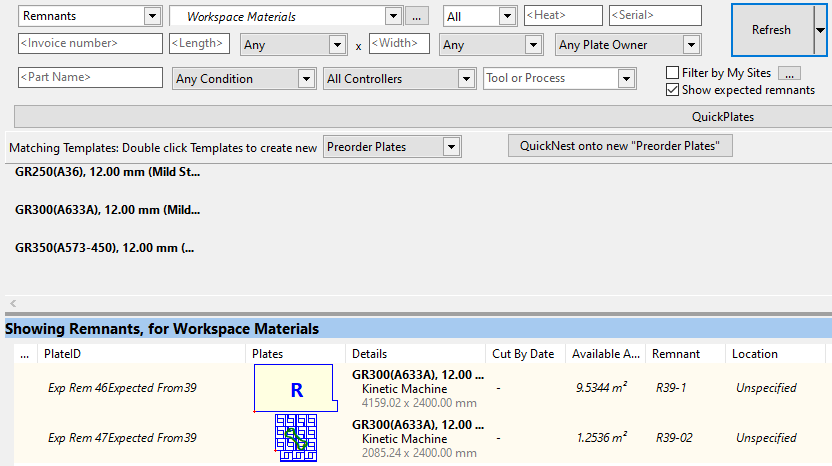
Note the remnant numbers in the window, indicating the Plate ID of the plate it comes from and the type of remnant.
10Double Click to open the blank remnant.
11Check the nesting is set to 1 Box ![]() , as shown above the Nest All button. If not, click the button and set Number of Boxes to 1.
, as shown above the Nest All button. If not, click the button and set Number of Boxes to 1.
12Drag the part onto the plate, and right-click and click Self Cluster, then click anywhere on the plate.
13Right click on the part and click Add Cluster to Parts List.
14Press DELETE to remove the nested part inserts from the plate to allow room for autonesting.
15Click Nest All to nest all the parts on the plate.
16Click DONE.
17Click the Processing tab at the top of the screen and click Process All. Tick closed paths and select Plasma Best. Click OK.
18Click Crop and Remnant. Select Single Line Crop. Click End Manual Crop.
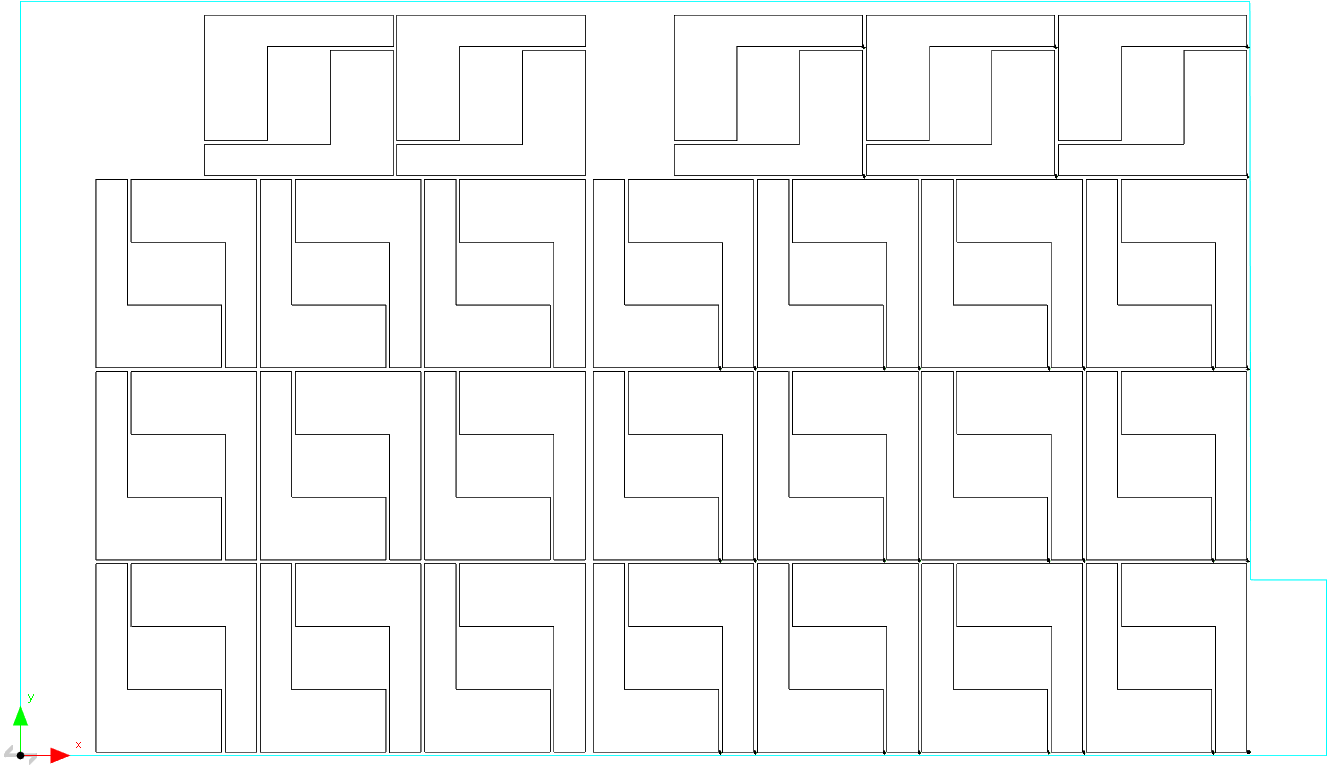
19Click Process geometry again. Click OK. Your plate should look similar to that shown below, although the colors may be different depending on processing options selected. There may also be differences in nesting due to different versions of the nesting algorithm.
20Close the mode and Save.
If the TouchCut operator were to run the original plate, and the operation went smoothly, the expected remnants would become normal remnants in the database.
If the operator wanted to reject the job, then TouchCut would disallow this and tell them to contact the programmer to unschedule the plate.
If the operator wanted to scrap the remnant, TouchCut will let them and would tell them to contact the programmer to clear the remnant they nested on and delete the remnant. This is so that the effort put into the nest can be saved.
21Open the Reconciliation mode.
22Double Click on our plate in the plates selector to open it.
Note you can see in our thumbnail that the remnant has parts on it.
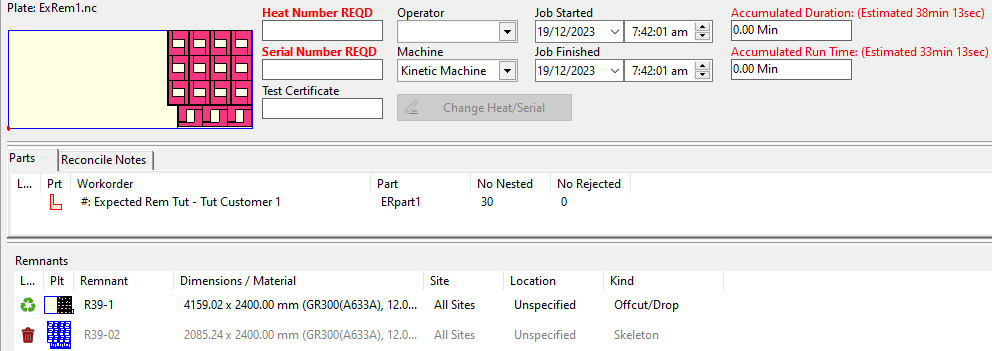
23Enter a heat and serial number and click Reconcile. Click Yes for the cut plates being final prompt. The following prompt should open.
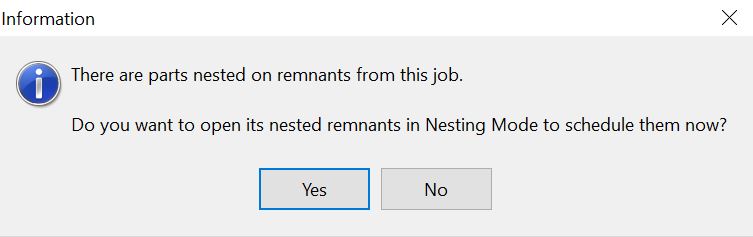
24Click Yes. The nesting editor should open with all the remnant plates that have been nested on.
25Click the green GO schedule button above the plates explorer on the left.
26Tick Ask for Filenames. Click OK. Enter "ExRem2" and click Save.
When a plate for some reason is unscheduled, rather than lose the work of nesting onto the remnant plate, it would be better to merge the plates into one nest, provided the parts are all to be cut on the same machine.
We will now see this effect when unscheduling a plate with nested parts on its expected remnants.
27Click the open parts button ![]() at the top left corner of the screen.
at the top left corner of the screen.
28Under <All Invoice Numbers> enter "Expected Rem Tut 2" (make sure All Cut by Dates and Show All are selected in the dropdowns).
29Double click on the part to open it.
30Click the Open Plate button ![]() at the top left corner of the screen.
at the top left corner of the screen.
31In the top left dropdown boxes in the plate selector select Remnants and Workspace Materials, and tick the Show expected remnants checkbox. Click Refresh.
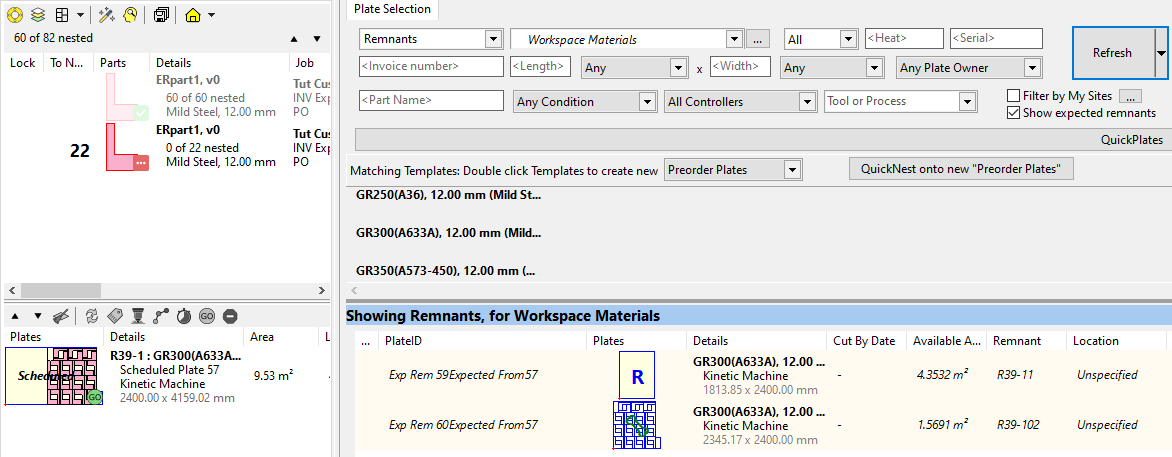
Note the remnant numbers in the window, indicating the remnant number of the plate it comes from and the type of remnant.
32Double Click on the blank remnant to open it.
33Drag the part onto the plate, and right-click and click Self Cluster. Then click anywhere on the plate
34Right click on the part and click Add Cluster to Parts List.
35Press DELETE to remove the nested part inserts from the plate.
36Click Nest All to nest all the parts on the plate.
37Click DONE.
38Save the workspace.
39Select the scheduled plate in the plates explorer on the left.
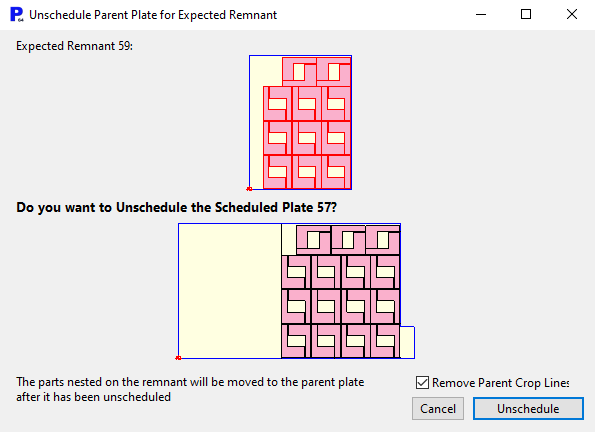
40Click the red STOP button ![]() to unschedule the plate. The following dialog should open. Click Unschedule. You may have to click this twice.
to unschedule the plate. The following dialog should open. Click Unschedule. You may have to click this twice.
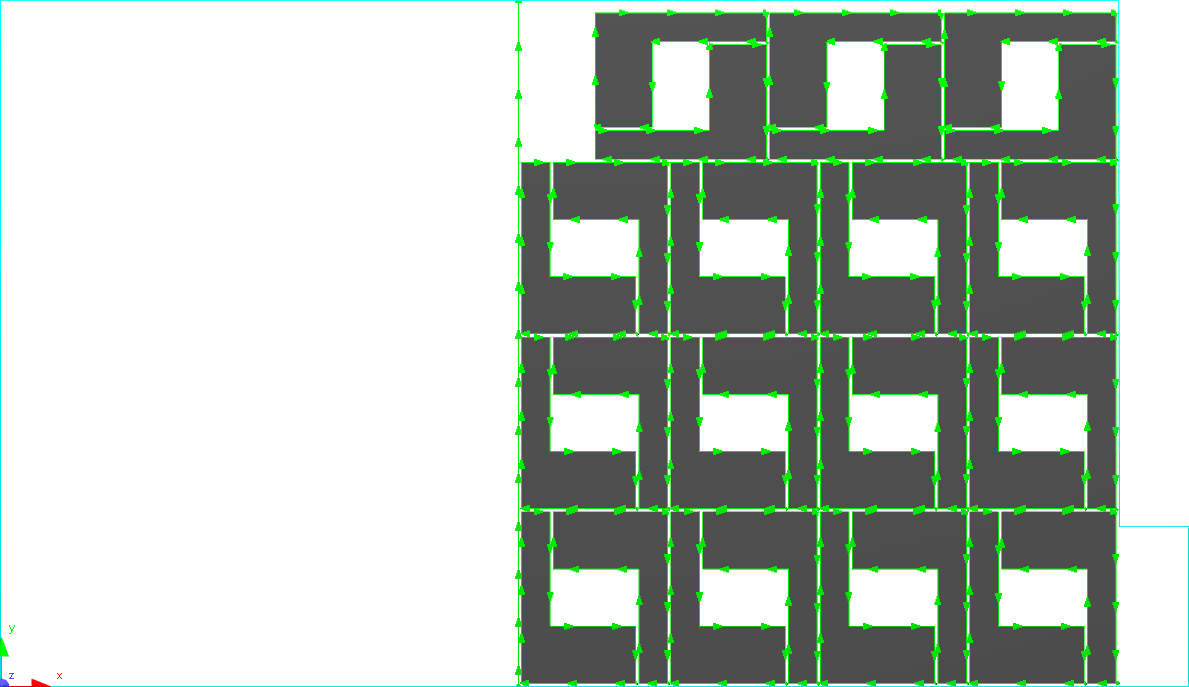
41The finished result should look similar to this, with both nests merged.