A pre-drill is used when you need to drill a small diameter hole in a relatively thick plate. In this situation if you try to use a long drill without a pre-drill, the bit is likely to wander. This is bad for the bit, and may result in the hole being in the wrong location. You might want to use a shorter drill of the same diameter to drill a shallow hole first. This will ensure the long drill starts in the correct location.
PrimeCut lets you handle these operations by specifying multiple tools to be applied to a given hole diameter. These multiple operations must be set up in the spindle table of the Machines mode.
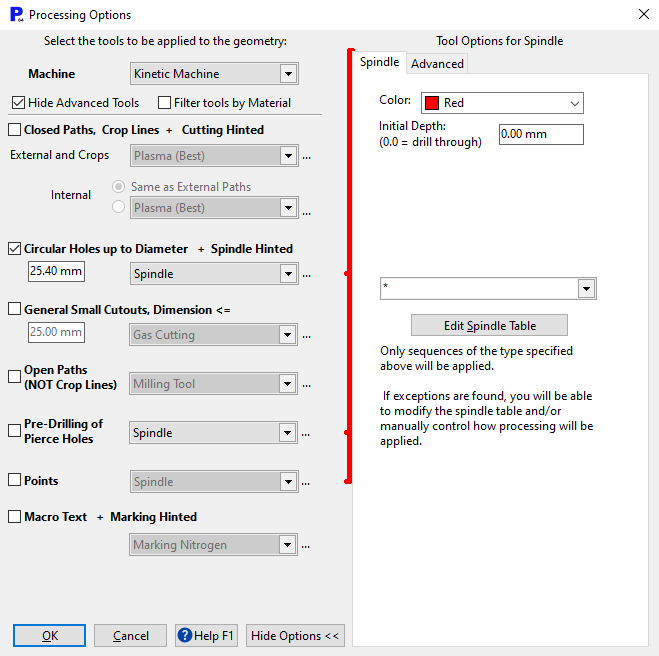
1Open the workorders mode.
2Find and Open the workorder with More Spindle as its Invoice number. Click OK to accept.
3Double Click on the Processing Holes part on the left.
4Click on the Processing tab at the top of the screen.
5Select one of the larger holes.
6Click Process, make sure no default process is selected for the spindle by selecting * as shown.
7Click OK. The following Window should open. Press the + button for Drill, Chamfer, Tap.
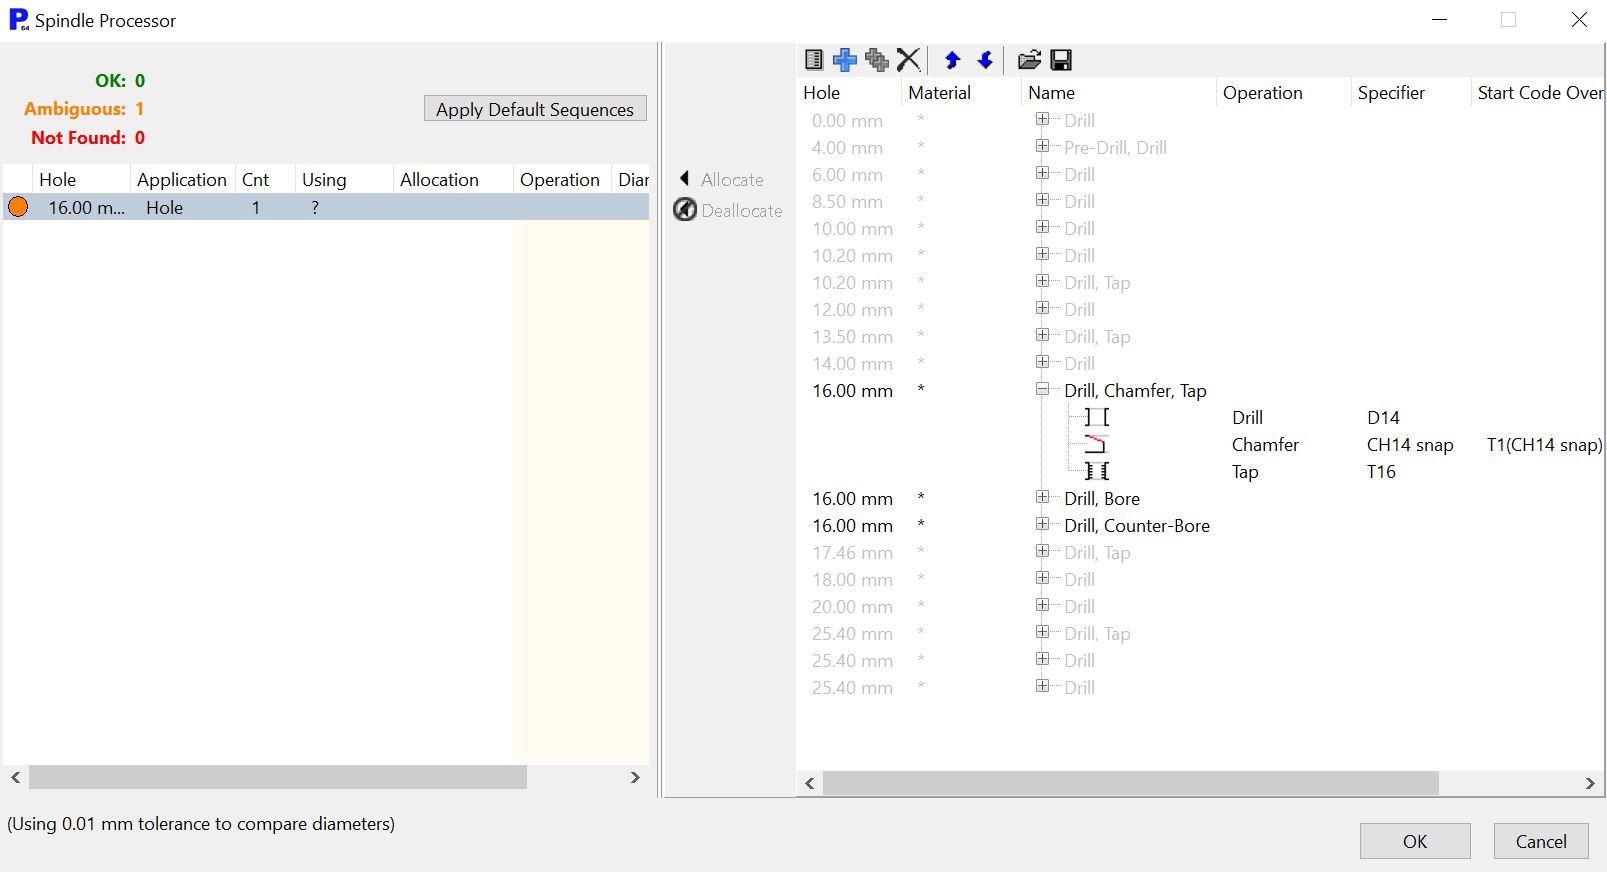
8The start code override for the chamfer, T1(CH14 snap) M38D16.E3C3.0, does as follows:
▪T1 selects the spindle, CH14 snap is the bit.
▪M38 is the macro code for the chamfer process.
▪D16 is the diameter of the hole we are chamfering.
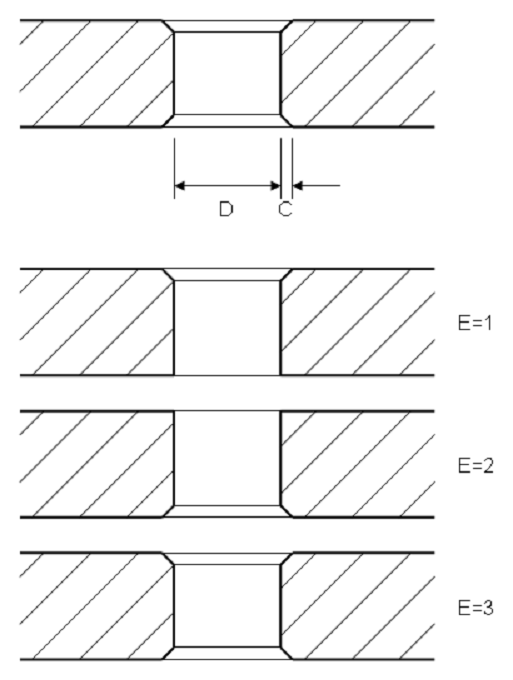
▪E3 means we are chamfering the top AND the bottom of the hole (E1 for top only, E2 for bottom only)
▪C3.0 is a 3mm deep chamfer. Because our chamfer is 45 degrees, this is also 3mm in increase in outer diameter of the hole.
9Select Drill, Chamfer,Tap and click the allocate button, near the middle of the window.
10Repeat steps 5 to 7 for the other two large holes, assigning 'Drill, Counter-Bore' and 'Drill, Bore' to them.
11Select the small hole. Click Process, and use the settings used previously. There should be no ambiguity window, because there is only one process PrimeCut knows of for a 4mm hole. So your part should look something like that shown below.
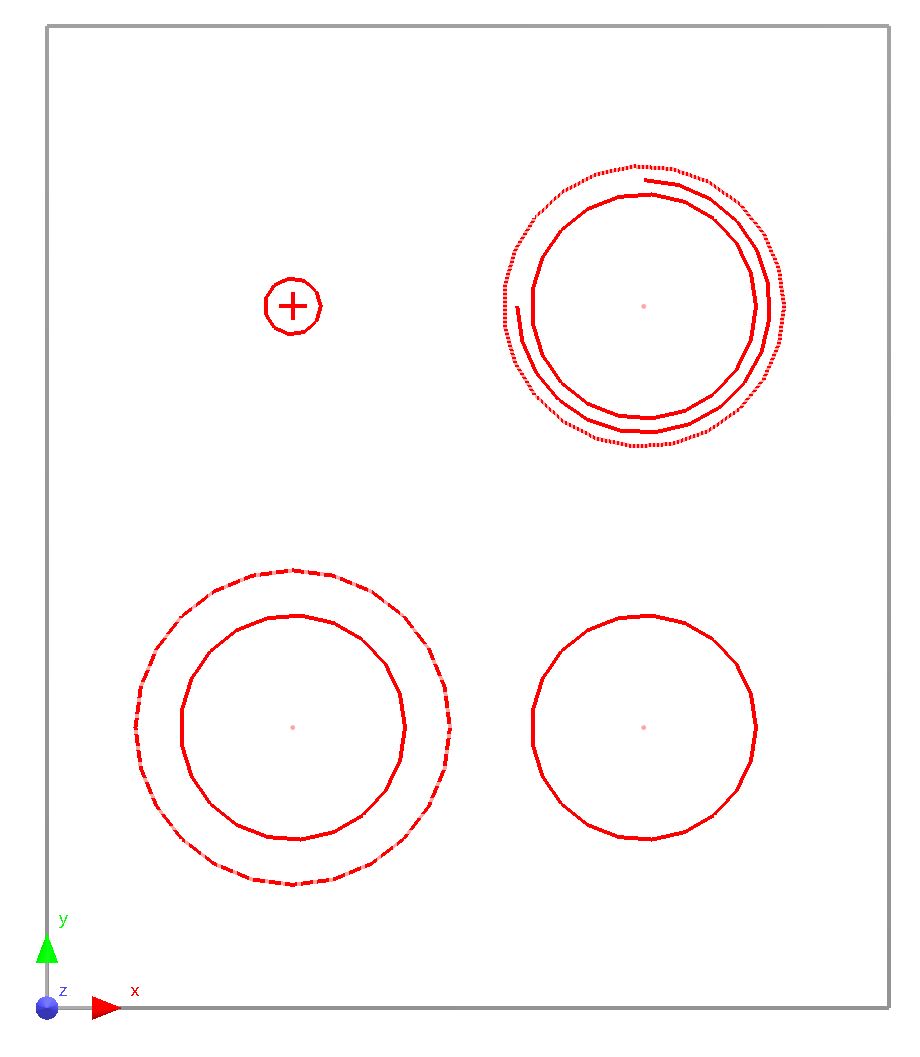
12As you can see the small hole is to be pre-drilled, as indicated by the + sign.
13Select the CounterBore (Large dashed circle).
14In the properties window change the Depth to 12mm.Press apply
15Select the Pre-drill.
16In the properties window, also change the Depth to 12mm. Press apply
17Use ALT and right click to rotate and view the geometry from other angles.
18Home without saving when you've finished.