In this section we will use a part from the shapes library to drill a hole with a simple drill rather than profile cutting it. All of the techniques covered in this section are also applicable to drills with tool changers, so if you have a more complex machine you should also work through this section.
1Open the Workorders mode
2Search for Part Processing under Invoice number.
3Double-click the workorder to open it.
4Double-click on the flange-3 part in the parts explorer on the left to open it for editing.
5Click on the Processing editor tab. Select all processing a previous user has left with CTRL+A and press DELETE.
The part is displayed gray because there is currently no processing applied to it.
6Click the Process All button to apply processing.
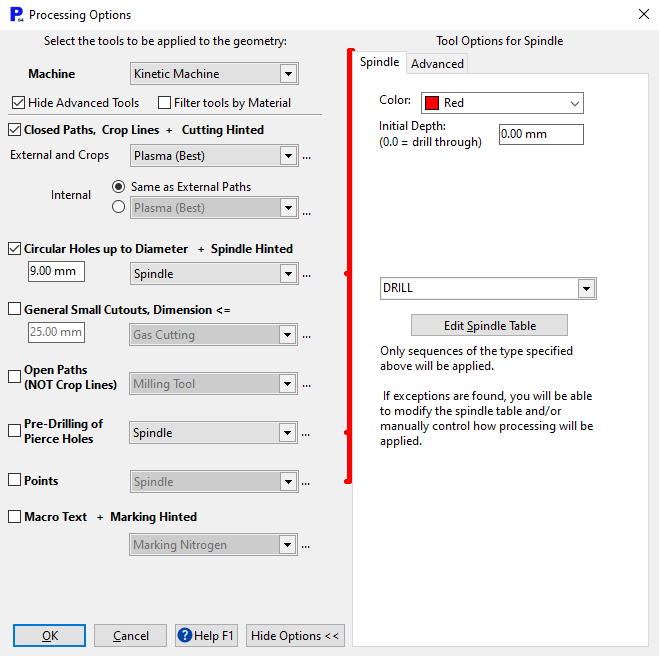
7Make the selections shown below and press the OK button. (Press the ... button after the Circular Holes field to see the advanced options.)
Notice that the part has been processed but the drill has not been applied - you can see this because there are lead-ins visible on the two smaller holes. This is because in the Circular Holes, up to Diameter field we entered 9mm. This means that the drill will only be applied to holes that are equal to or less than 9mm.
8Process the part again, but this time in the Circular Holes, up to Diameter field enter 10mm.
Now the holes are being drilled. We can see this because they are colored, indicating processing, but there are no leads or arrows to indicate path direction. If you select the drill holes and view the properties you will get definite confirmation that they are being drilled.
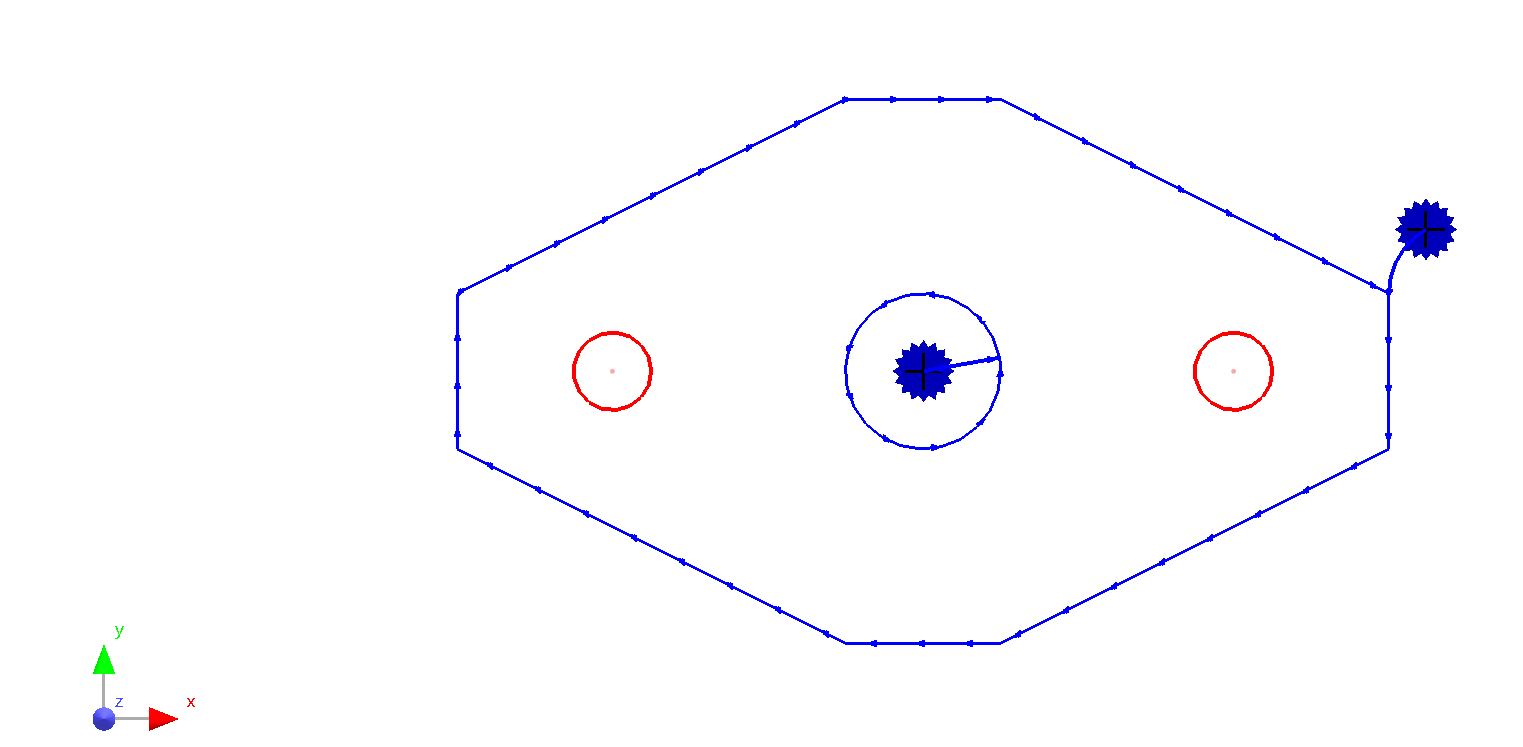
9Process the part again, but this time in the Circular Holes, up to Diameter field enter 20mm.
Now you will see that the large circle at the center of the part is being drilled as well. In reality this is not practical because 20mm is a very large drill for your average "simple drill". So instead of drilling all the way through we will only drill a short distance in order to mark the hole position so it can be drilled elsewhere - i.e. on a drill press or similar.

10Select the large hole at the center of the part to view its properties. Change the depth from zero to 4mm (or 0.16") as shown below.
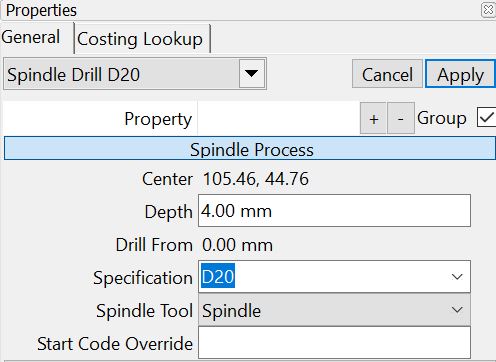
Provided your Code Post Processor has been set up correctly PrimeCut will generate the NC codes required to instruct the controller to drill to that requested depth.
There is a more detailed Spindle tutorial involving pre-drilling, counterboring etc.
You can hold ALT and use the right mouse button to rotate the part to see the depth of the hole.
11Close the mode without saving.