1Open the Nesting mode.
2Click on the Open Parts button ![]() .
.
3Under <All Invoice Numbers> enter Nesting: Basics.
4Click Refresh. (If no match comes up, make sure to select the "Show All" and "All Cut By Dates" options in the drop boxes and click refresh.)
5Click Open All in the bottom right of the screen to open both parts.
6Click on the Open Plate Button ![]() (top left corner)
(top left corner)
7Click on the New Plate Button ![]() (right hand side of screen)
(right hand side of screen)
8Create 3 plates with
Plate Material GR250(A36), 5.00mm, Width 1500mm, Length 2000mm with 10mm Gap, as shown.
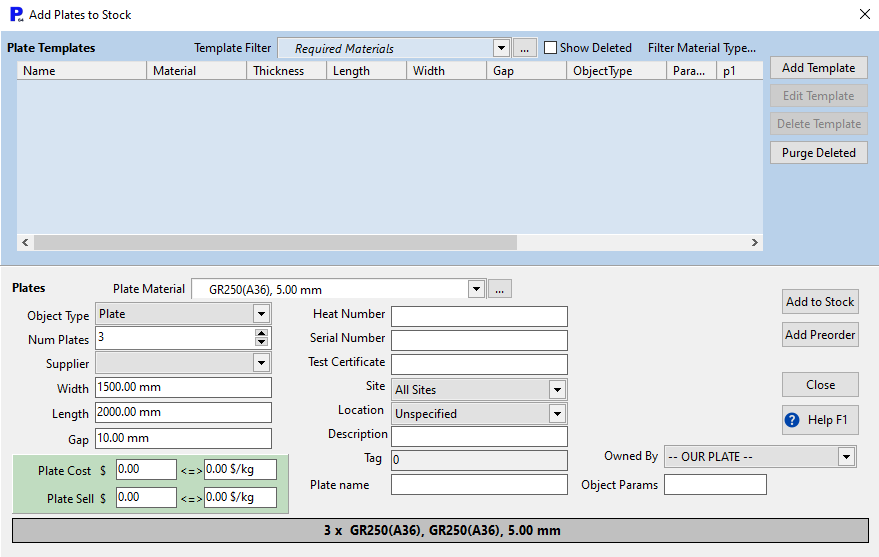
9Click Add to Stock then Close.
10Double-click on one of the plates now in your plates explorer on the left, to open the nesting editor.
If QuickPlates is enabled in Global Settings then you can just double-click the plate templates above the plate selector to create your plates. Parts to nest must be loaded before QuickPlates will show suitable templates however.