This exercise is designed to teach you how to create a simple 30 degree knife-edge bevel. Since this requires only the geometry that already exists on the part it is not necessary to use the bevel wizard. Finally at the end of the exercise you will need to reload your original controller.
1Open the Workorders mode.
2Search for the Invoice Number 'Bevelling Tutorials' and open the workorder.
3Double-click on the Bevelling Rectangle part in the explorer on the left.
4Go to the Processing editor tab and click the Process All button.
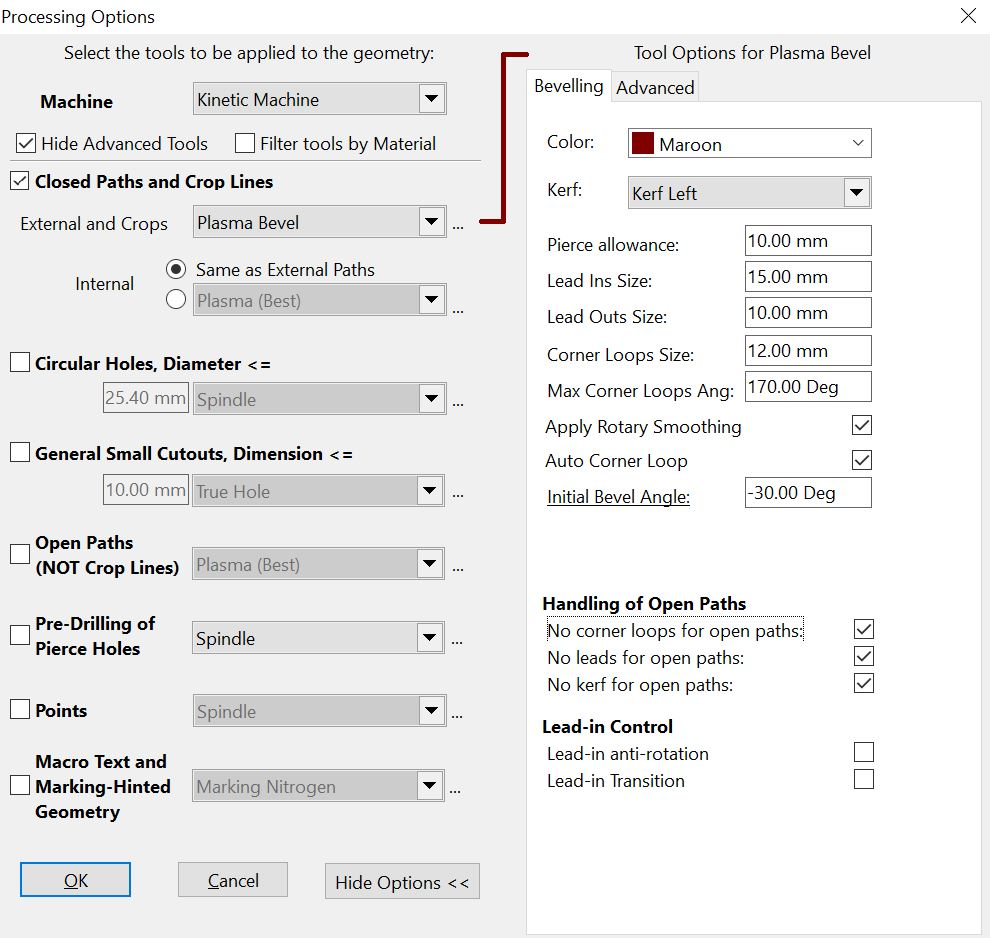
5As shown above:
▪Untick all of the left hand checkboxes apart from Closed Paths.
▪Select Plasma Bevel as the tool to apply.
▪Enter the Initial Bevel Angle as -30 degrees.
▪Leave the other settings as they are.
6Click the OK button.
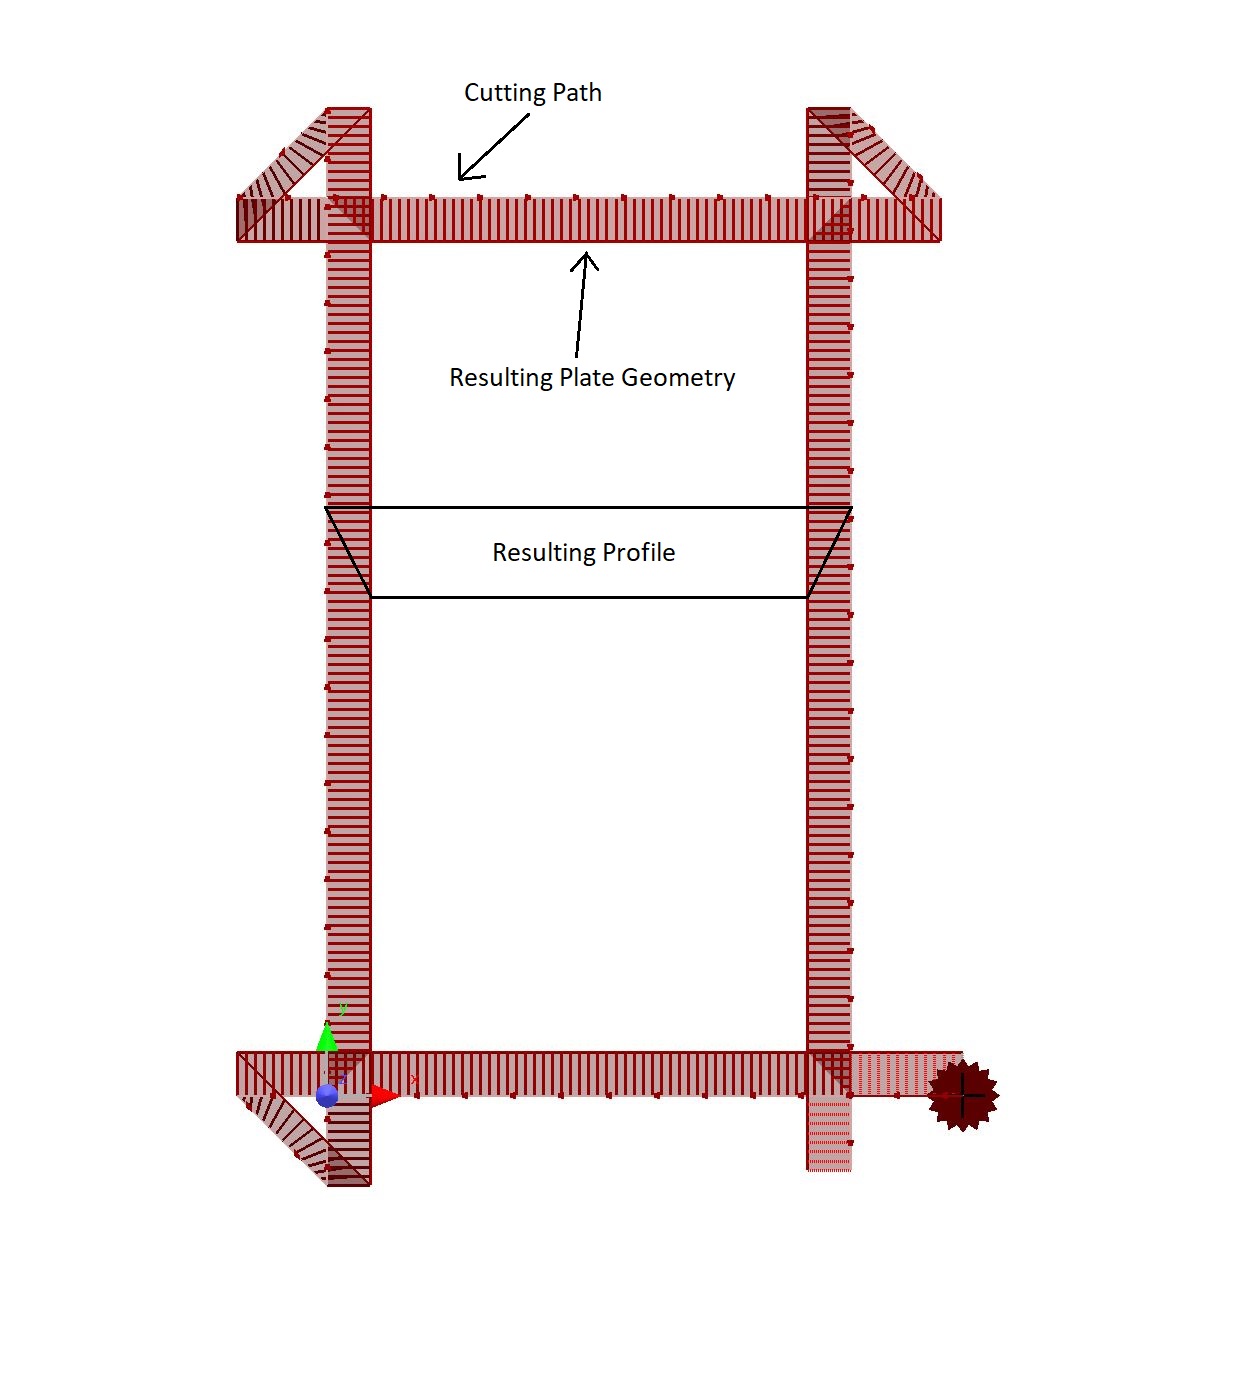
As you can see, PrimeCut has used the original geometry to define the outer limits of the part. Since we have a negative bevel angle (where the top surface of the part is larger than the bottom) this original geometry has also been used to define the tool path. This is apparent because the cutting path lies coincides with the origin. Hold ALT and use the right mouse button to rotate the part and view the bevel. Press Z to reset the view.
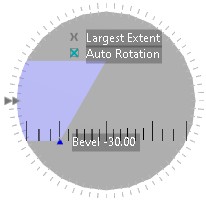
Another way to view you bevel is to click the processing path, which will bring up a circular window showing a side on view. Dragging the bottom of the bevel will change the angle along that path.
We will now process the same part with a positive bevel angle to show the resulting contrast.
7Click the Process Geometry button. Click Yes to regenerate all
8Change the Initial Bevel Angle setting to positive 30 degrees.
9Click the OK button.
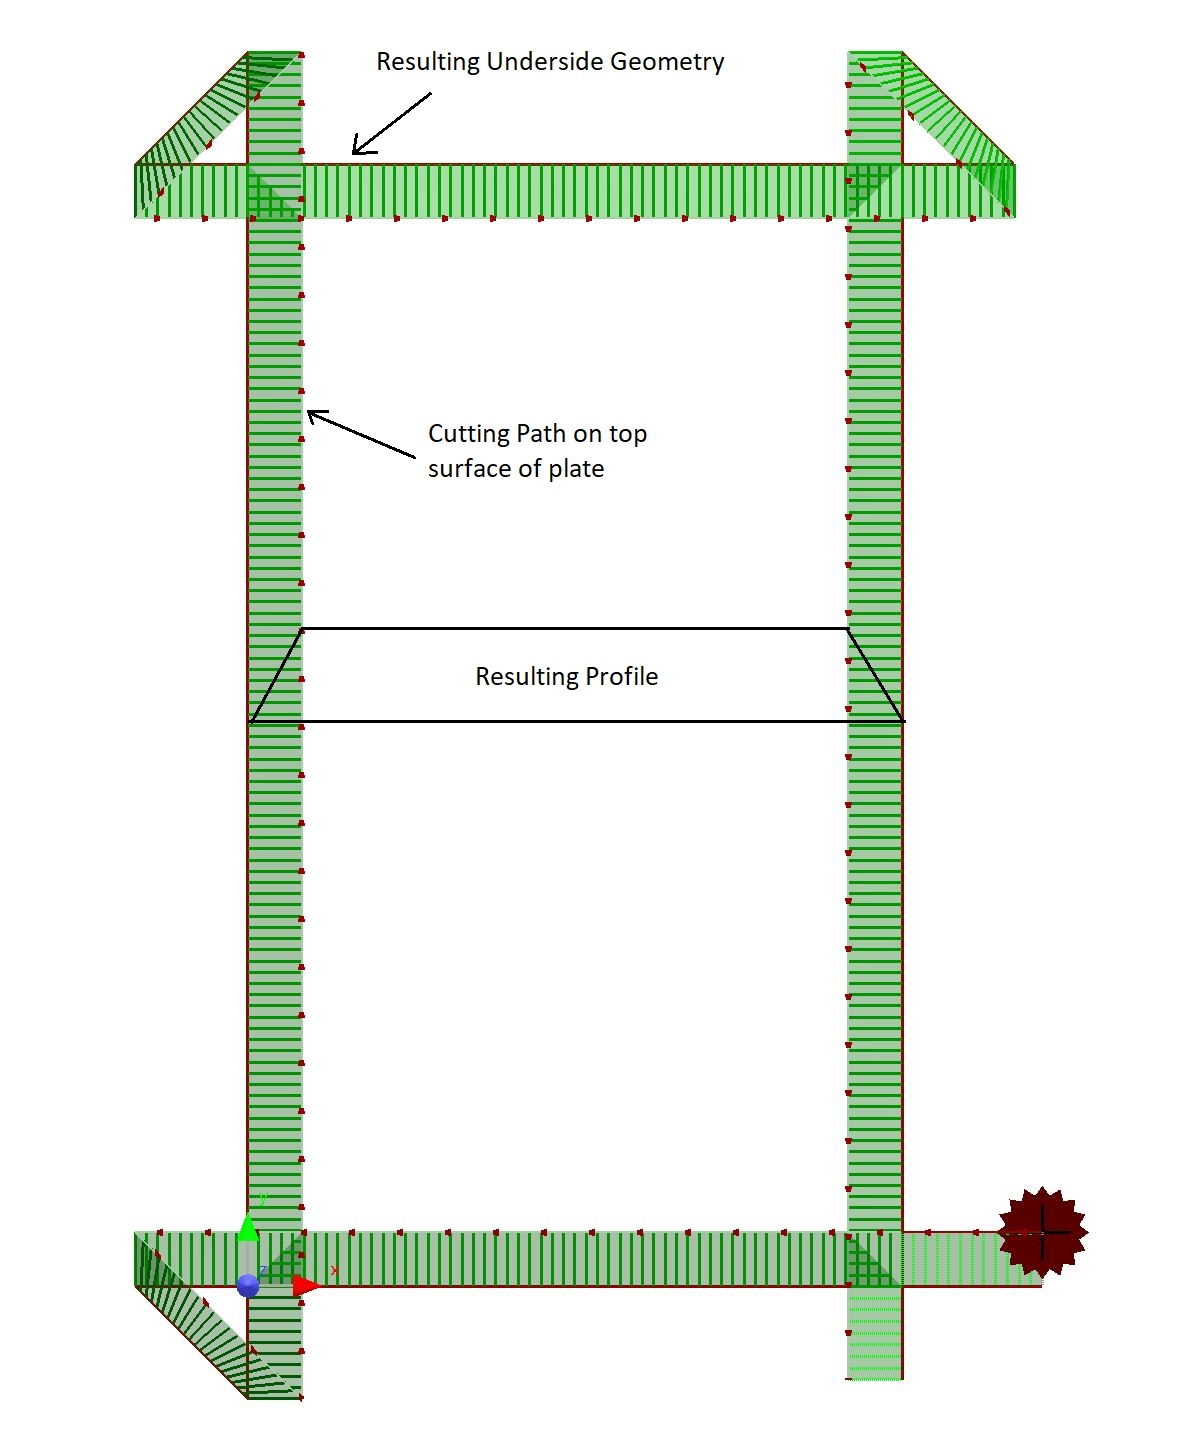
As you can see the original geometry (and the part origin) now coincides with the underside of the part, and this still defines the outer limits of the finished part. As mentioned earlier this positive bevel will create a sharper knife-edge, but it will be more difficult to remove the part from the plate.
This part could now be nested on a plate for processing. Remember that the part should not be reprocessed on the plate, and the plate should be sequenced on a 'part by part' basis.