USING PRIMECUT’S DISPATCH FUNCTIONALITY TO TRACK PART SHIPMENTS
PrimeCut can now track part shipments to customers, and to and from additional work suppliers, returned by customer for rework.
Tracking numbers and packing information is tracked, and packing slips can be generated. Partial fulfillment of workorders, as well as shipping of multiple workorders within a single shipment is supported.
To enable Dispatch Functionality click here.
Workorder Filters
NOTE: You must have Version 4.5.386 or later to use this!
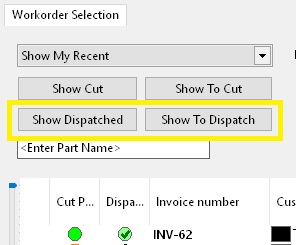
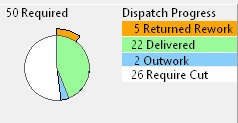
Show Dispatched – Will show all active workorders where the quantity delivered to customer is equal to (or greater than) number required
Show To Dispatch – Will Show all active workorders where all parts are cut and quantity delivered to customer is less than the number required
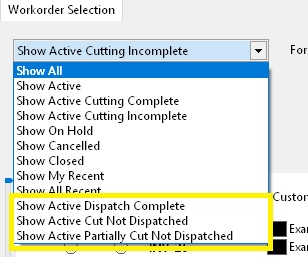
Show Active Partially Cut Not Dispatched – Show workorders where that are not fully cut but have a quantity on hand that has not yet been delivered
Please note that these work on a sum of all the quantities shipped. A workorder could show dispatch as being complete if we dispatch more than the required quantity of one part and less of another.
Shipping Parts Outwards
Parts are shipped/dispatched from the Dispatch tab of the workorder editor. Only available parts may be shipped outwards.
Parts are “available” if: they are sitting out our premises in stock, ie:
•They have been cut
•They have not been rejected
•They have not already been shipped to the customer
•They have not been shipped to an “extra processing” service supplier, or have been received back from the same supplier.
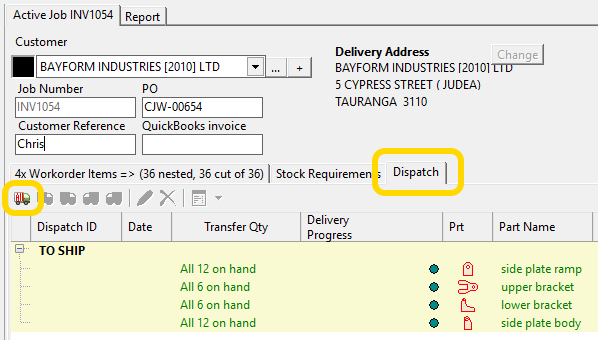
To ship all available parts in a single shipment, click the ship all button.
EXAMPLE: SHIPPING ALL AVAILABLE PARTS
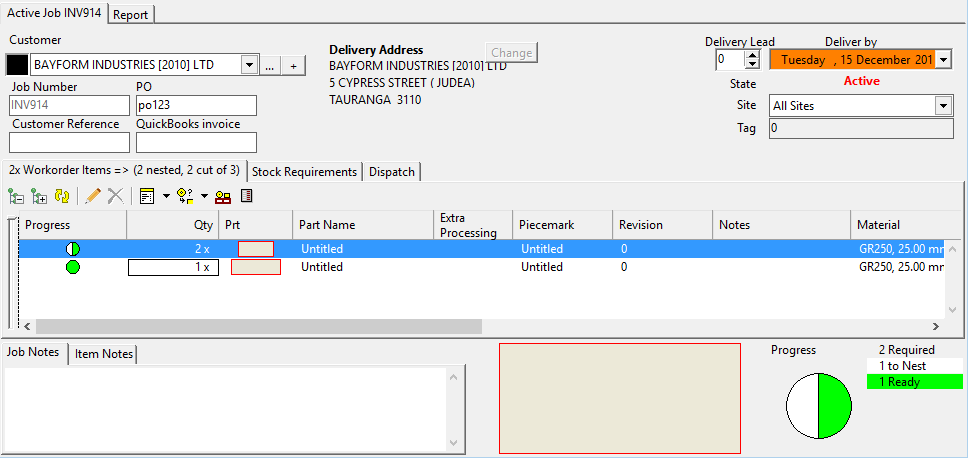
The following workorder shows all parts have been cut and are available. Note however Ship All will work regardless of whether all parts have been cut- it simply creates a shipment for all available parts.
1.Open the workorder
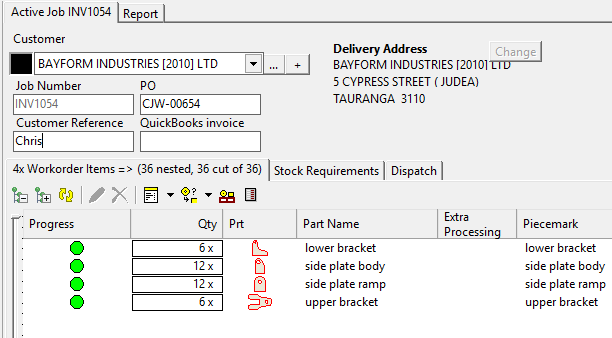
2.Click on the Dispatch tab, the parts available to ship will be displayed. Then click on the Ship All button to create a shipment for all available parts:
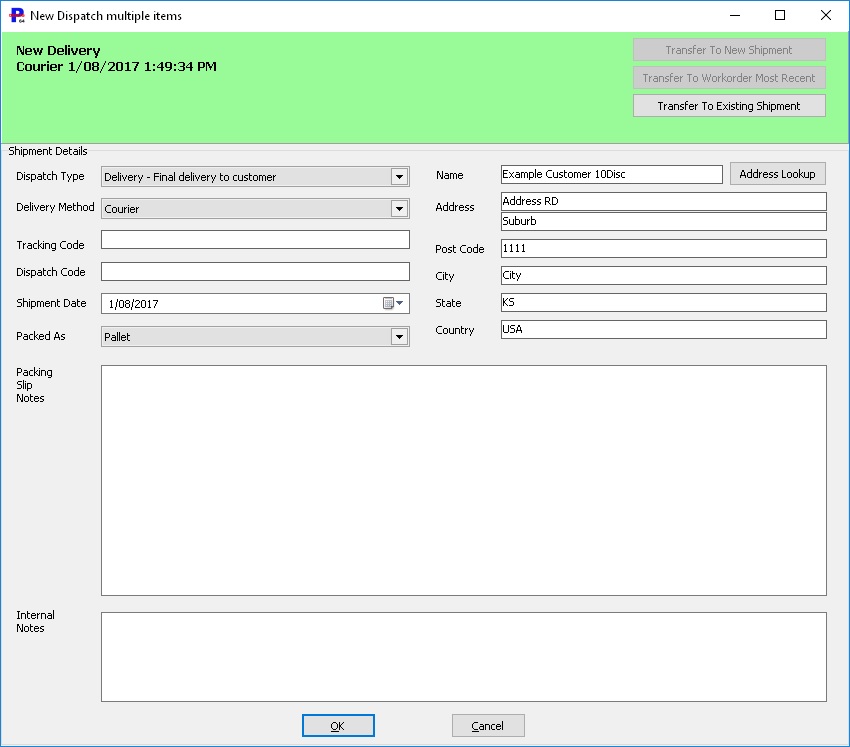
3.The shipment editor is now shown. It will be this green color if shipping to the customer, and the Dispatch Type will automatically have been set to Deliver To Customer. Delivery Method may be selected to indicate how the goods are being sent. You may enter the Tracking Code if known at this time, or it can be entered later. Dispatch Code is an additional tracking number available to use if required (eg enter driver name, truck number or other information). Packed As indicates how the parts are packed. The delivery address will be pre-selected as the delivery address for the workorder however you can modify it to have it sent to an alternative address if you wish. The address specified is stored explicitly with the shipment and will be printed on the packing slip. Packing Slip Notes are customer facing additional notes or comments that can be optionally included on the packing slip, while Internal Notes as the name suggests are shipment notes not seen by the customer.
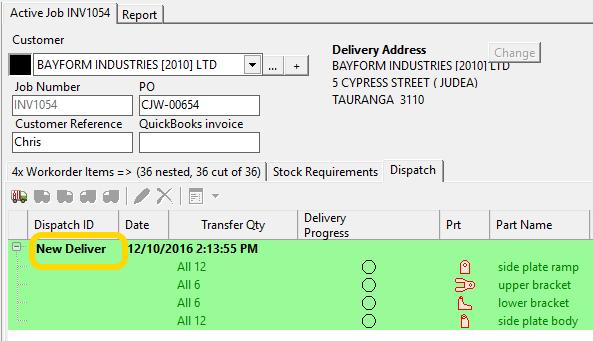
4.After entering the data and pressing OK the shipment will be displayed as “New Delivery”. The parts to ship section will be hidden as there are no more parts to ship. Note the shipment has not yet been saved.
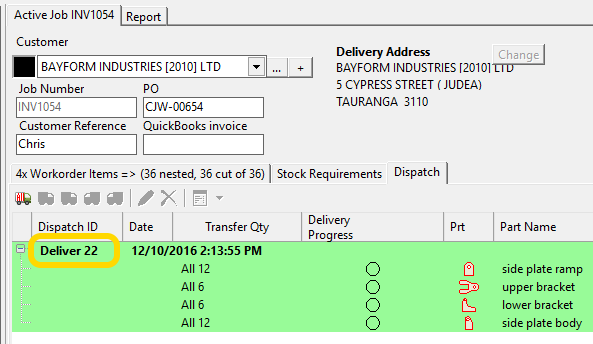
5.Click the Save All button at top left of screen. Once the shipment has been saved it will be assigned a database delivery ID, in this case “22”.
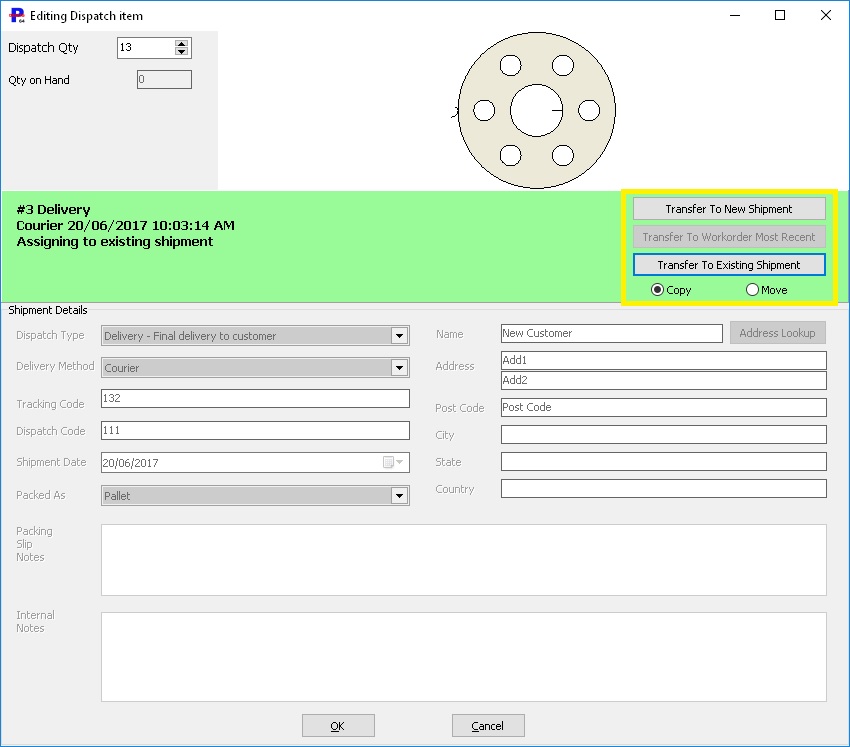
Double clicking on a shipment item will allow you to edit the quantity.
All the shipment fields will be read-only, to edit the shipment fields you must double click on the shipment header.
You can also transfer the shipment item from the current shipment to:
•A New Shipment – Will create a new shipment
•Workorder Most Recent – Will be the most recent shipment that is the same type (i.e. final delivery to customer) on the current workorder, must be today’s date.
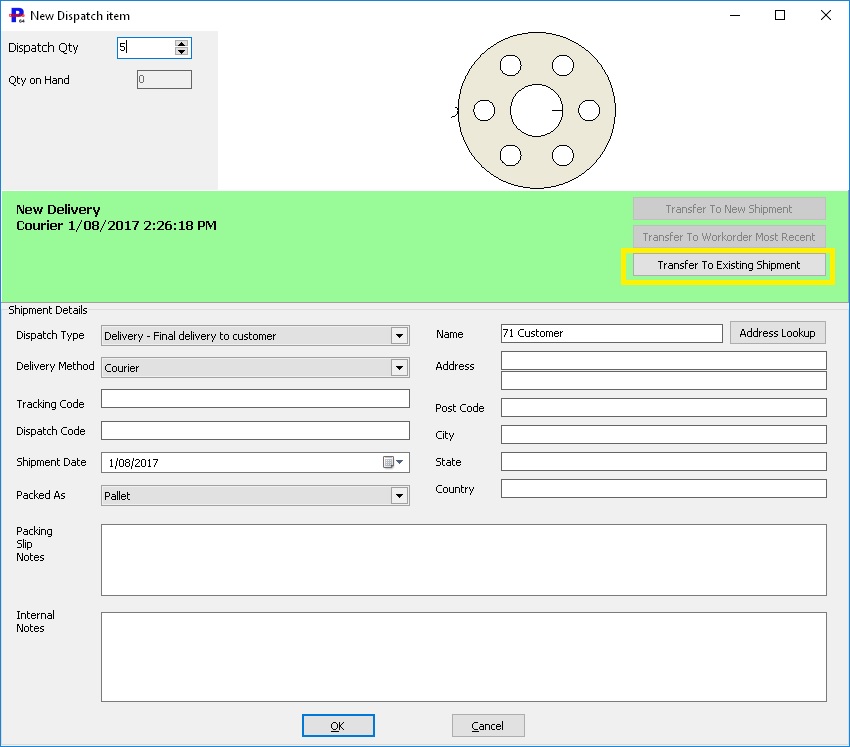
•An Existing Shipment – Will open the shipment search window. New shipments will not appear in this window until they have been saved.
Copy will keep the original shipment item as is and create a new copy in new/selected shipment.
Move will delete the shipment item from the original shipment and create a new copy in new/selected shipment.
You can also select multiple shipment items and right click Edit Dispatch Item. You will not be able to edit the quantity but it will allow to transfer multiple shipment items to another shipment.
By right clicking on the shipment itself, you can select a Dispatch report, typically a packing slip to print.
Once a shipment has been created, parts from the same workorder, or from different workorders can be added to it subsequently (Ship All always creates a new shipment- you must ship selected items if you want to add them to an existing shipment as in the next example).
SHIPMENT TYPES
Below are the different shipment types and how they affect the workorder item quantities.
Customer Delivery – (Qty on Hand – Transfer Qty) and (Qty Delivered + Transfer Qty)
Sent to Outwork – (Qty on Hand – Transfer Qty) and (Qty At Outwork + Transfer Qty)
Outwork to Customer – (Qty At Outwork – Transfer Qty) and (Qty Delivered + Transfer Qty)
Outwork to Outwork – Doesn’t effect any of the quantities used mainly a record keeping
Received From Outwork – (Qty At Outwork – Transfer Qty) and (Qty on Hand + Transfer Qty)
Rejected Scrapped – (Qty Delivered – Transfer Qty) and (Workorder Item NrRejected + Transfer Qty)
Returned for Rework – (Qty Delivered – Transfer Qty) and (Qty on Hand + Transfer Qty) and (Qty Returned Rework + Transfer Qty)
Rework to Customer – (Qty Delivered + Transfer Qty) and (Qty on Hand – Transfer Qty) and (Qty Returned Rework – Transfer Qty)
EXAMPLE: ADDING A PART TO AN EXISTING SHIPMENT FROM ANOTHER WORKORDER
Now we will ship another part from a separate workorder, adding it to the shipment we just created. It is valid in this example because the separate workorders are for the same customer and are to go to the same address, however another use case might be where the “shipment” is in fact representing a truck-run or similar, where multiple customers have their deliveries aggregated into a single truck run.
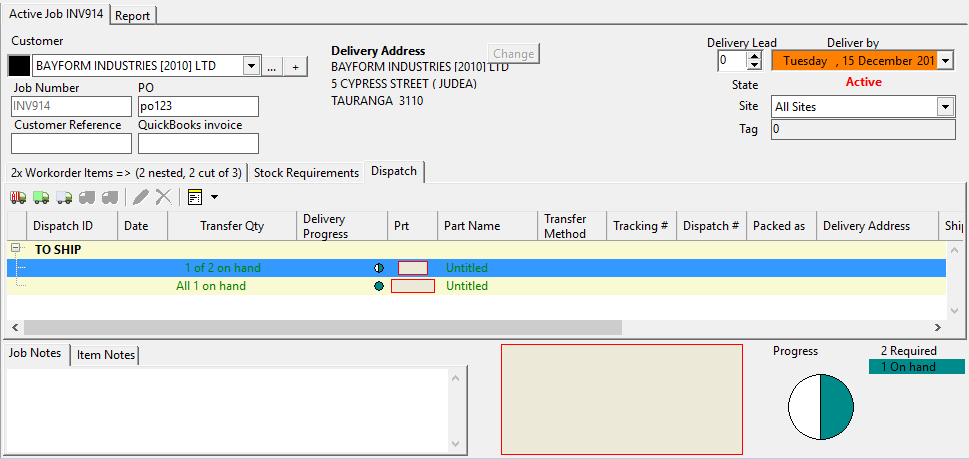
We will ship one of these parts as shown below. Note the pie chart coloring on the dispatch tab is different to the main workorder editor tab. The dark olive color represents the number On-Hand which is not necessarily the number “ready”, “ready" in PrimeCut’s context simply means cut; a part which has been shipped to the customer is still “ready” but is no longer “on-hand”. With the part we wish to ship selected, right click and choose Deliver To Customer or click the green truck button (green for “to Customer”).
This time we will click Transfer To Existing Shipment to allow us to add the parts to another shipment.
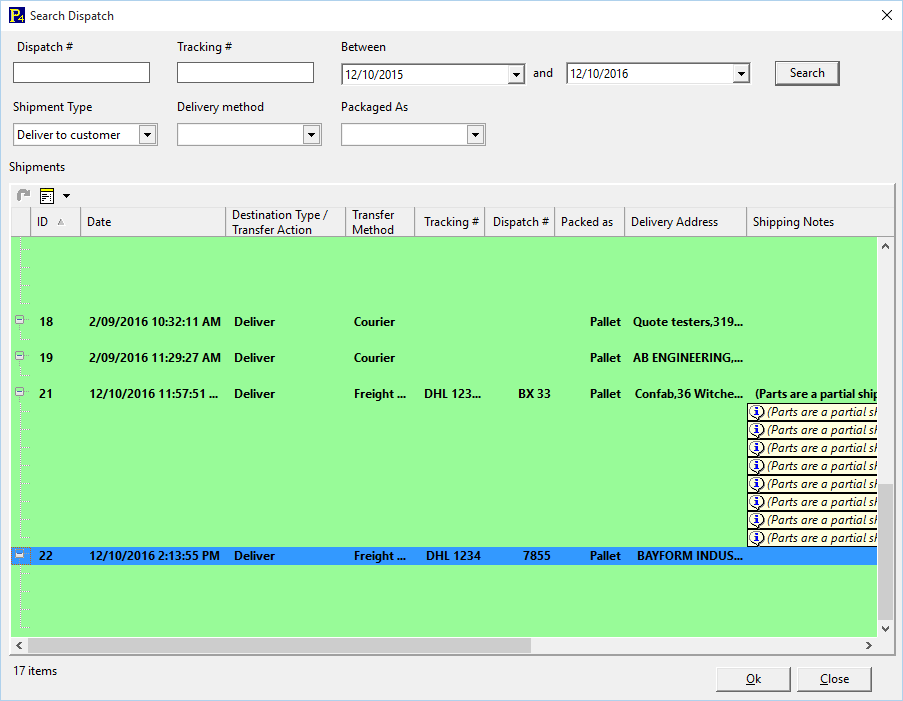
This brings up the select shipment window. We can use the filters or simply scroll to the bottom to find the shipment we just created; select it and press OK.
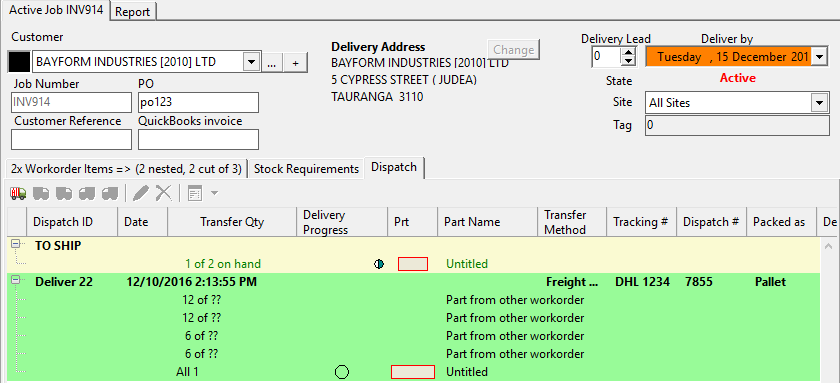
Delivery 22 now shows the details for the part we just added, as well as the other parts from other workorders. Not all details are shown for the other workorder parts in this view. Note also To Ship is still present showing one available of two parts required.
Viewing Shipments and Printing Packing Slips
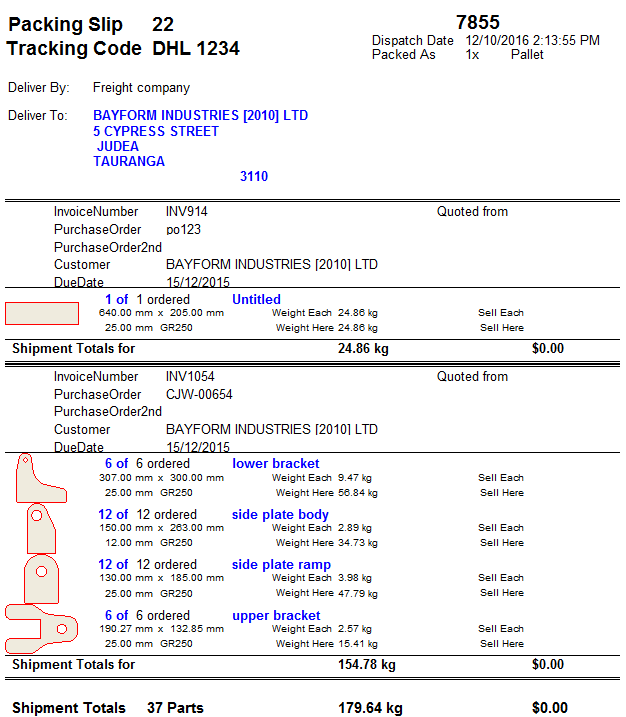
In the previous example if we save the workorder, we can print the packing slip by selecting the shipment in the workorder editor dispatch tab, right clicking and choosing a Dispatch report. We can also find the shipment in the Dispatch module from the main screen, which will list all shipments, and allow us to search and filter the shipments.
The packing slip for this shipment now looks something like the following, showing the shipment header and delivery address at the top, followed by the individual workorder headers and the parts shipped.
See Also