In this tutorial we will cut an elliptical hole in a piece of plate so that a pipe can pass through it at a 45º angle. In order to do this we need to turn off the default tangential following for the bevel. Tangential following means that the tip angle of the bevel is normal to the cutting path. By turning this off and fixing the rotation angle for the duration of the cut we can keep the torch sloping in the same direction. The advantage of this will become much more clear in the following tutorial.
The plan is to cut a hole in a piece of 20mm (3/4") plate so that a 50mm (2") OD pipe can pass through it at a 45º angle.
1Open the Workorders mode
2Open the Workorder with the invoice number 'Bevelling Tutorials'
3Double-click on the 45 Degree Pipe Intersection part to open it
4Click on the Processing editor tab, and then click the Process All button.
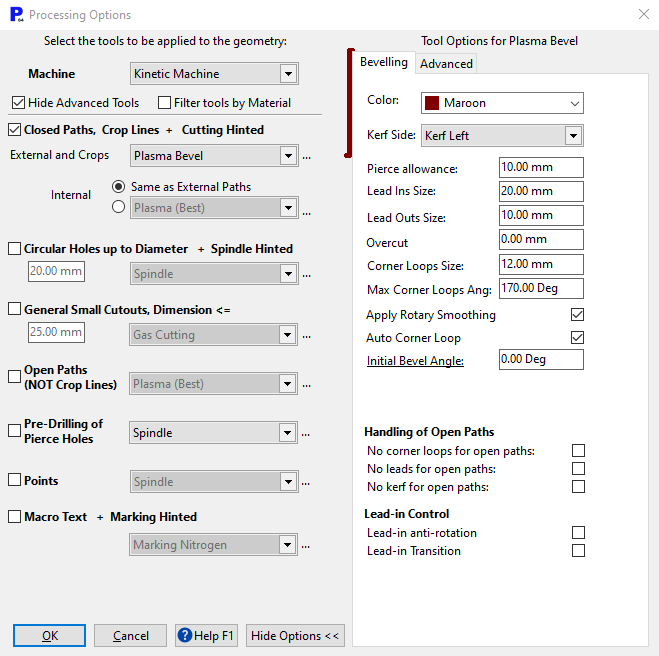
▪Select the Plasma Bevel for closed paths.
▪Enter 20mm (3/4") as the Leadin size, and 10mm (3/8") as the Leadout size.
▪Choose an Initial Bevel Angle of zero degrees.
Click OK to apply the processing.
5Select the leadout for the ellipse and press the DELETE key.
Since the ellipse is a drop part we should avoid giving it a leadout.
6Select the whole processed part by using an enclosing rectangle so you can view the Properties in the properties window. (Click Show All in the window)
Scroll to the bottom of the properties window, where you will find those related to the corner loops. We want to remove these because the outside of the rectangle will be cut vertically, meaning that corner loops are not required.
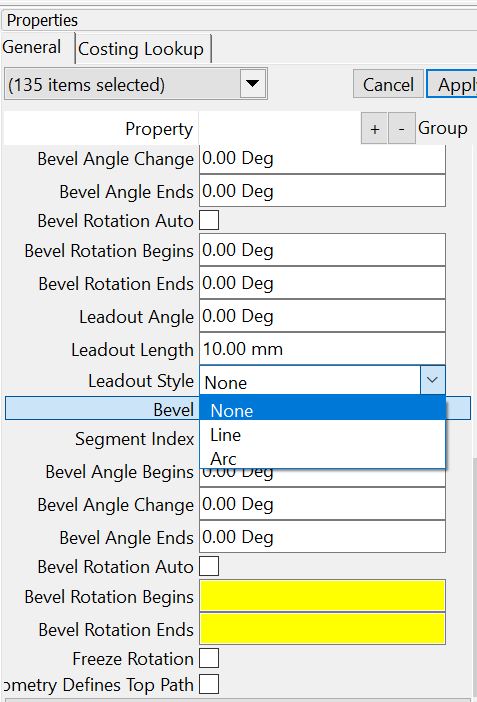
7Select None from the Leadout Style drop down menu.
8Click the Place Leads button on the Editor Toolbar.
We want the put the leads on the bottom of the ellipse because this will shift the pierce point further from the path.
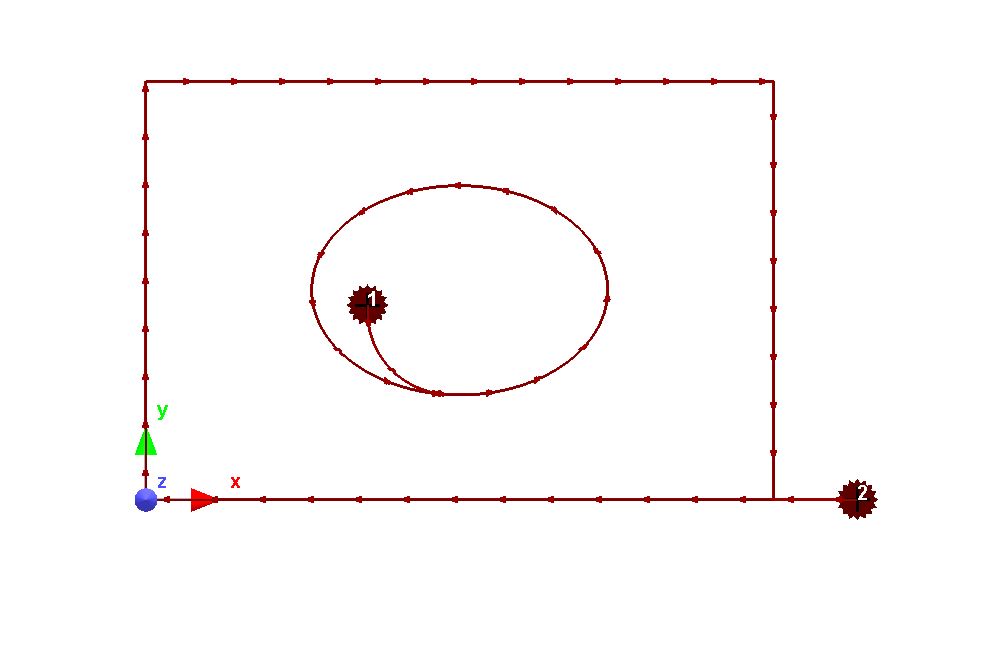
9Click at the bottom of the ellipse path to place the leads there.
10Click on the Place Leads button once more to turn off that function.
Now we can change the processing for the ellipse so that it is being cut at a 45º angle.
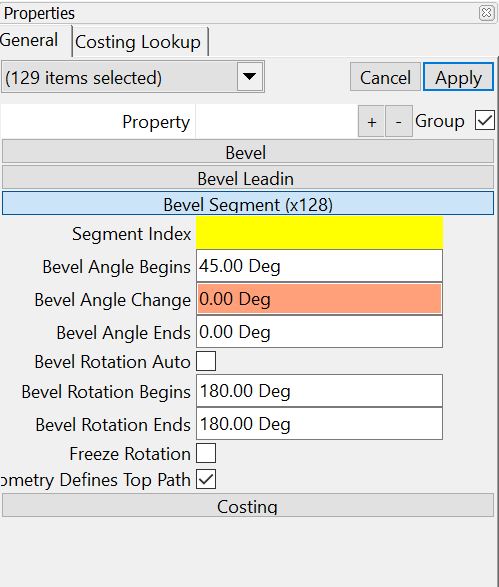
11Use a selection rectangle to select the cutting path for the ellipse so that you can view the properties. Make sure the leadin is not selected.
▪Change the Bevel Angle Begins to 45º
▪Change Bevel Rotation Begins to 180º
▪Change Bevel Rotation Ends to 180º
▪Untick the Bevel Rotation Auto checkbox
▪Change Geometry Defines to Top in the drop down. Once again be aware that the standard rule is to leave this as Extents, because in most cases the path has been drawn to define the extents of the path.
12Click the Apply button.
13Use ALT and right-click to rotate the part in 3D and view the geometry.