In this exercise we will be nesting a part that interlocks with itself very well. As you will see this particular example is slightly contrived (it is basically the capital letter F), but it serves to illustrate the concept very well. The method can be applied to other individual parts or even a group of different parts.
Arraying this part normally would result in an inefficient nest. By interlocking the part and creating a cluster however, we are able to create a highly efficient array.
1Make sure you are in the Nesting mode
2Click Open Parts ![]() .
.
3Under the Invoice Number search criteria, search for the Nesting: Arraying a Cluster. Only the F part should appear in the list. Double-click on it.
4Click the Open Plate ![]() button. In the top 2 drop-down boxes, select Available Not Nested and Workspace Materials, and Click Refresh.
button. In the top 2 drop-down boxes, select Available Not Nested and Workspace Materials, and Click Refresh.
Scroll down and Double-click on a 3000x2000mm, 5mm GR250(A36) plate to open it.
5Drag the part from the explorer to near the center of the plate.
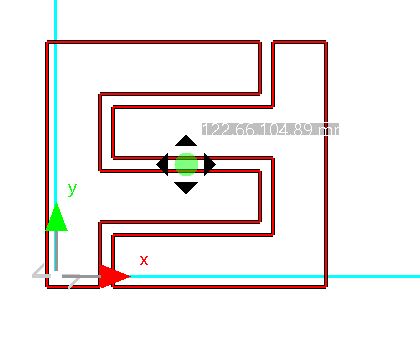
6Drag a second copy of the part onto the plate. We want to rotate one of these part inserts by 180 degrees so that the two will interlock cleanly.
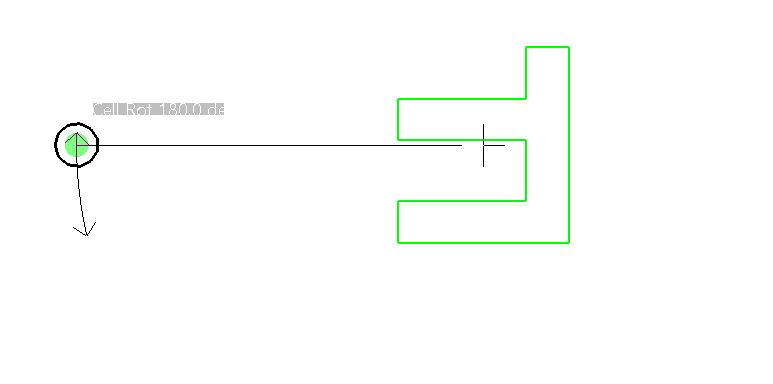
7Hold down the SHIFT key (to constrain the movement to 15 degree increments), and use the 'rotate part insert' handle to rotate the part as shown below.
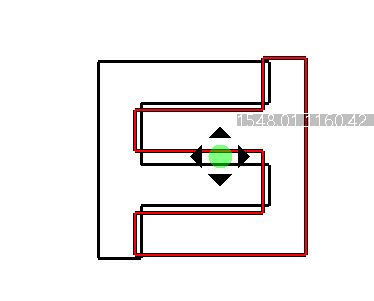
8Now drag one part so that it interlocks with the other. Drop the part when they both overlap (as shown below), so that PrimeCut will nudge them into an optimal position.
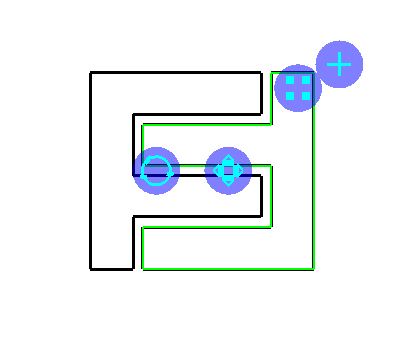
9Now select both parts at once, and right-click to display the popup context menu.
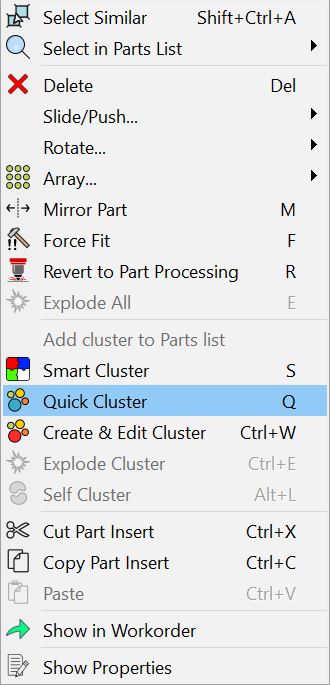
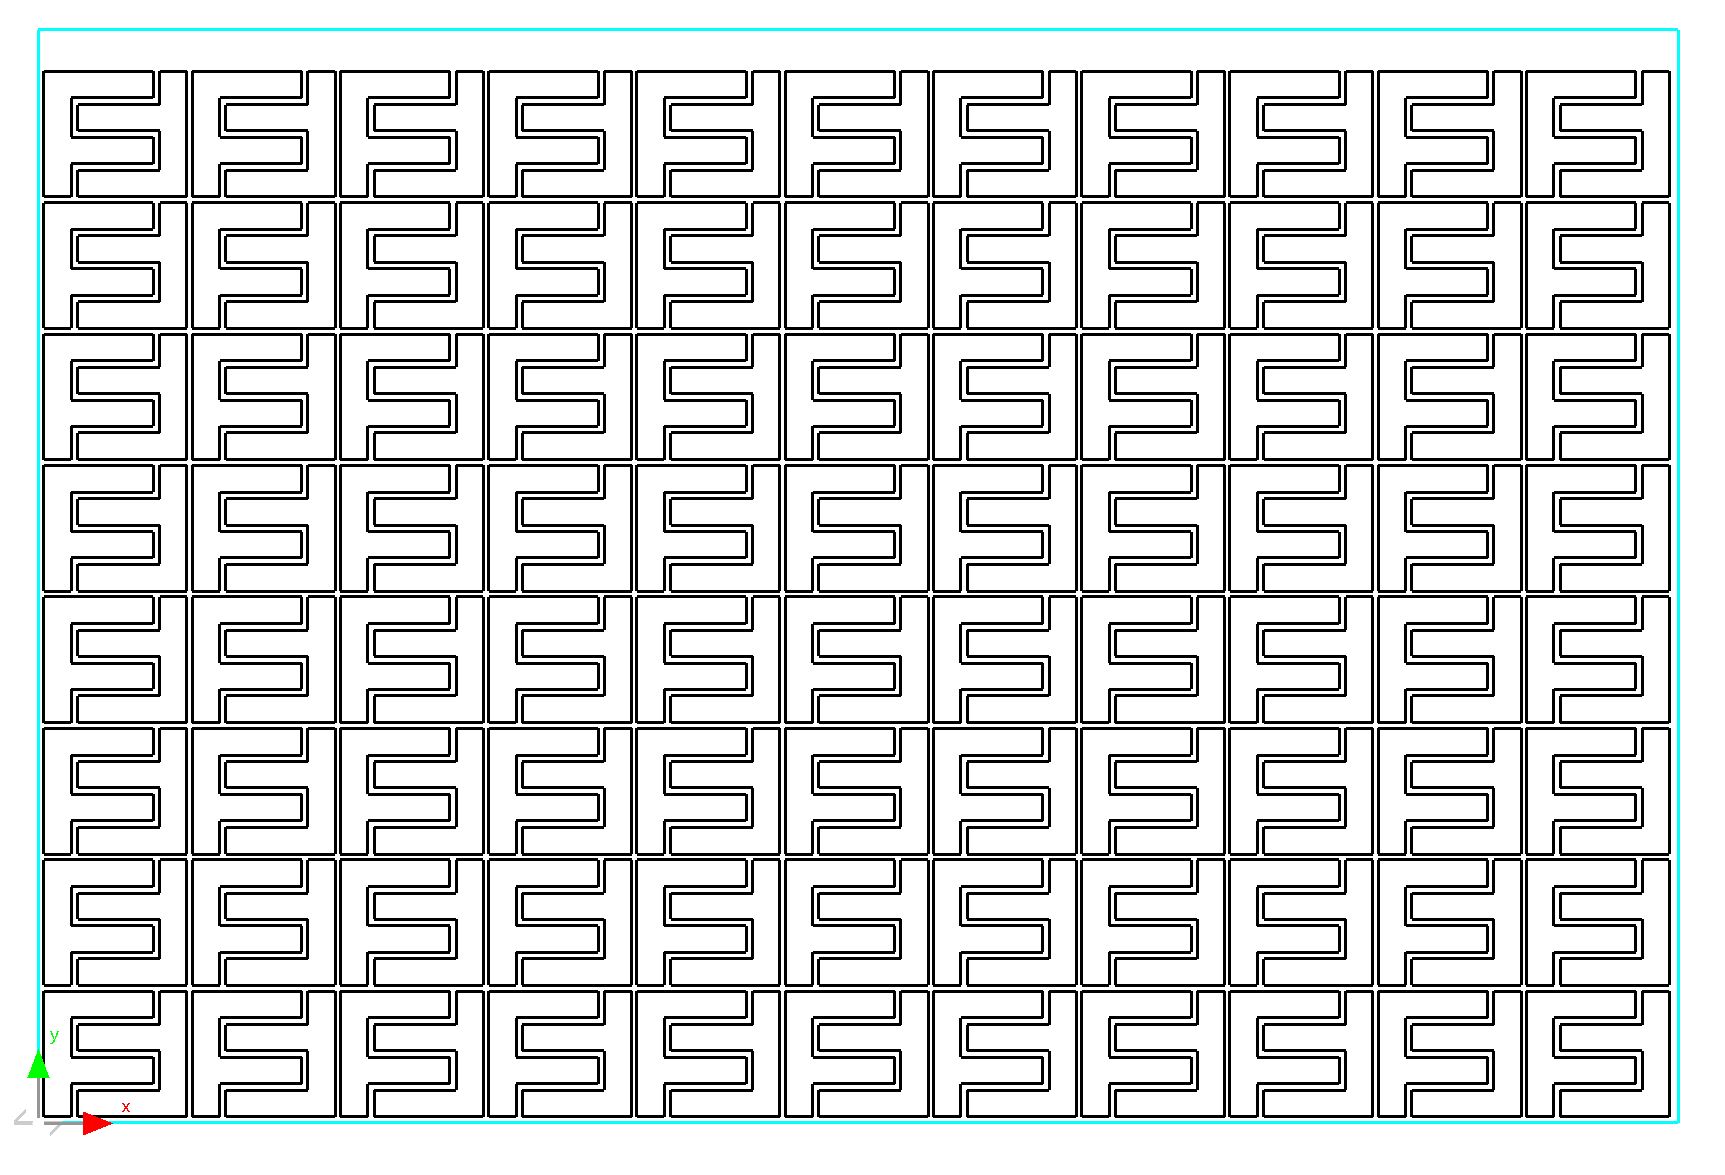
10Select Quick Cluster from the menu.
In this case we are just using the cluster for this nest, so there is no need to add it to the parts list.
11Drag the newly created cluster to the bottom left corner of the plate, and drop it there.
Once again, drop it slightly off the plate so that it will be nudged into position.
12Drag the array handle so that the plate is fully nested.
If the 8x11 cluster array does not fully fit onto the plate, select the plate in the plate explorer on the left. Under properties, change the gap size and edge gap size to 2mm, and use bump nesting to reposition the array.
13Close the mode without saving, so this tutorial is ready for reuse.