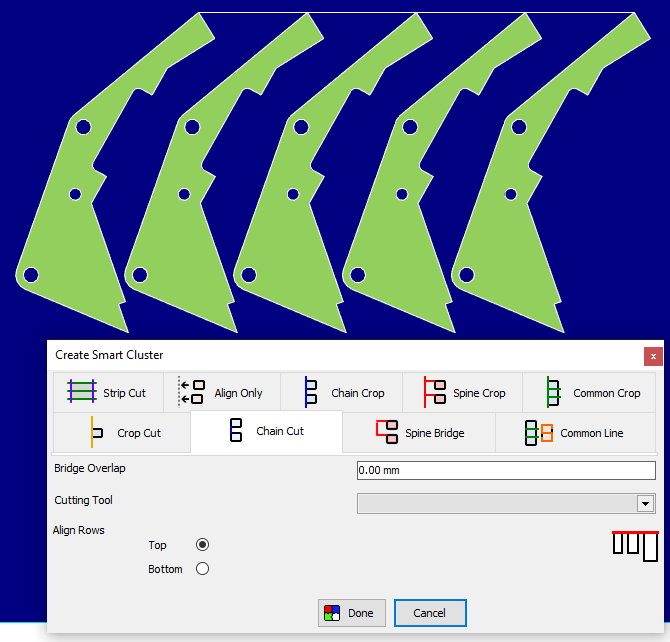
Continuing on from the previous tutorial, we will show you how to use Smart Cluster to quickly do bridging. See SmartCluster: Chain Cut and Chain Crop for more information about using Smart Cluster.
1Double click the plate explorer and click the clear plate ![]() button in the nesting editor toolbar. Click Yes to confirm.
button in the nesting editor toolbar. Click Yes to confirm.
2Right click the cluster from the previous tutorial and click remove part. Click Yes to confirm.
3Drag a Bridging Part 2 onto the plate. Array all five parts horizontally, as you did when creating the cluster for the previous tutorials.
4Click Smart Cluster at the bottom of the editor toolbar.
5Choose chain cut. Smart Cluster will show a preview on your nest of the chain cut it will create. Take a moment to look through the other options in Smart Cluster, and see how the preview changes with different options.

6Click done. You can now add the cluster to the parts list and edit it further, or move straight on to processing the part.
7Close the module without saving.