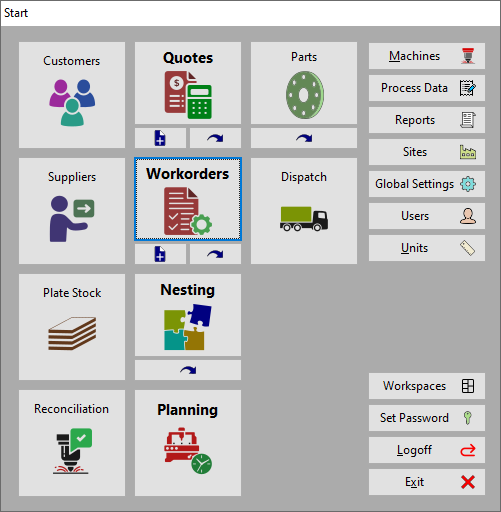
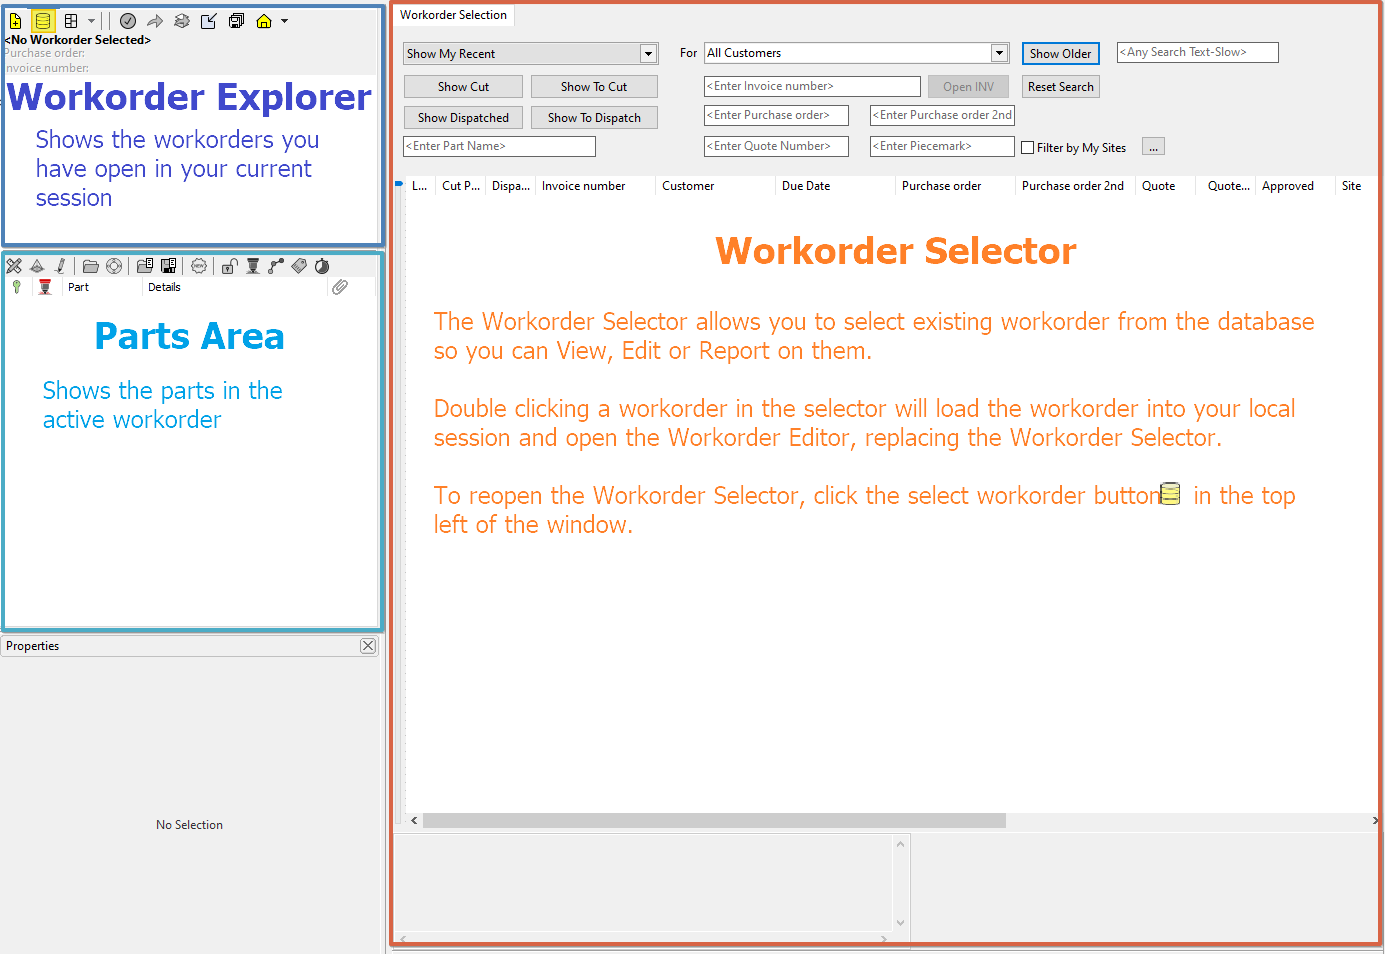
1Click on the Workorders (often renamed by Custom Naming to Jobs) icon to open the Workorders Mode. For more information on the workorders mode refer to that section of the PrimeCutNE Manual.
2Click on the New Workorder Button, ![]() to create a blank workorder.
to create a blank workorder.
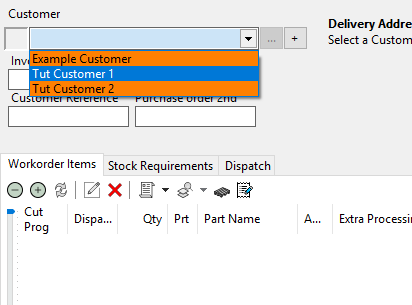
3Select Tut Customer 1 from the list in the Customer field.
4Under Purchase order enter "Basic Workflow"
Note the Invoice number will be automatically set to "INV-something". PrimeCut can be configured to automatically generate invoice or job numbers, as has been here in the tutorials database. Alternatively, it can be set that the user must enter their own invoice or job number, perhaps generated by an external ERP or accounting system. The combination of Invoice Number, Purchase Order and Purchase Order 2nd must be unique, primecut will not allow you to save a workorder with all 3 fields the same as one already in the database
5Click the import parts button ![]() above the parts area, to import parts for our workorder.
above the parts area, to import parts for our workorder.

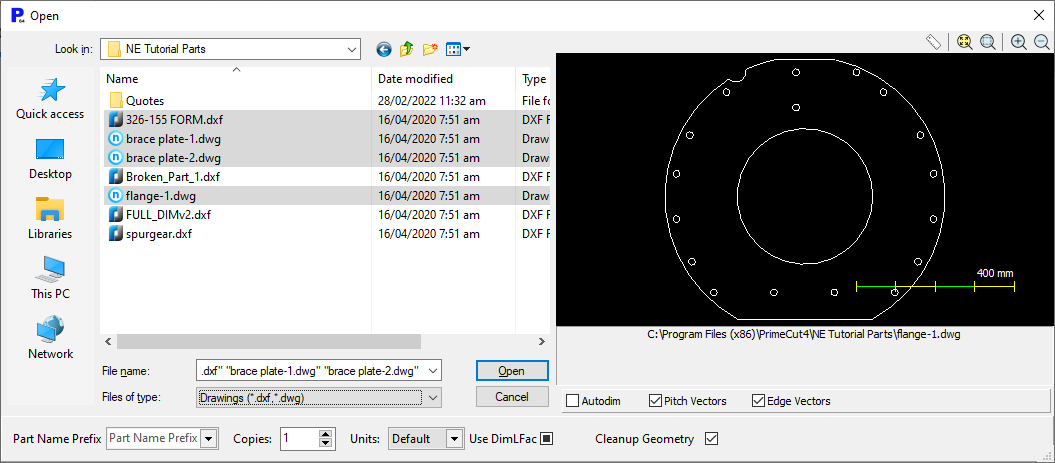
6Navigate to the NE Tutorial parts folder which should be found (in a standard installation) in C:\Program Files\PrimeCut4\NE Tutorial parts.
7Hold down the CTRL key and Click to select the drawings 326-155 FORM.dxf, brace plate-1.dwg, brace plate-2.dwg, and flange-1.dwg. Click Open.
Note that if you made a mistake and you are importing these parts for a second time, click New Revision of DB Part from File on the warnings on name repetition.
Settings for part name warnings can be changed in Global Settings so that if desired, no repetition is allowed in part names, or no warnings are given. If you aren't happy to have multiple parts with the same name in the database in future then change the name of the part names.
8The following parts will appear in the order you selected them - read the names carefully to enter the right numbers. If you forget to tick Auto Dimension Part, then just continue anyway; you just won't be able to automatically see the dimensions of the parts.
1.For 326-155 FORM, set Number Required to 2, Material Mild Steel, and Thickness to 10 mm. Tick Auto Dimension Part, and Click OK
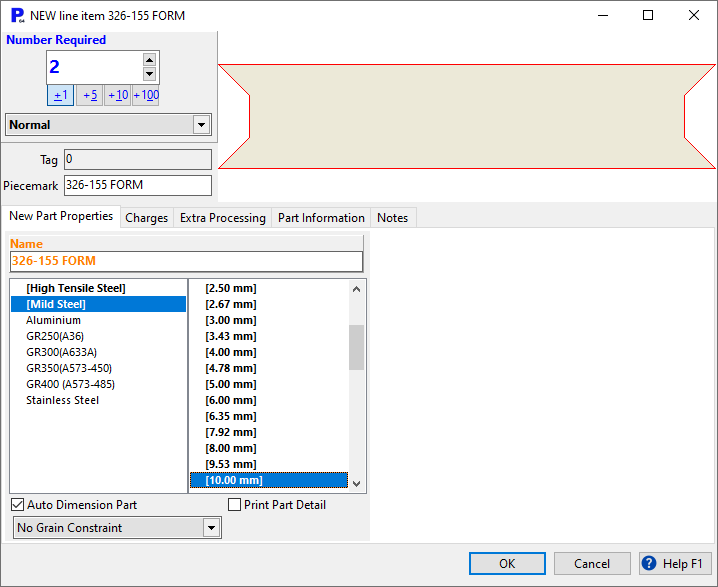
Auto Dimension Part will attempt to automatically dimension the part on import.
For future reference, you can click on the +1 +5 +10 and +100 adder buttons for speedy numeric entry, or type if you wish.
2.For brace plate-1, set Parts Required to 4, Material to Mild Steel, and Thickness to 10 mm. Tick Auto Dimension Part, and Click OK.
3.For brace plate-2, set Parts Required to 5, Material to Mild Steel, and Thickness to 10 mm. Tick Auto Dimension Part, and Click OK.
4.For flange-1, set Parts Required to 1, Material to Mild Steel, and Thickness to 10 mm. Tick Auto Dimension Part, and Click OK.
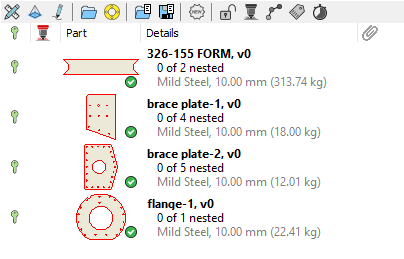
The Workorder Line Items will now be visible in the workorder selector window. (If not double click on the workorder in the top left window).

The Parts these line items refer to can be seen in the parts explorer on the left.
9Right-click our workspace workorder in the workorder explorer. Click Open Workorder in Nesting.
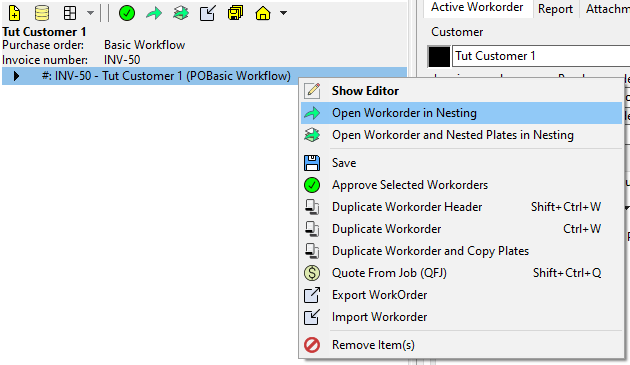
This is a shortcut to closing the Workorders mode and opening the Nesting mode and workorder parts, which we will see later.
10Click Yes to save the workorder when prompted.