We will create a new part from the shapes library for this exercise.
You may notice that your dimensions are a different size to the ones shown in the tutorial. If so, do not be concerned. At the end of this tutorial you will learn how to change dimension style and size.
1Open the workorders mode.
2Under Invoice Number enter Part Dimensioning, and Click Open INV.
3Double-Click on our Dim Flange part from the parts explorer on the left.
4Click on the Geometry editor tab. If any dimensions are still on the plate from a previous tutorial user, select them and press DELETE.
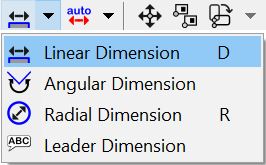
5From the geometry editor toolbar Click the Create Dimension button, and select Linear Dimension:
6In the Linear Dimension dialog select Select Points and Horizontal.
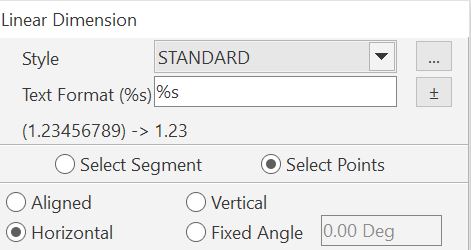
7Ensure that STANDARD is the selected style (as shown above). If not, use the drop-down menu to select it.
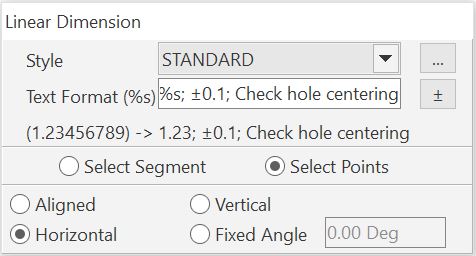
8Press the ± button next to the Text Format (%s) field to enter a dimension tolerance:
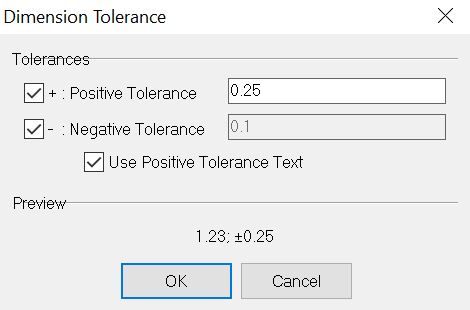
Enter 0.25 as above and Click OK. Notice that this has been entered into the Text Format (%s) field. You can type other text here that will appear next to the dimension.
9Click the Select all Snaps button.

This will make it easier to select the points we want to dimension.
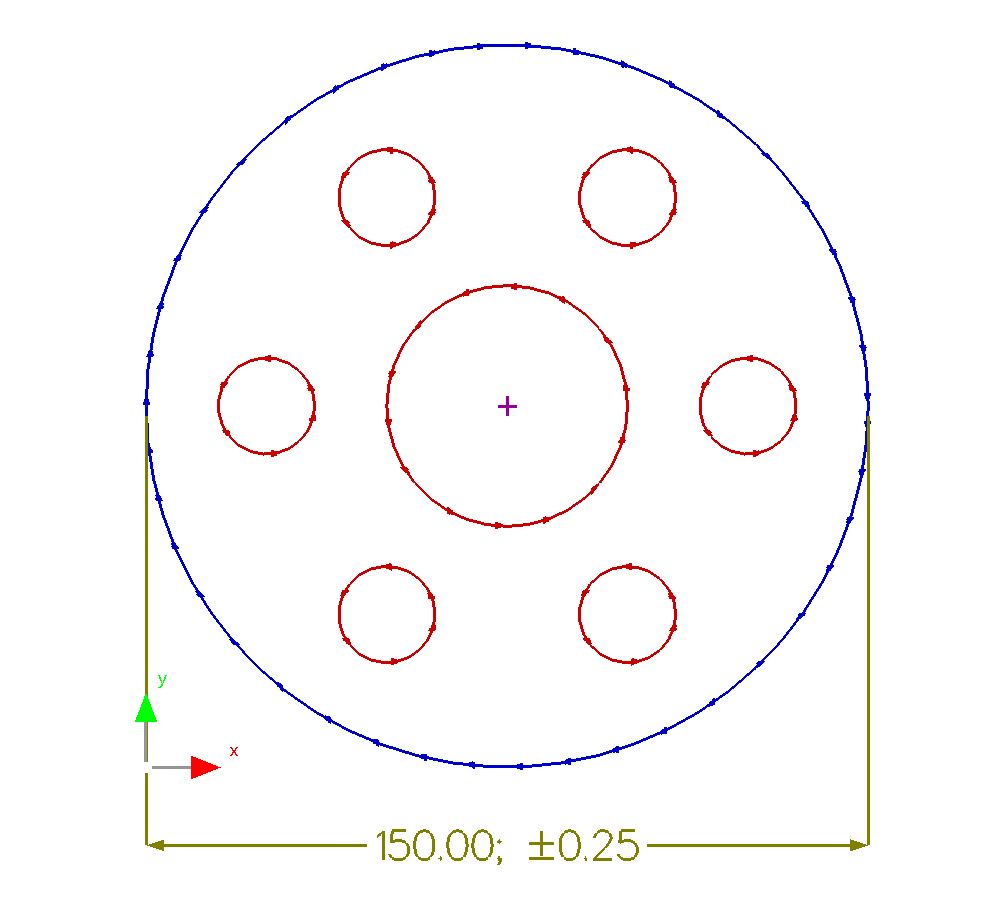
10Click on the point furthest left, and then Click the point furthest right:
This will create the dimension.
11Move the mouse to position the dimension. (Note: you can press the zoom out button to get a better view before placing). Click to place the dimension.
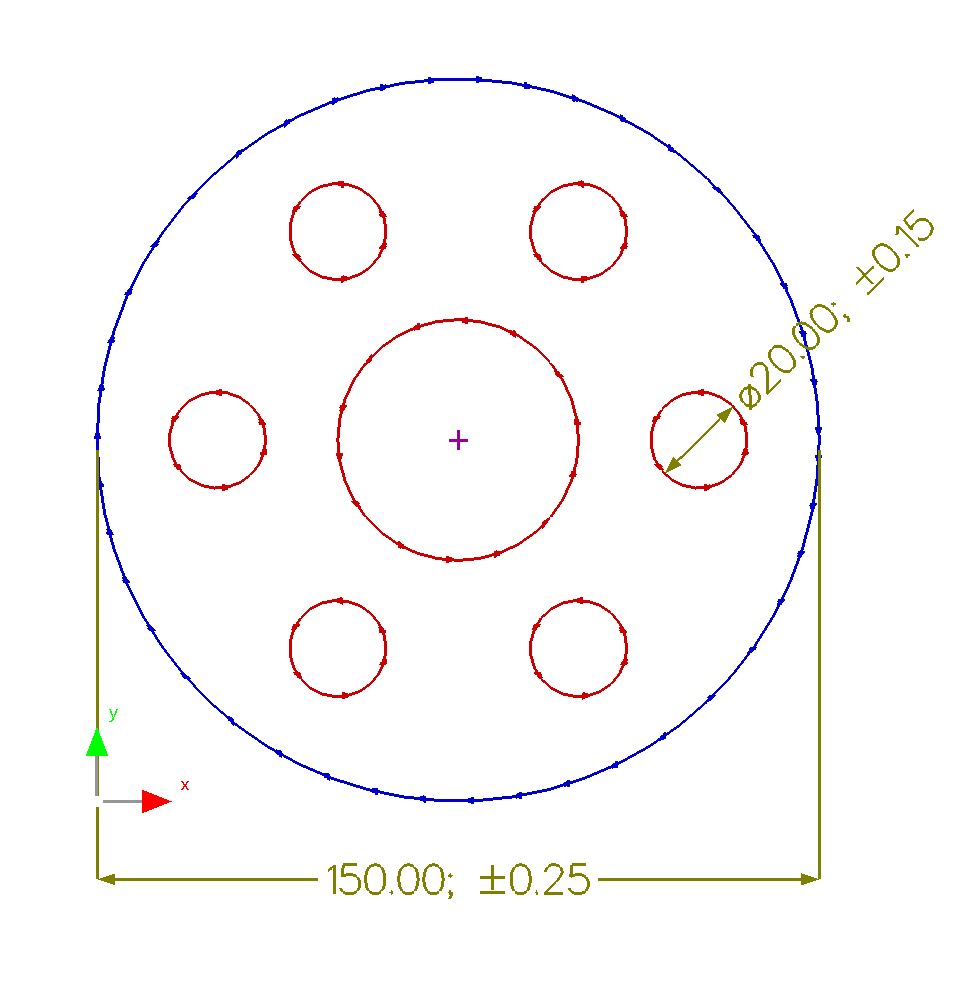
12From the geometry editor toolbar Click the Create Dimension button, and select Radial Dimension:

13Add a ± 0.15 tolerance, and select Diameter.
14Click on the internal circle at the far right to place the dimension.
15Place the dimension as shown below:
16 Click the Create Dimension button, and select Linear Dimension. Use tolerancing, and add text to the Text Format (%s) field to get the following result:
17Place the dimension just above the part.
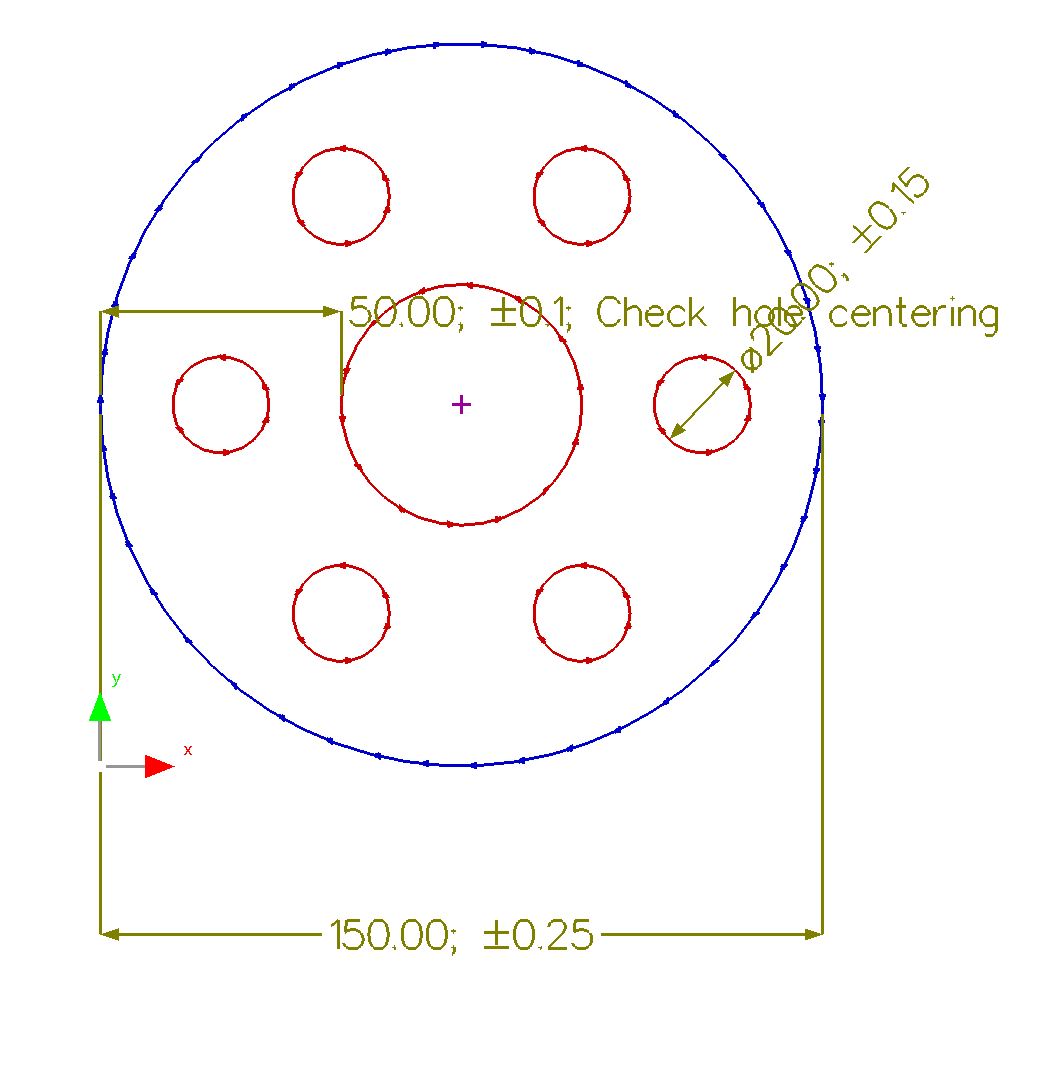
18 Select the last dimension. Drag it using the green circle so that it appears as shown below:
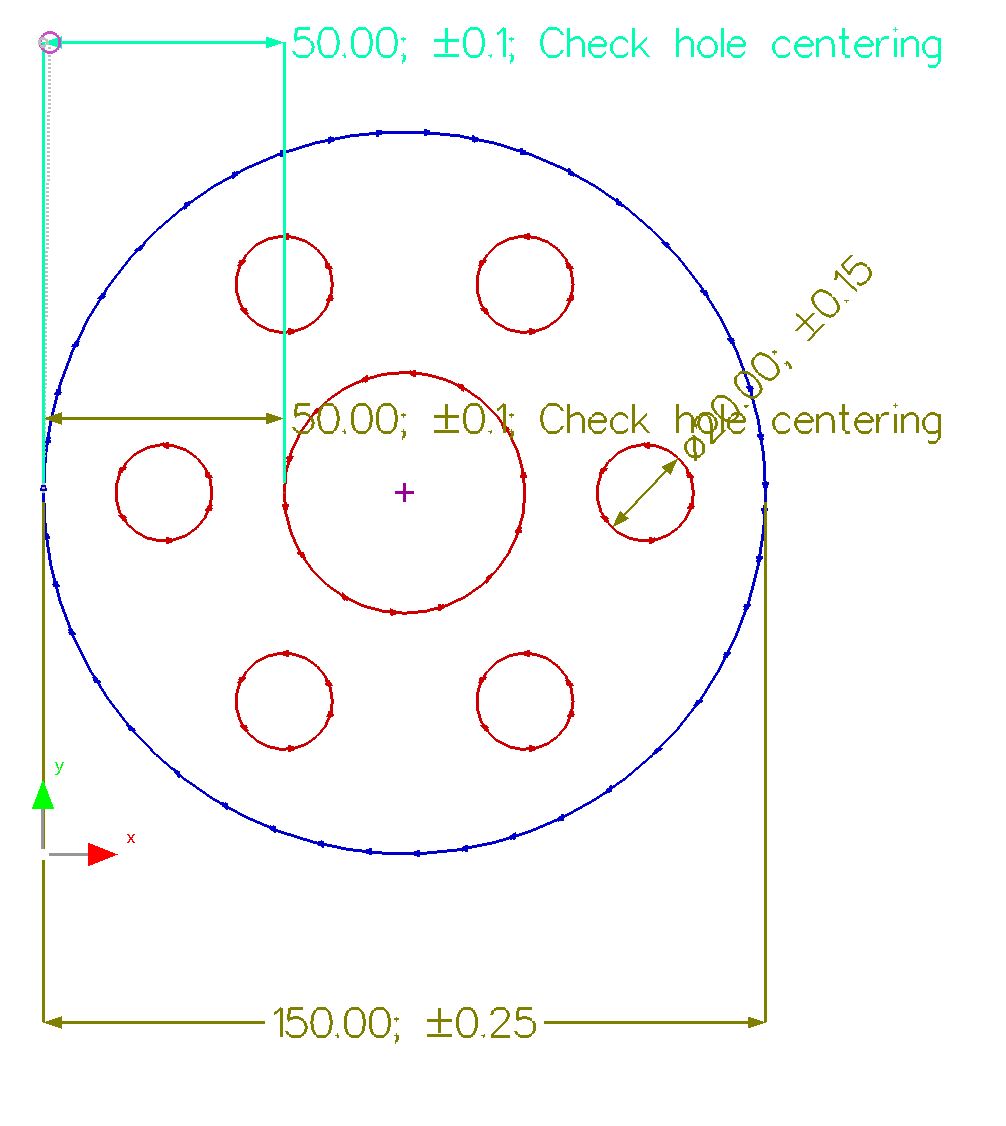
19 Notice that the text takes up a lot of space to the right. You can move the dimension text using the box that appears on it from the geometry editor toolbar
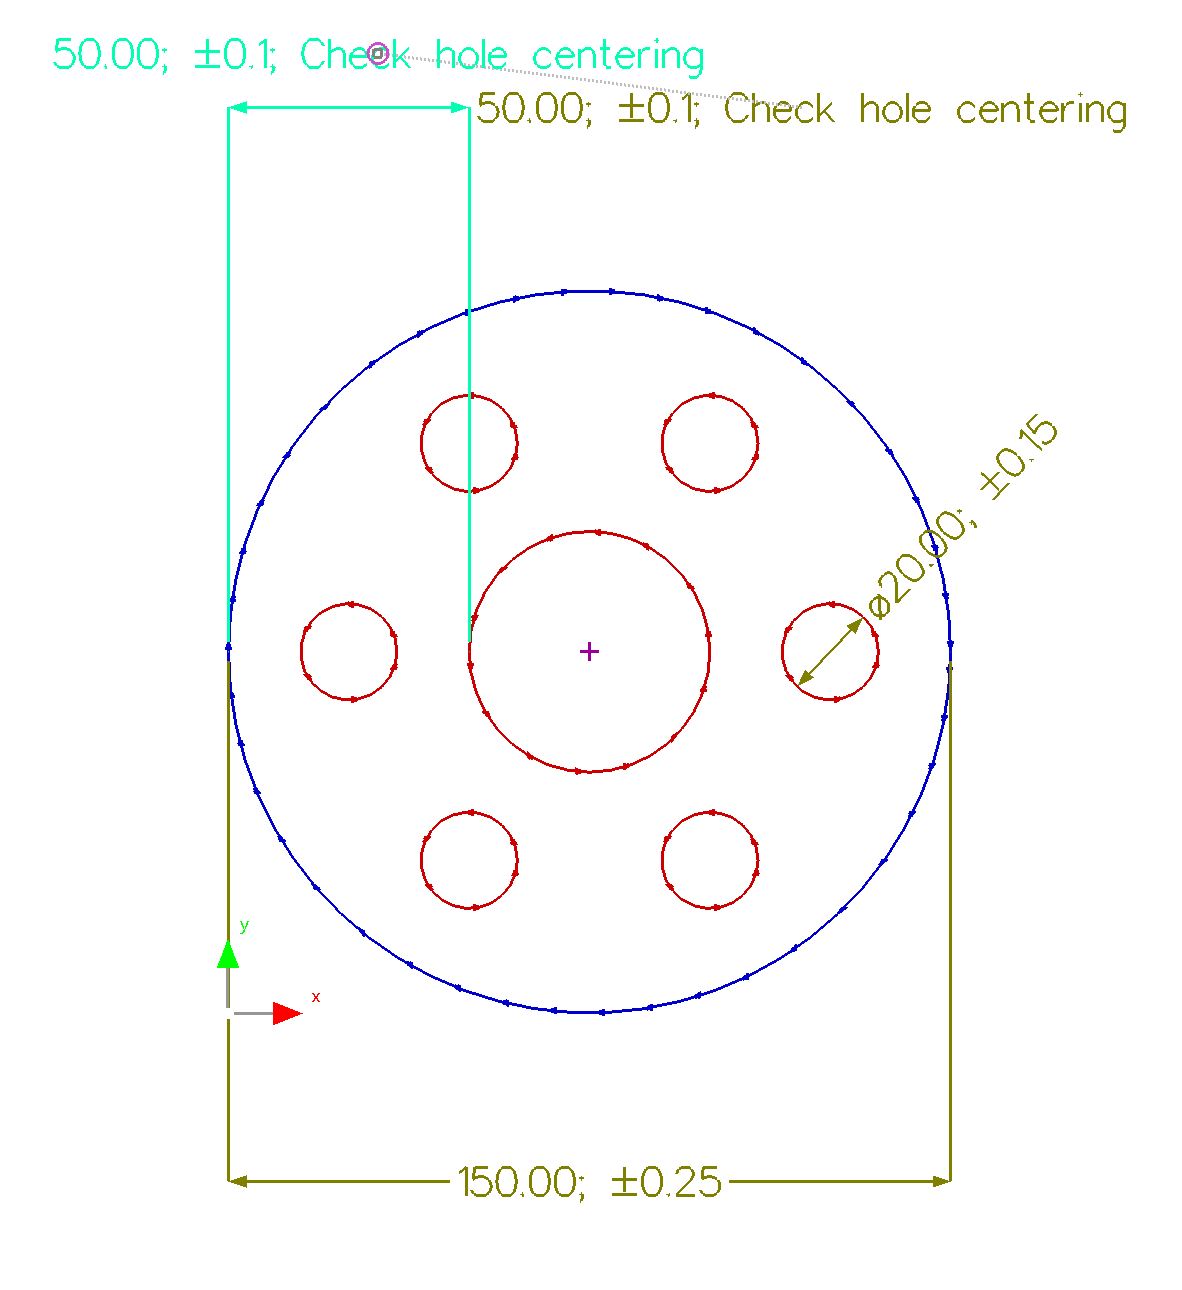
20Click the Auto Zoom button to view all dimensions.