In this tutorial we learn how to 'harvest' parts from one large dxf file with all the parts a customer wants cut all together. This is done using the Create Workorder Item From tool on the context menu.
1Open the Workorders mode from the start screen
2Search for the invoice number "Harvesting Parts" and open it.
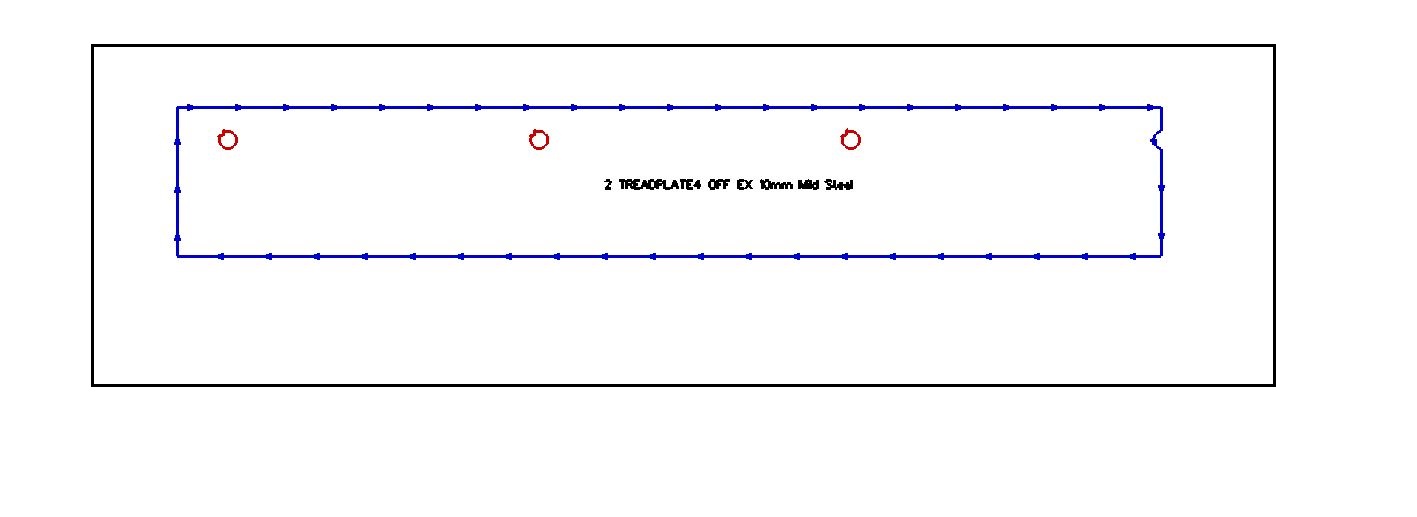
3Double-click on the Compound Part in the part area window to open it.
4Drag a box around the bottom right part in the drawing to select it.
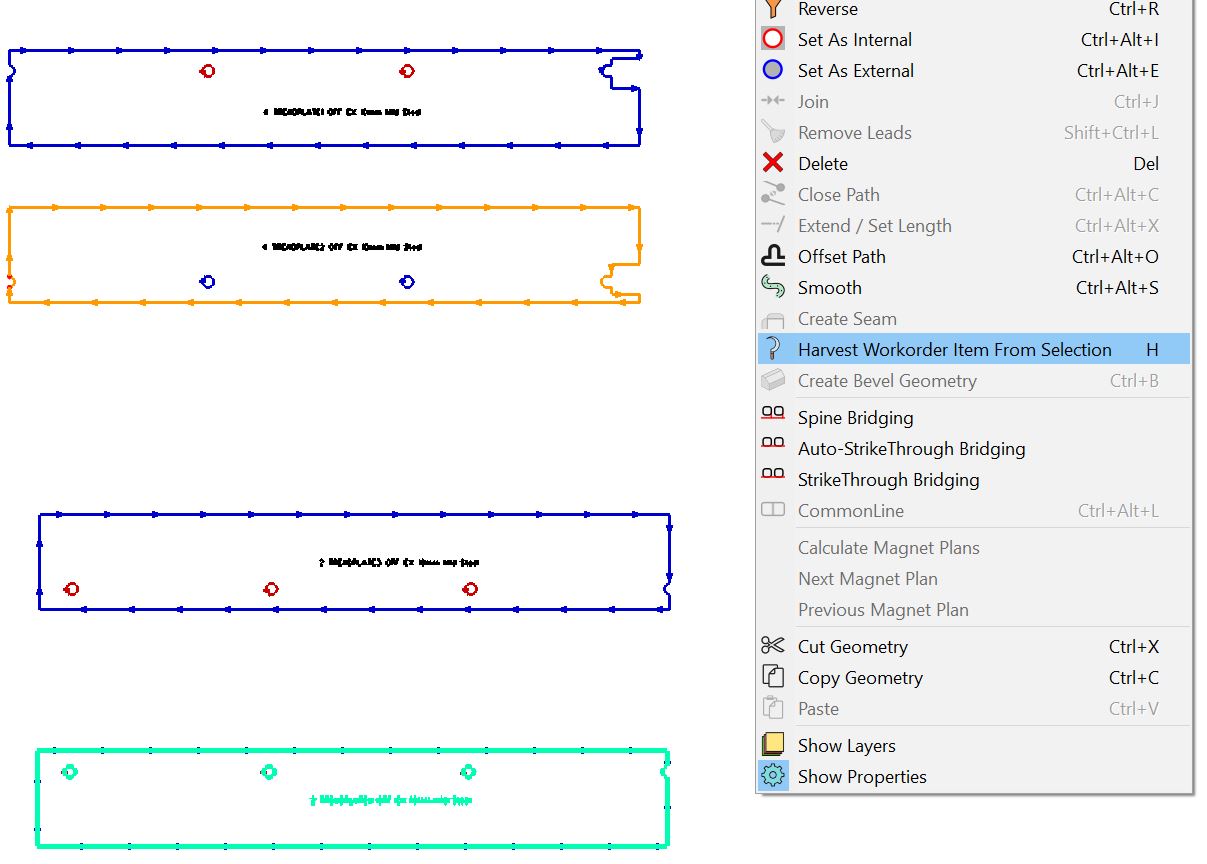
5Right Click and select Harvest Workorder Item from Selection or press ALT+H.
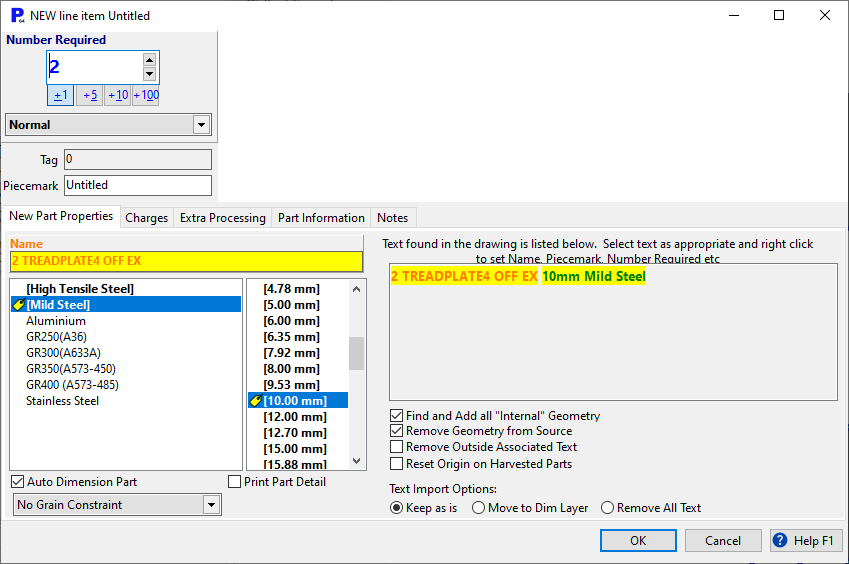
6Set the Number Required to 2 by pressing the +1 button or the ![]() button for the selection box.
button for the selection box.
Find and Add all "Internal" Geometry finds all the geometric entities within the extents of the selected part. For example if you have the outside of a part selected, but missed a slot or hole, it would still be added.
Remove Geometry from Source will delete it from our Compound Part version file.
Auto Dimension Part dimensions the key features of the part. These are added to the dimension layer and can be made invisible by pressing ![]() .
.
Keep Text as is, Move Text to Dim Layer, Remove All Text buttons dictate what happens to the text that has been identified on the part above.
Notice that PrimeCut has already filled in the Name, Material and Thickness information based on the text it found inside of the part geometry. These automatically applied fields are indicated by the yellow highlighting.
You can manually enter the details of the part if they should be different than what PrimeCut has selected based on the text.
7Click OK. You should see a new part in the parts explorer on the left.

You should also notice that the part has disappeared from the original drawing.
8Similarly, repeat for a few parts, until you are satisfied with the process.
9Close the mode without saving.