An entire plate, or even multiple plates, can have their parts labeled at once.
It is accessed via the Processing Editor toolbar when processing a plate, or via the labeling button the plates explorer in nesting mode. It can also be applied to parts as they are imported, see Auto Label Parts on Import, or manually via the Part Processing Editor.
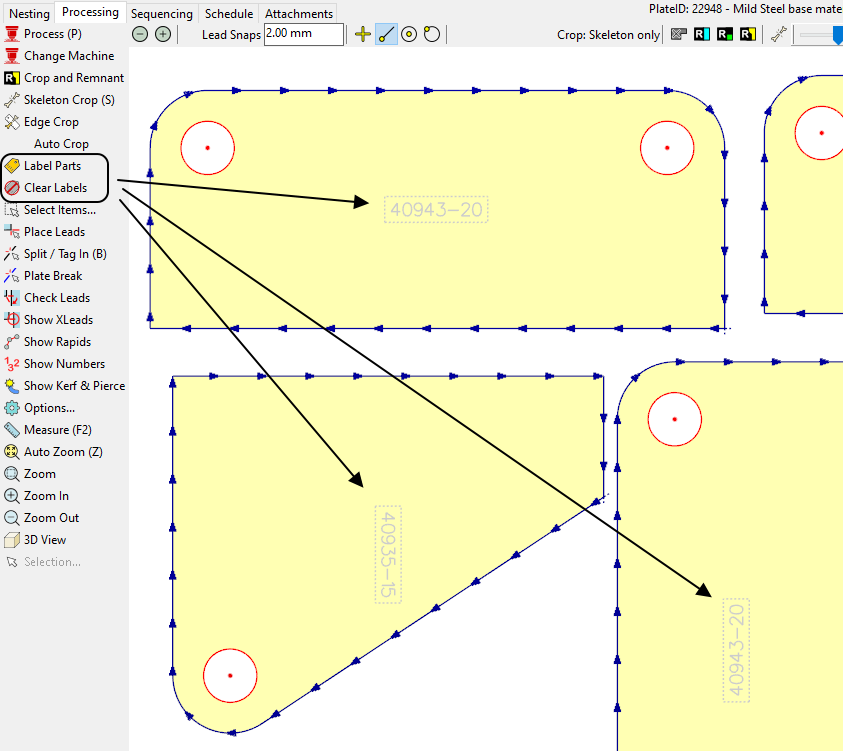
Clear Labels can be used to remove all the labels.
As can be seen the parts labels are drawn with a lightly stippled surrounding box (not processable, only a visual indication), to distinguish them from normal text drawn on the parts. These Part labels will display text handles when selected, even when processed with a marking tool, allowing them to be easily moved, and scaled.

Move, Scale and Rotate handles are available in the Processing Editor on Part Labels when selected.
The plate labeling is in the form of macro text which can be processed by a marking tool such as plasma marking, scribe, pen tool, pin stamp, Kinetic stamp marker etc.
The Label Parts button brings up the window (below) that can be used to automatically label the parts for marking on the current nest.
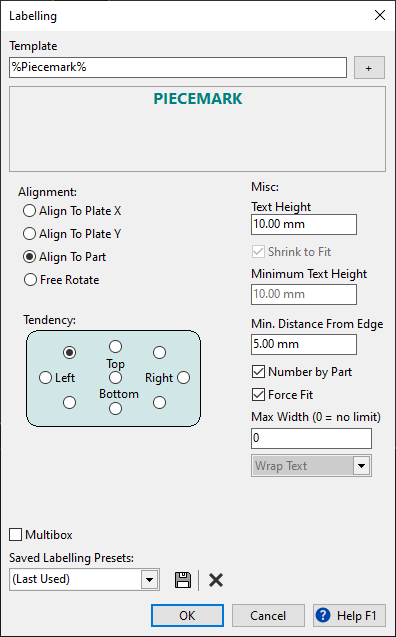
There are Macro codes that define the content and some formatting of the text to be marked. Pressing the + button will open a drop down menu of the database fields available for auto labeling (pictured below). \p denotes a new line. This can be added by selecting the New Line option in the drop down menu. This will force the next field to be labeled on the line below. Options available include:
•Name
•Piecemark
•PartID
•Part Revision
•PlateID*
•Plate Serial*
•Plate Heat*
•Plate Test Cert*
•Workorder Item ID
•Workorder ID
•Customer
•Purchase Order
•Invoice number
•Instance #
•Total #
•New Line (\p, a special code which adds a line break)
•ERP Fields (Only resolves on workorder items and plates with associated ERP data if Primecut is being used with Strumis or Tekla)
•Text Functions (useful for parsing text)
oSplit - Splits text by separator and returns string at (0-based) index. A negative index counts last to first.
oReplace - Replaces all instances of a substring
oPos - returns the position of the first instance of a substring
oAdd - adds two strings that can be resolved to positive or negative integers. Useful when used with other functions e.g. %Mid(%PlateHeat%,%Add(%Pos(%PlateHeat%,'/'),1)%,50)%
oLeft - limits the number of characters of the enclosed string - uses the first N characters
oRight - limits the number of characters of the enclosed string - uses the last N characters
oMid - returns the middle of a string counting from the second parameter (0-based), of length up to the 3rd parameter
oLen - returns the length of the string
▪The Alignment options dictates the alignment of the labeling text block. Align to part works the best in most cases.
▪The tendency window selects where on the part the labeling function will tend to place the text block. It attempts to achieve the location selected but will place the text block where it fits if the other rules override.
▪If checked, the MultiBox selection box will enable the marking device on the slave carriage(s) to be used for the plate labeling.
▪Text height determines the height, and hence the size, of the text. If using a stamp marker this must be set to the height that the stamps are manufactured to.
▪The Min. Distance From Edge will ensure the labeling text block is at least this distance away from the edge of the parts.
▪If checked, the Number by Part box will make the part numbering return the total number of parts of the same kind rather than for the entire plate. This must be used in conjunction with the Instance # field in the Template.
▪The Force Fit box, if checked, will place labels even if they do not fit on the part. Use this feature with caution.
▪The Max Width parameters determine the maximum number of characters allowed in a block of text in a single line. If the labeling text exceeds this amount it will wrap the word down to the next line if the Wrap Text is selected in the drop down box. Alternatively Keep Right Text or Keep Left Text can be selected which will discard the characters exceeding the Max Width amount to the right or left of the labeling text block.
Ensure the sequence of the nest is correct after Auto Plate Labeling has been applied. Ie the marking text should come before cutting.