This tutorial assumes you have done the Basic Workflow Tutorial.
In this tutorial we will
▪Load parts from the database into our workorder
▪Nest the parts by reusing a nest
▪Schedule the plate
▪Reconcile the plate
▪Close the workorder
1Open the workorders mode.
2Click on the New workorder button ![]() at the top left hand corner of the screen.
at the top left hand corner of the screen.
3Under the Customer field select Tut Customer 2, and in the Purchase order field for the workorder enter: 'Reuse Nest Workflow'
4Click the yellow Open Part button ![]() .
.
5Under the field that reads <Purchase order> enter Basic Workflow. In the top left dropdown box, select Linked Revisions. Click Refresh.
Note we would usually search for a workorder of parts with the Invoice number field, but because PrimeCut cannot allow Invoice number repetition, we are using Purchase order to find our workorder.
Note also that we want to have All Customers selected.
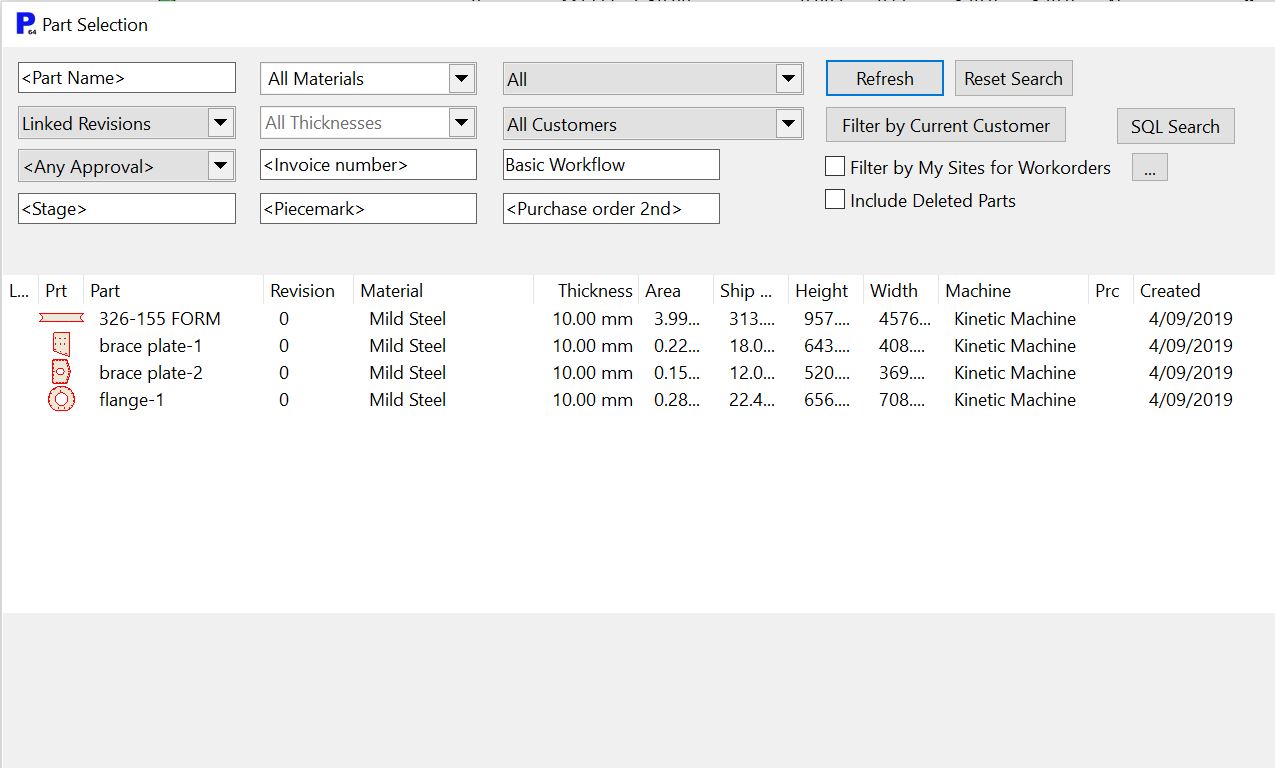
6Uncheck Exit After Selection at the bottom of the window
7One by one, select the brace plate-2 part and flange-1, clicking Use Database Revision each time. Change Parts Required to 15 for brace plate-2 and Parts Required to 3 for flange-1. Click Exit to close the Part Selection window.
8Click on the Import Part button ![]() .
.
9Open the spurgear.dxf file, which is most likely located at C:\Program Files\Primecut4\NE Tutorial Parts.
10Set Parts Required to 8, Material to Mild Steel, and Thickness to 10.0 mm. Click Ok.
11Right-click on our workorder, in the workorder explorer window, which is the upper left hand side window.
Click the Open Workorder in Nesting dropdown button, as in the previous tutorials. Click Yes to save.
Now that we have our workorder ready, we realize it is similar to our workorder in the second tutorial, which is still saved in PrimeCut.
12Click the Nest Reuse Button ![]() .
.
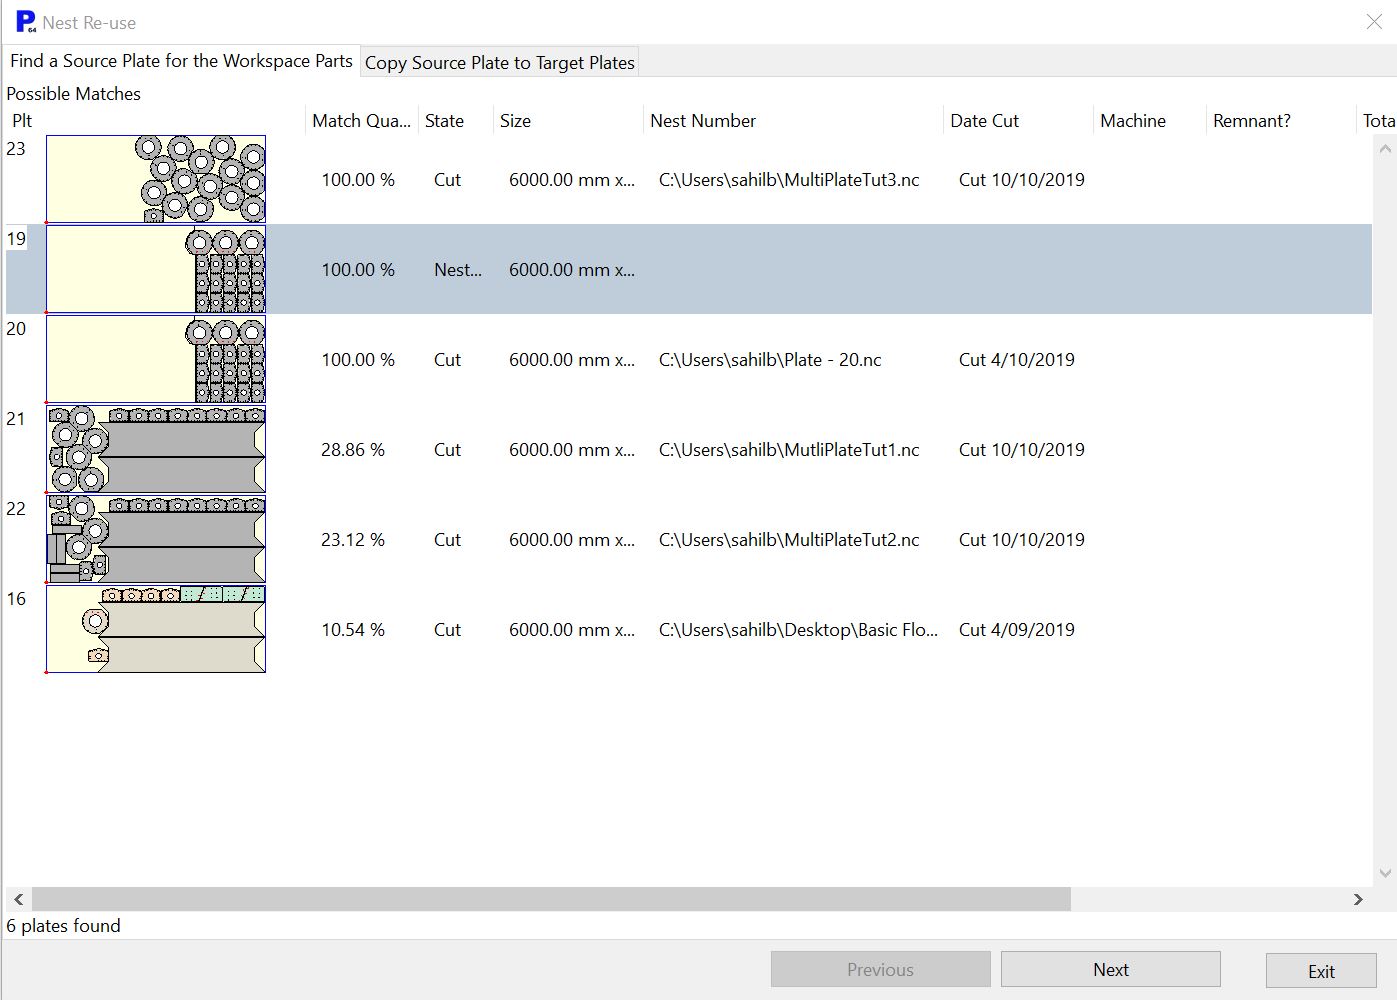
13Click on the previous nest in the list that looks like this:
and Click Next. Loading of nests may take a few seconds.
PrimeCut tries to sort the nests by match quality for the parts we have uploaded into our workspace.
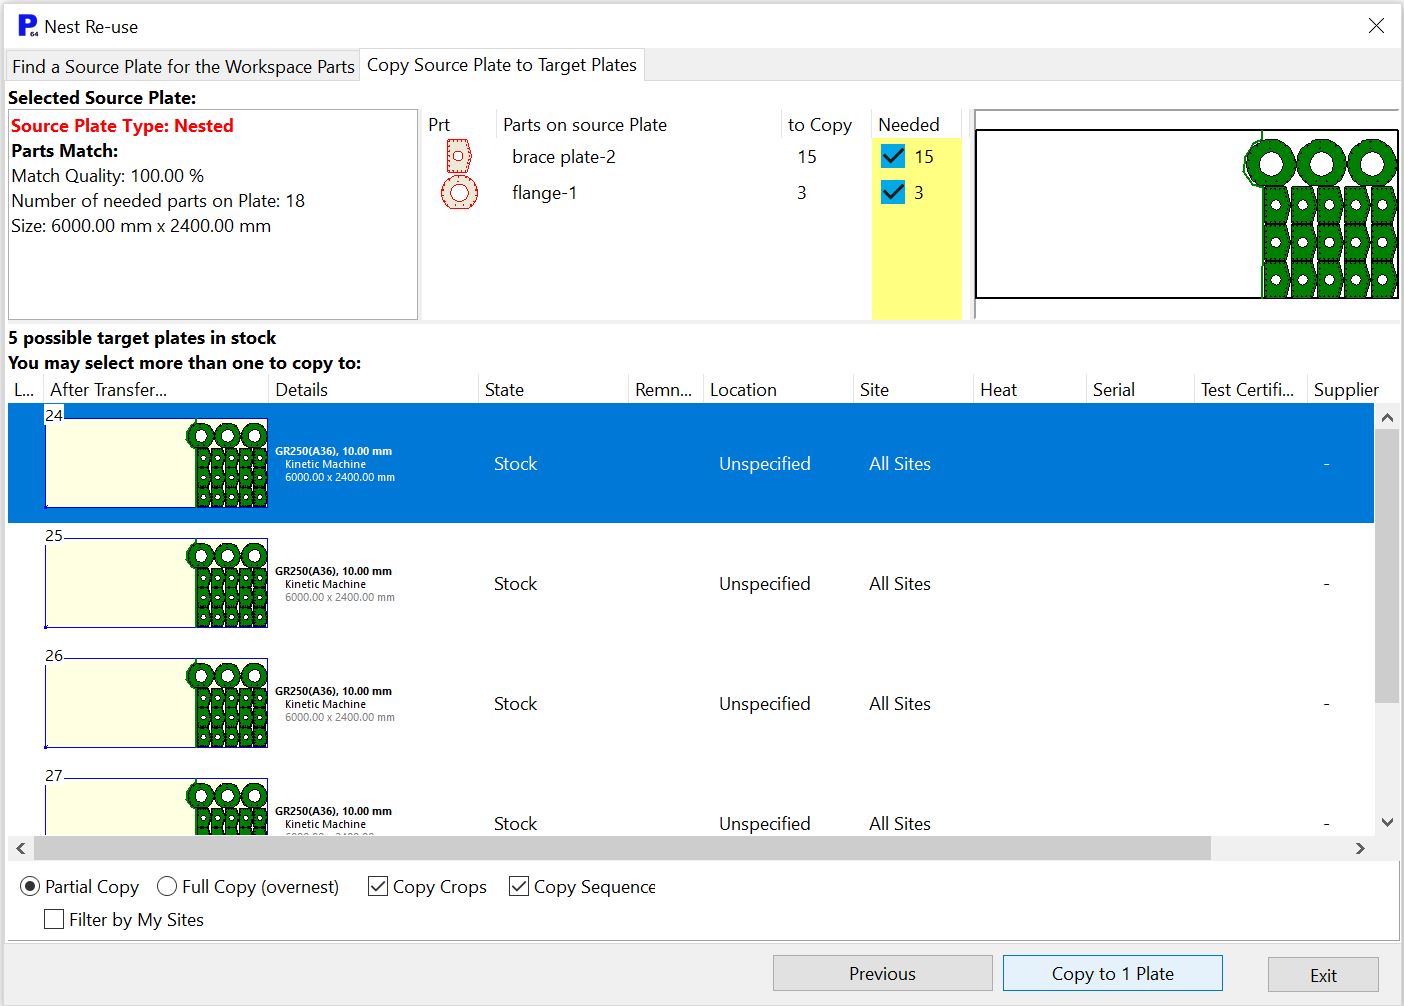
14Select the first plate in the list of plates, (which should be blank except for the nest we are copying in green), and select Copy to 1 plate. Click Ok when it says the nest has successfully been copied.
15Double-click on our plate in the plates explorer window on the left.
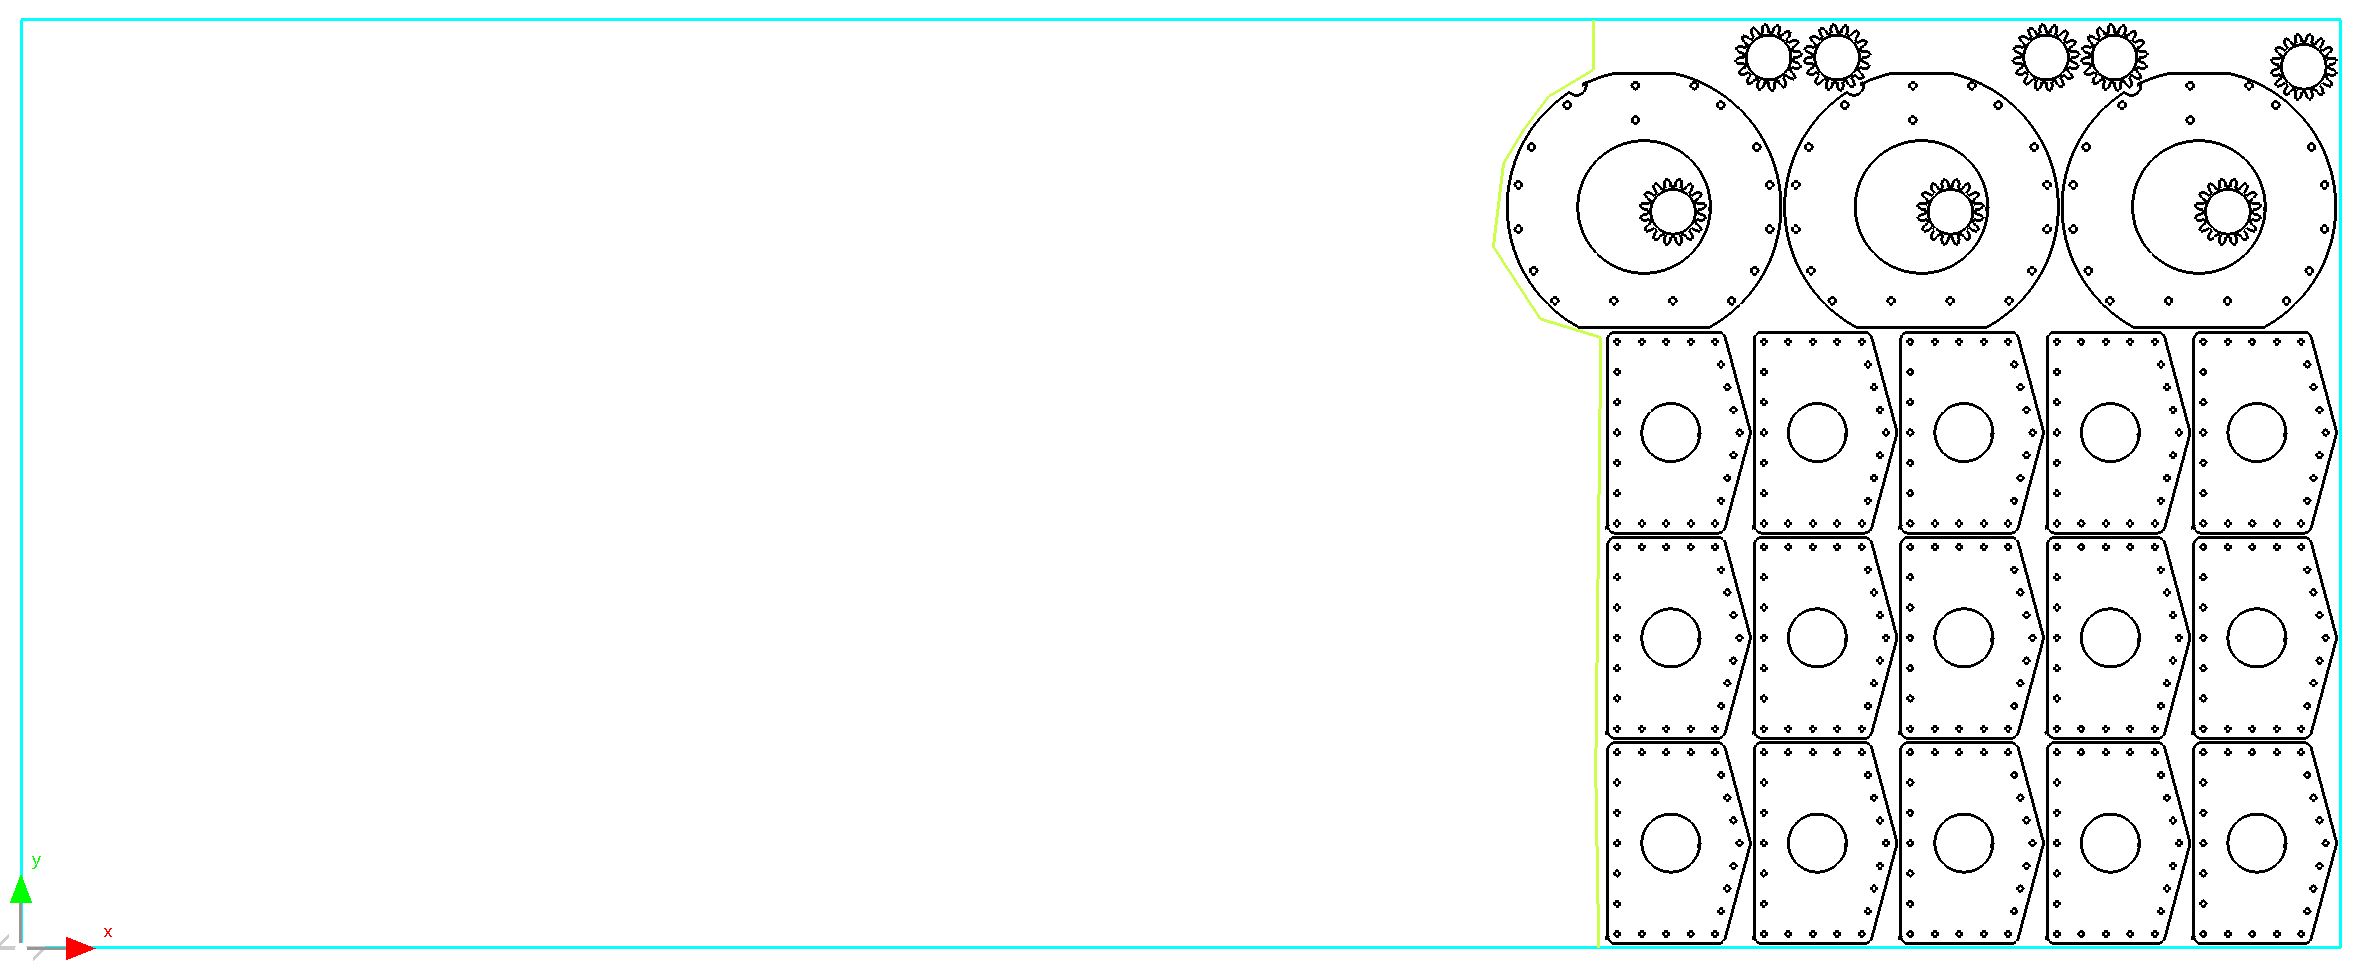
16Click Nest All ![]() to nest the 8 spurgears into the holes in our nest. Click OK. The plate should look like this.
to nest the 8 spurgears into the holes in our nest. Click OK. The plate should look like this.
17Click the Processing tab at the top of the screen.
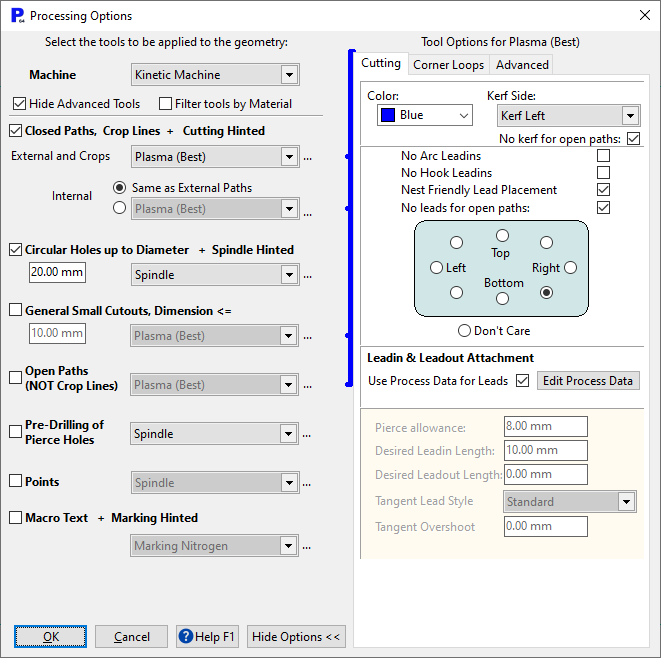
18Click Process, to process the spurgear geometry on the plate. When the dialog pops up, check it matches the one shown below and Click OK.
19Click the Schedule button ![]() on the middle of the left hand toolbar. On the dialog box that opens, tick the "Ask for Filename" box and Click OK. Enter a filename eg. Nest Reuse, and save.
on the middle of the left hand toolbar. On the dialog box that opens, tick the "Ask for Filename" box and Click OK. Enter a filename eg. Nest Reuse, and save.
20Home and save.
21Click the Reconciliation mode.
22double-click on our plate in the list to open it.
23Enter a 6 digit Heat and Serial number, eg 246873 and 976342 and Click Reconcile.
24Home.
25Click on the Workorders mode.
26Click the Show to Dispatch button.
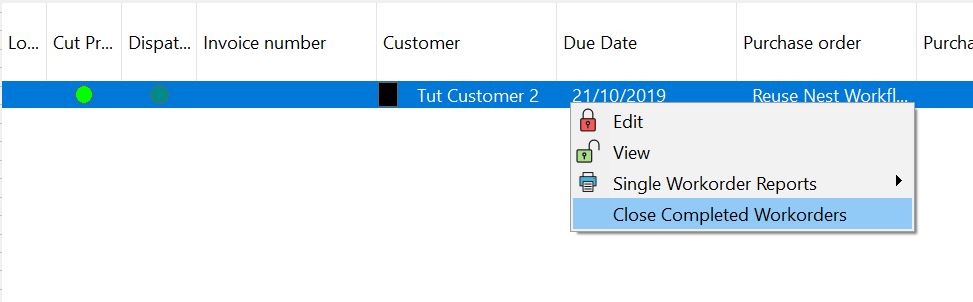
27Click on our work order in the list, right-click on it again and Click Close Completed Workorders from the dropdown list.
28Home.