In this tutorial we will
▪Process a part independently of a plate
▪Import a solid STEP file
▪Create a plate on the fly/as we need it
▪Nest and process the plate
▪Schedule, Reconcile the plate, Close the workorder.
This tutorial shows how to process parts before they are nested, and how to import a solid STEP file. It also shows how to create a plate on the fly in the Nesting Mode.
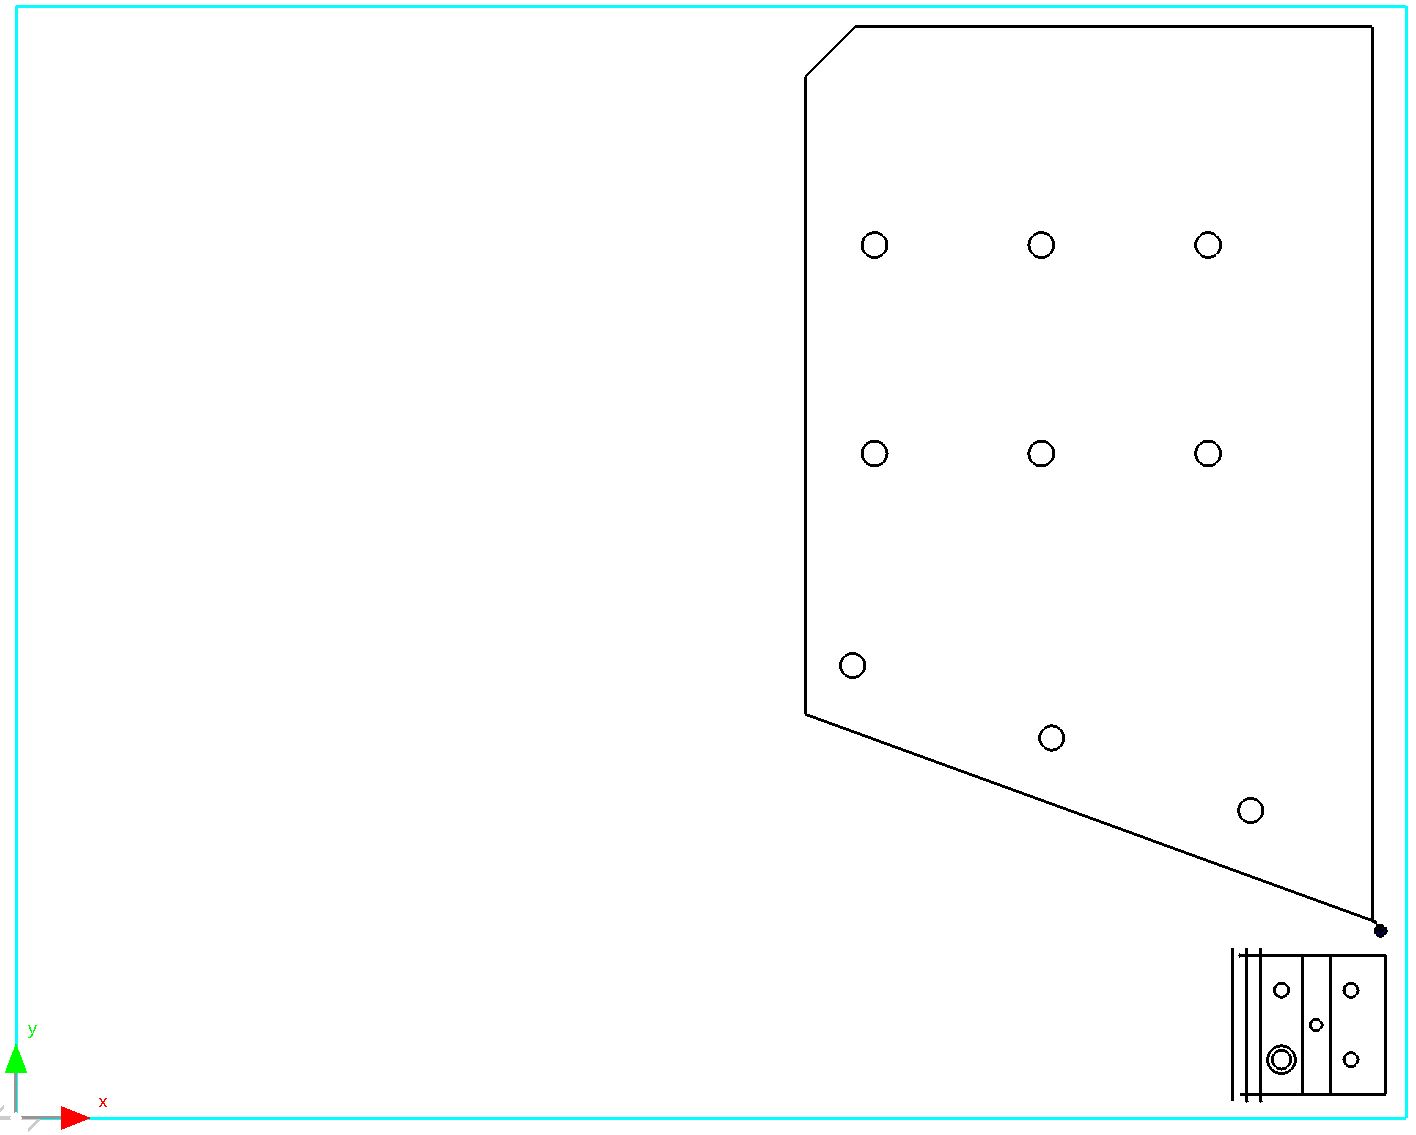
We want to process a part that exists in the database, and import a solid STEP file into our workorder, which comes with its own processing.
1From the start screen click on the workorders mode.
2Click on the New Workorder button in the top left hand corner of the screen.
3In the Customer field at the top of the screen, use the dropdown arrow to choose Tut Customer 1. In the purchase order field enter: 'Part Processing Workflow'.
4Click on the Open Part button ![]() on the tool bar on the mid left hand side of the screen.
on the tool bar on the mid left hand side of the screen.
In the Part Selection window that opens, type in the top left field 'brace plate-1'. Ensure that the dropdown box reads All Customers and All Revisions Press ENTER or Click Refresh. The part database will now be searched for parts with the name brace plate-1. If you cannot find the part it will need to be imported as shown in the Creating a Workorder tutorial.
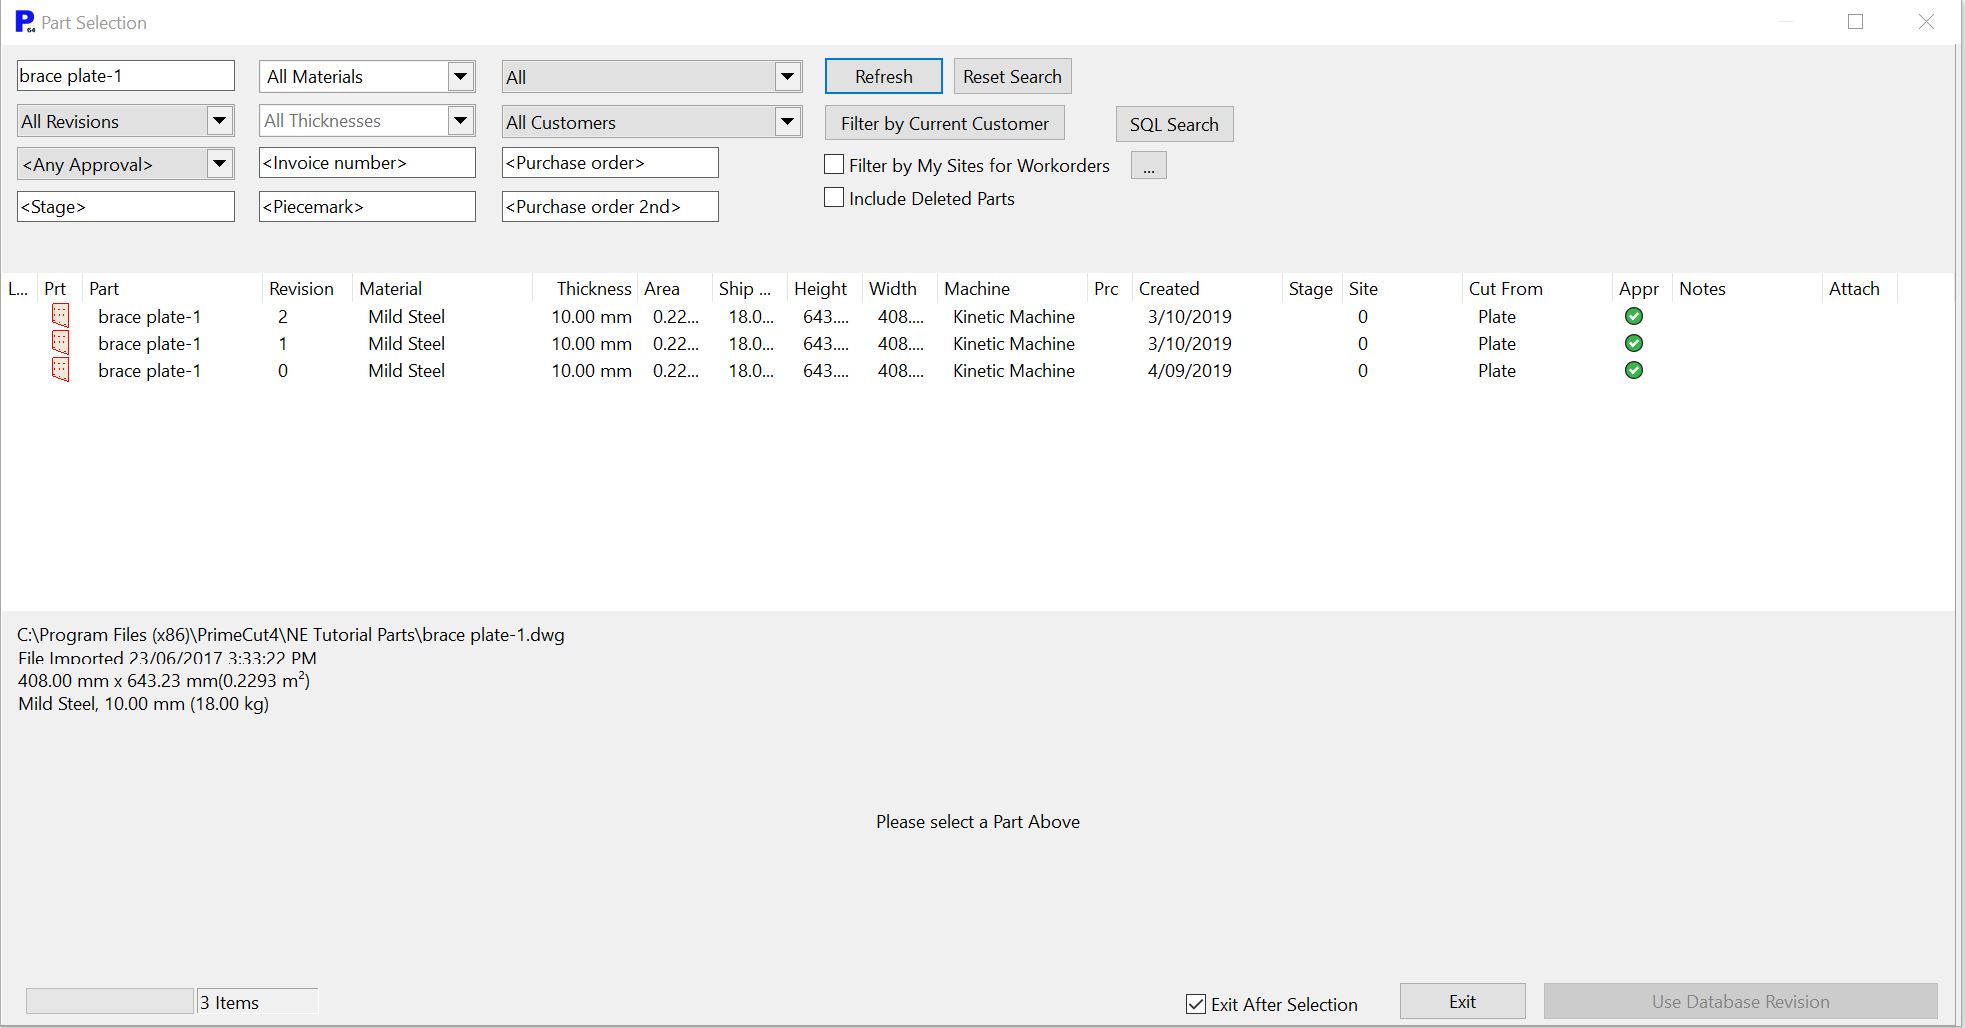
5Click on the brace plate-1 revision 0 part in the list and Click Use Database Revision.
6Click on OK in window that pops up and Exit.
7Double-click on our part in the parts area (which is the lower window on the left hand side).
If the Show Properties window isn't showing in the bottom left panel of the screen then do the following 2 steps.
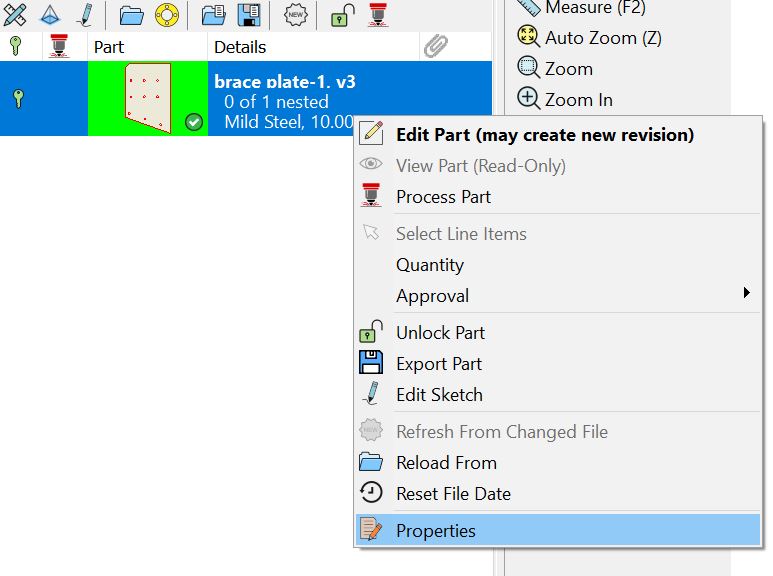
1.Right-click on our part in the parts area and Click Properties from the drop down box.
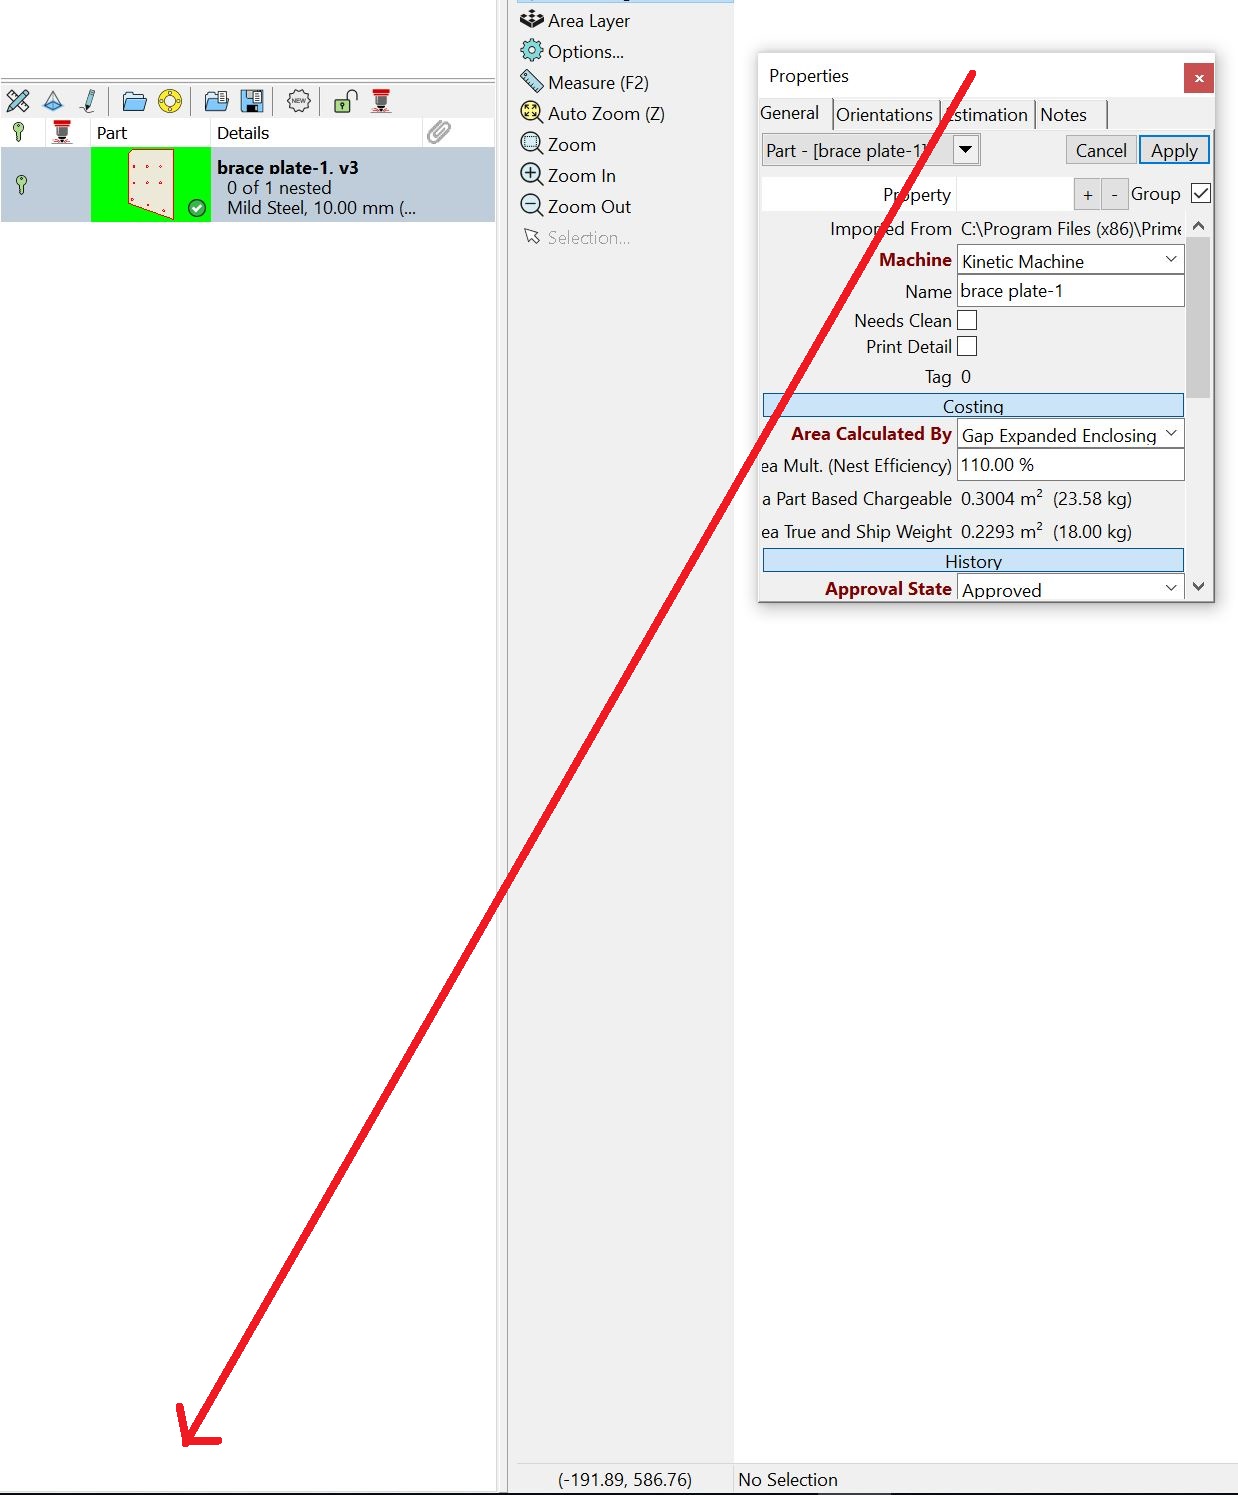
If a free untethered window appears, (if not then skip the next step)
2.Drag the box to the bottom left hand corner until a grey line appears to indicate it will be placed in the left hand column of windows.
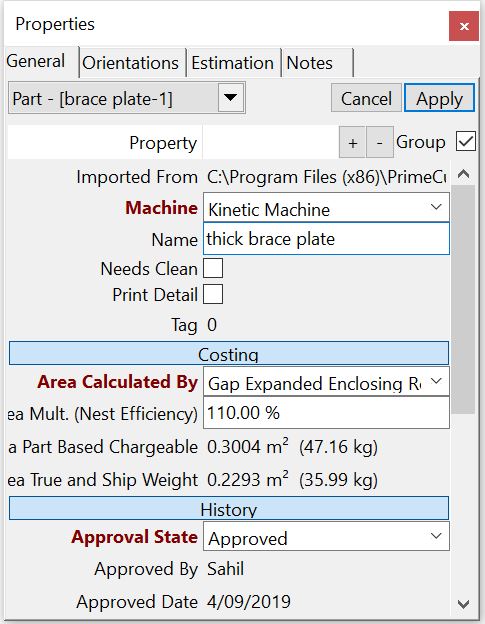
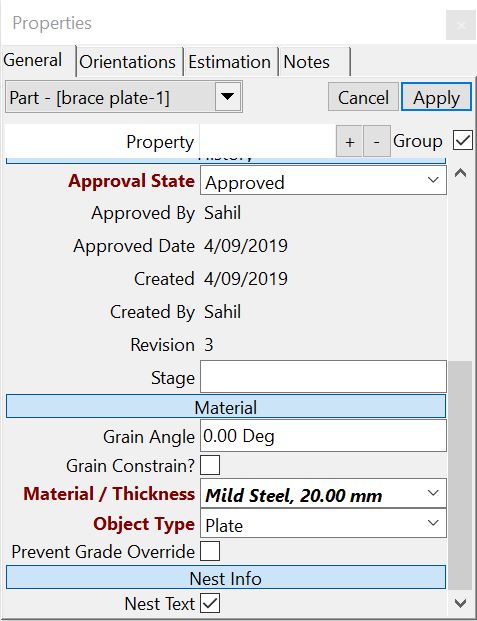
8Under Name, change the name of the part to 'thick brace plate'. Under the Material/Thickness category, change to Mild Steel, 20.00mm. Click Apply.
We now want to process this part independently of the plate processing step.
9Click on the processing tab at the top of the screen.
10Click Process All ![]()
We want to make the holes drilled only halfway into the part.
11Under the field Circular Holes up to Diameter to the right hand side there is a ... button ![]() . Click on this button. A panel should open on the right hand side of the processing dialog box.
. Click on this button. A panel should open on the right hand side of the processing dialog box.
12Under the Initial Depth field change it from 0.0 to 10.00 mm. Click OK.
Initial Depth is the depth from the top surface the spindle will drill. 0.0 is a special number, and is assigned to mean the drill goes all the way through.
You can rotate around the part to view the hole depth by pressing ALT and right clicking. Press Z to get back to normal.
13Click Save All ![]() .
.
14Click Import Part ![]() on the tool bar on the mid left hand side of the screen.
on the tool bar on the mid left hand side of the screen.
15Change the Files of type field to be STEP(*.stp,*step)
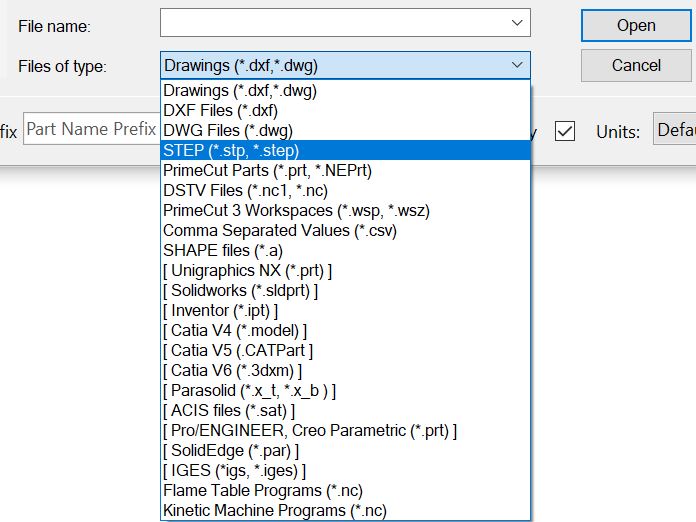
16Click on the DrillingStep1.STEP file in the NE Tutorial Parts folder and Click Open.
Click on the Indicate top face button and then select one of the top surfaces of this part.
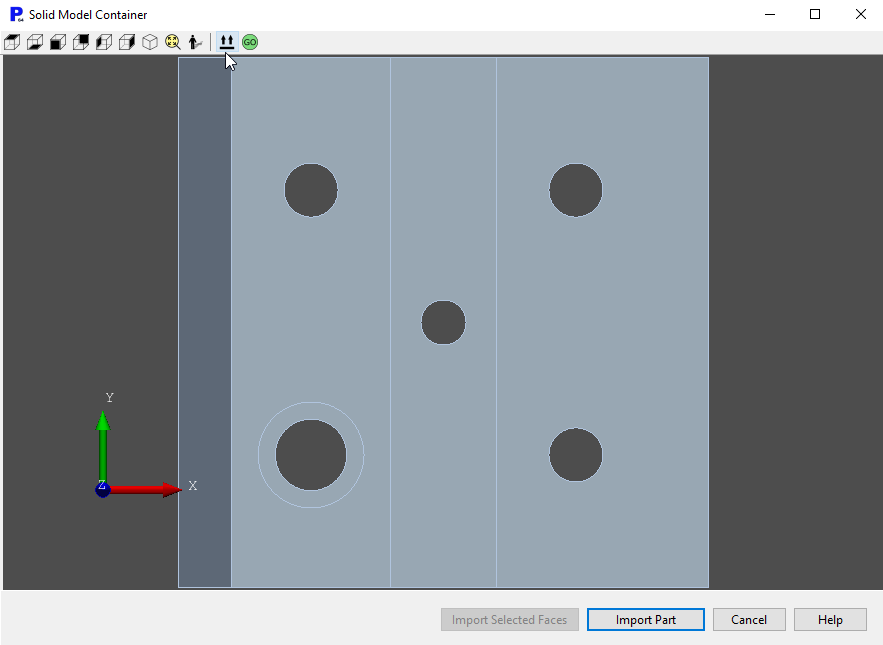
Click Import Part in the bottom right hand corner of the box that opens.
17Under Material select Mild Steel. Ensure that the Thickness field is 20.00mm - it should be by default, since the STEP file is 20.00mm- Click OK.
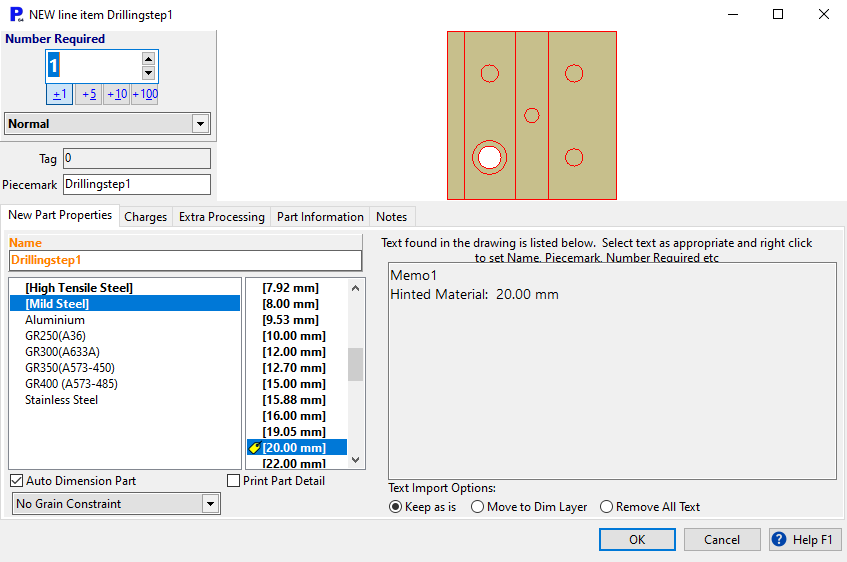
18Double Click on the Drillingstep1 part in the parts list on the left of the screen.
19Click on the Shapes tab at the top of the screen to view the shape.
20Press ALT and right click to rotate the view of the part.
21Click on the Processing tab at the top of the screen.
22Click on Process All ![]() .
.
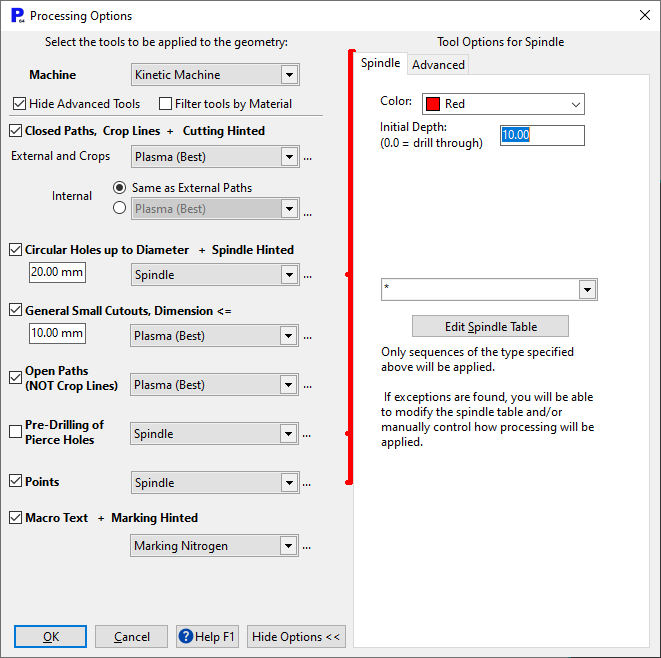
23Press the ... button to the right of Circular Holes up to Diameter and change settings to match the picture shown.
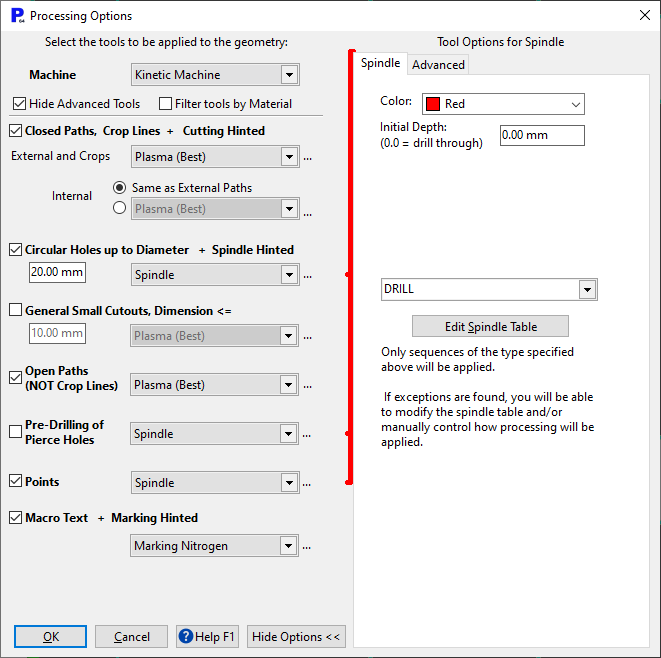
24For the spindle's tool options ![]() , select the DRILL tool from the dropdown on the right as shown above.
, select the DRILL tool from the dropdown on the right as shown above.
25Under the Closed Paths and Open Paths fields, it should have chosen a Plasma Bevel tool. If not, select this. Click OK.
26If the spindle processor window appears, Click OK.
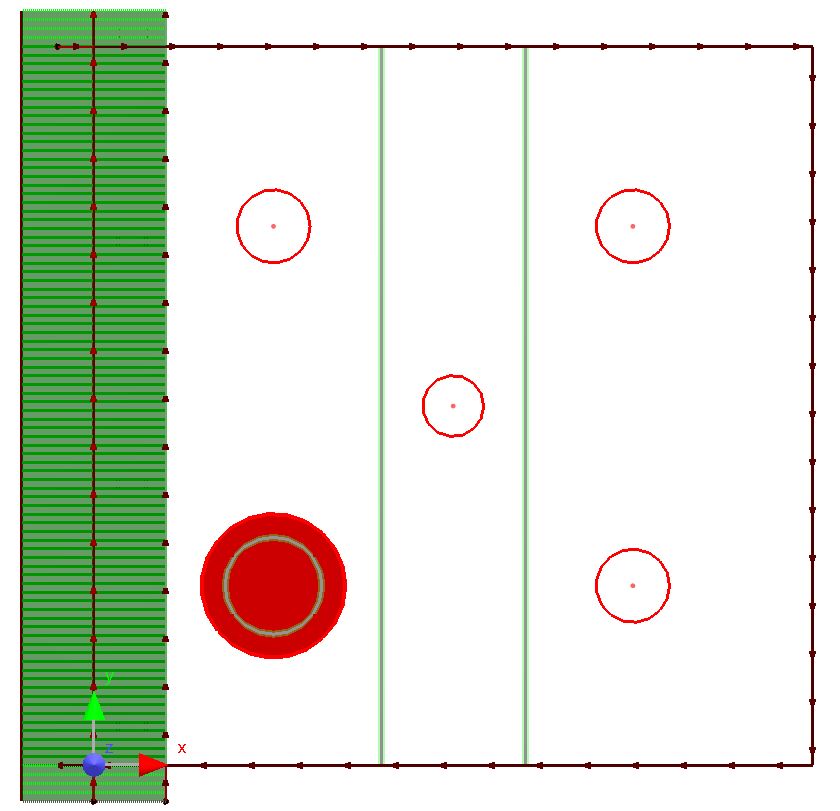
As you can see by the arrows, the external paths have been processed but not the two internal paths. This is because they need to be a special depth.
27Once again press ALT and right-click to rotate the view of the part processing.
28Right-click on our workorder in the workorder explorer window in the top left of the screen and Click Open Workorder in Nesting.
We have no plates in our database that are 20mm thick, so we will create a plate on the fly in the nesting mode.
29Click on the Open Plate ![]() button in the top left hand corner.
button in the top left hand corner.
30Click on the New Plate ![]() button on the toolbar on the right.
button on the toolbar on the right.
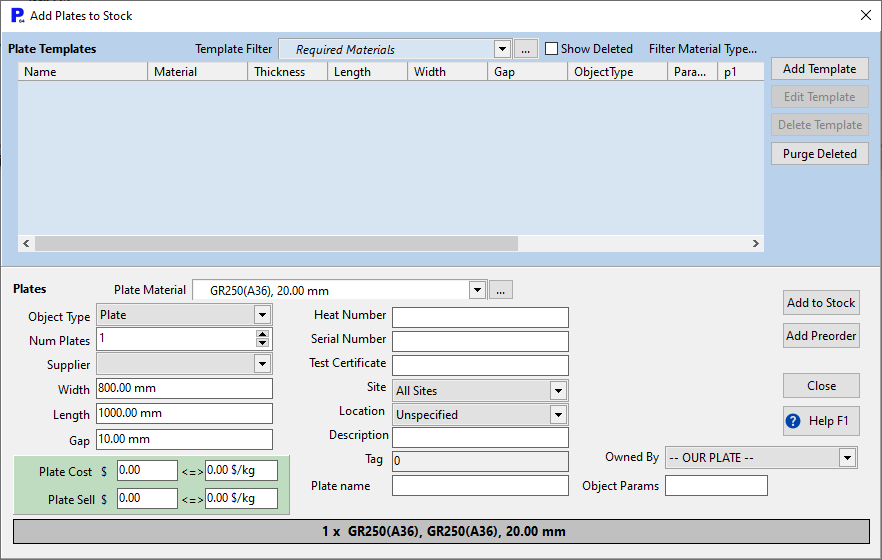
31Under Plate Material click on GR250 (A36), 20.00mm. Other parameters are irrelevant. Click Add to Stock and then click Close
The plate should automatically have been added to our workspace (should be visible in the plates explorer on the left).
32Double-click on our plate in the plates explorer to open it up for nesting.
33Drag and drop the parts in our workspace onto the plate, using bumpnesting from the Sequencing and Creating a Cropped Plate Remnant tutorial.
34Click the Processing tab at the top of the screen.
Note that the part's processing is already there, because we have processed the parts already.
We will now follow through with scheduling, reconciling and closing the completed workorder as it is best practice.
35Click the Schedule button ![]() on the left hand toolbar. Press Schedule.
on the left hand toolbar. Press Schedule.
36Check the Ask for Filenames checkbox. Save as STEP file tutorial.nc
37Home, and save when asked.
38Open the Reconciliation mode.
39Double-Click on our plate in the plates list in the main window, and enter a random heat and serial number for it. Click Reconcile in the bottom right corner of the screen. Click Yes to confirm.
40Home.
41Click on the workorders mode.
42Click on the Show to Dispatch button.
43Right-click on our workorder in the main window. Click Close Completed Workorder from the pop-up menu.
44Home.