This tutorial depends on you having done the Nesting Onto Multiple Plates tutorial and not having done this tutorial since, because it removes plates which that tutorial nested.
This tutorial's purpose is to demonstrate how to take a nested plate out of the schedule to change its nest, and add another workorder of parts to the plate, as well as demonstrate the effect of having multiple workorders on the plate's job report.
In this tutorial we will
▪Create a new workorder with part
▪Unschedule a nested plate
▪Nest the second workorder's parts on that plate.
▪Reschedule the plate
▪Page through the job report
1Open the Workorders mode.
2Click on New Workorder button ![]() .
.
3Select Tut Customer 2 from the list of customers in the Customer field.
4Click on the grey New 2D shape button ![]() on the far left of the screen.
on the far left of the screen.
5Select the rectangle at the top of the library. Click Next. Enter a Width of 800mm and a Height of 240mm. Click Finish.
6Under Number Required enter 5, under Name enter 'rectangle-1'. Under Material choose Mild Steel. Under Thickness choose 10.0 mm. Click OK.
7Click Save All ![]() .
.
8Close the mode by clicking home![]() .
.
The following section requires that you have just previously done the Nesting Onto Multiple Plates tutorial. If this is your second attempt at doing this tutorial, make sure you go back and do that tutorial again.
9Click to open the Planning mode.
10By clicking on the segments of the machine's schedule and viewing the selected plate in the window below, select the segment in the timeline corresponding to the plate with a little extra space to the left, as shown.
(previews of the plate are shown in the bottom left hand corner.)
11Click the Unschedule button ![]() on the left hand side towards the bottom of the screen.
on the left hand side towards the bottom of the screen.
12Click Unschedule and Edit Plate to open up the plate in the nesting mode.
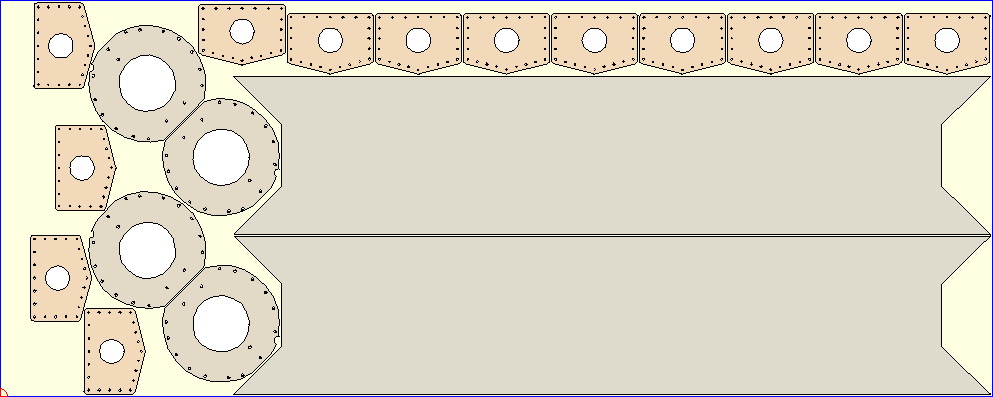
13Drag to select the three brace plate-2 parts one flange-1 part in the bottom left corner as shown. Press the DELETE key to unnest them.

14Click on the Open Part button ![]() in the top left corner of the screen.
in the top left corner of the screen.
15Set search criterion Customer field to Tut Customer 2, and Click Refresh.
16Double-click the rectangle-1 part from the list of available parts to add it to our workspace.
17Double-click our plate in the plates explorer window on the left hand side to open up the plate for nest editing.
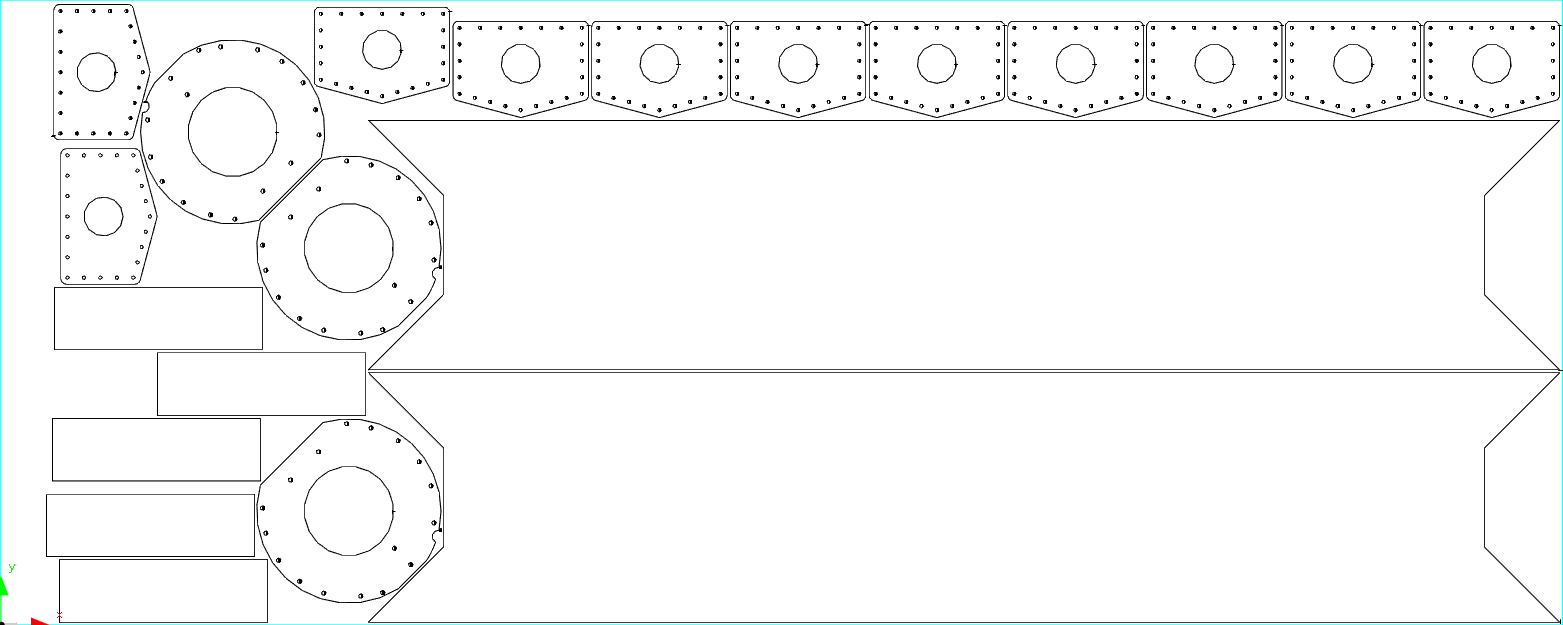
18Click Nest All. The plate should look as follows.
19Click on the Processing tab at the top of the screen.
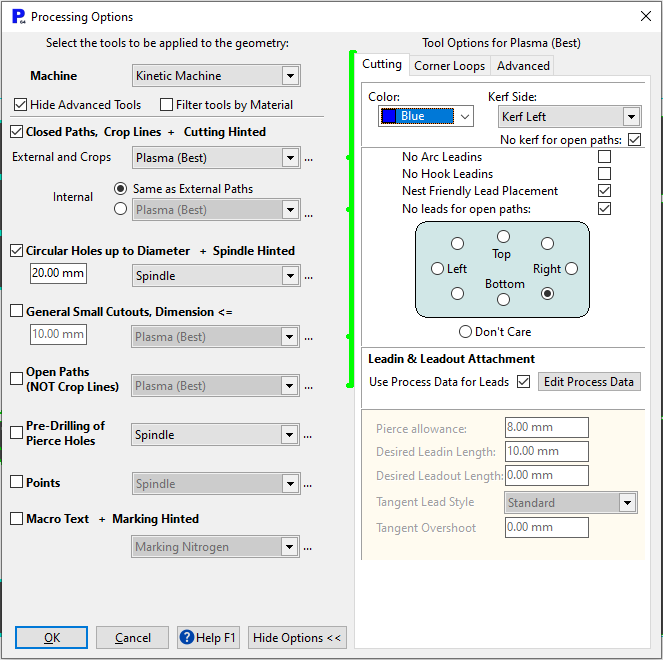
20Click Process Geometry ![]() . Change the settings so the dialog box is as shown and Click OK.
. Change the settings so the dialog box is as shown and Click OK.
21Click the Schedule tab at the top of the screen
22Click the Schedule button on the Editor sidebar. On the scheduling dialog that appears, uncheck Print Job Report, and Click Schedule.
We now want to see the effect of having multiple workorders on the same plate has on our job report.
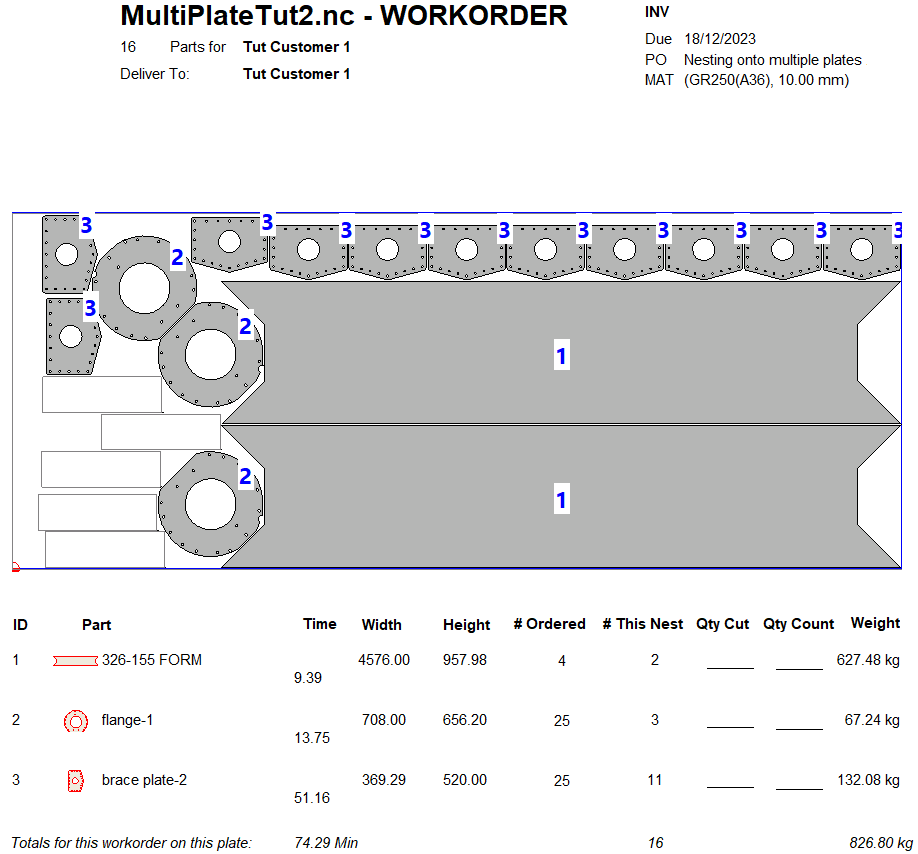
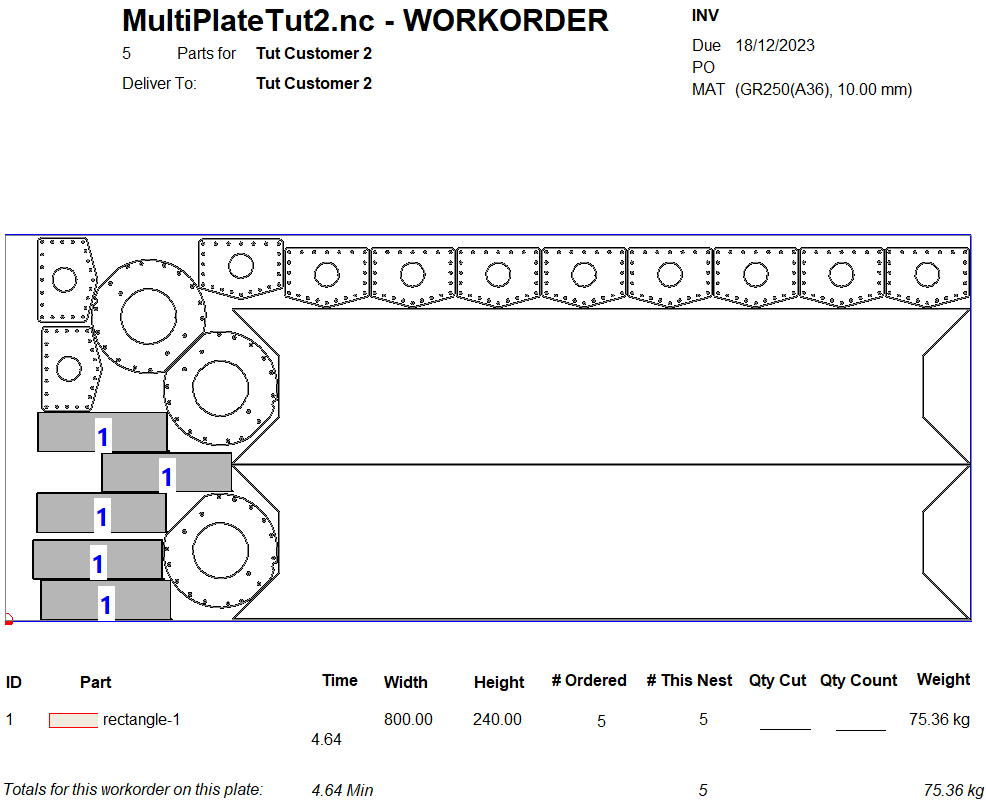
23Click the Workorder Summary with Times tab at the top of the job report.
This is the job summary for the original workorder nested on this plate.
24Click the Next button ![]() above the job summary.
above the job summary.
Here is the report for the parts on the plate that belong to the second workorder.
25Click Home. Save when prompted
Now we need to clean up the database.
26Click the Reconciliation mode.
27Our plates should appear at the top of the list of plates to be reconciled, in the main window. Double-click on the first plate to open it.
28Enter a Heat number and Serial number. For the sake of realism choose a random 6 digit number to do this, but any unique text will work.
29Click Reconcile and click Yes to confirm.
30Click refresh to update the list of plates. If shown a blank window click on the select plate icon![]() .
.
31Repeat Steps 27 to 30 until all three of our plates are reconciled, and the list is empty.
32Click Home.
33Open the workorders mode.
34Click on the ![]() button to show the completed workorders, and Click Refresh.
button to show the completed workorders, and Click Refresh.
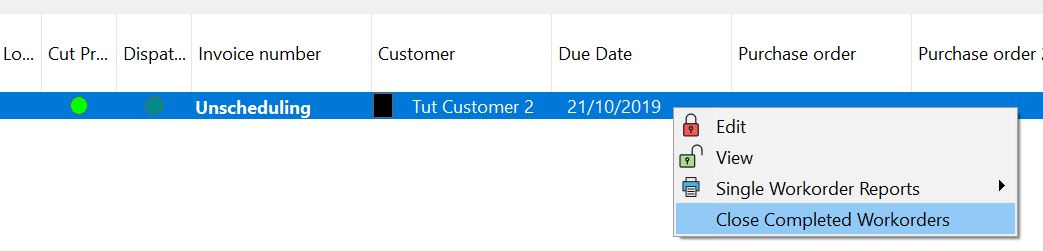
35Press CTRL + A to select all showing completed workorders, or select them one by one. Right-Click on one of them, and Click Close Completed Workorders.
36Save All and Home.
In conclusion - we have added our first library shape part, we have unscheduled a plate, and unnested some of its parts, and renested them with the new part, as well as view the pooled workorder report.