Note this tutorial depends on you having done the Basic Worklow Tutorial, as it copies its workorder.
In this tutorial we will:
▪Copy line items from a previous workorder into a new workorder
▪Use autonest to nest onto multiple plates at once
▪Process multiple plates at once
▪Schedule multiple plates at once.
▪Briefly explore the Planning mode
To set up a workorder large enough to nest nicely onto multiple plates, we are going to copy specific line items from an existing workorder, and change their quantity parameters.
1Click on the Workorders mode on the start screen.
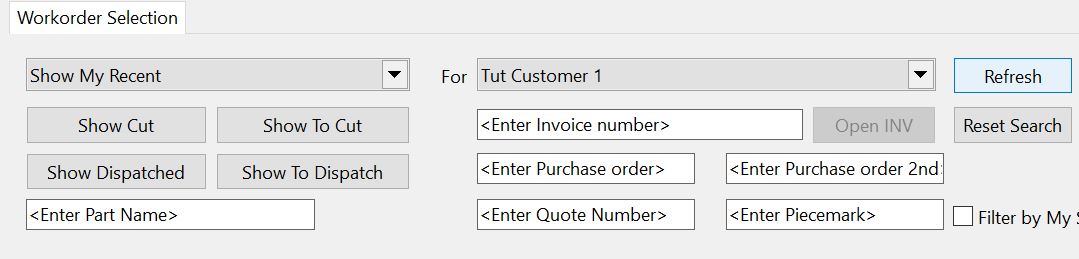
2Set the search fields at the top of the screen to be showing My Recent workorders, and under Customer select Tut Customer 1. Click Refresh.
3Double-click on our Basic Flow Tutorial workorder, (the workorder should have 12 parts in the parts field), or select and Click Edit.
4Hold down CTRL and left Click the 326-155 FORM, brace plate-2 and flange-1 parts from the parts selector window in the middle of the screen. Press CTRL + C to copy, or Right-click and select Copy Line Item from the drop down list.
5Click the new workorder button ![]() in the top left hand corner of the screen.
in the top left hand corner of the screen.
Click in the parts selector window in the middle of the screen and press CTRL + V to paste the line items. Alternatively, you can right-click and Click paste (reference same part). There should be an on-screen alternative to every keyboard shortcut.
NOTE paste (reference new copy of part) is used when the ordered part is similar to but not identical to the source part, and when a different part name is needed.
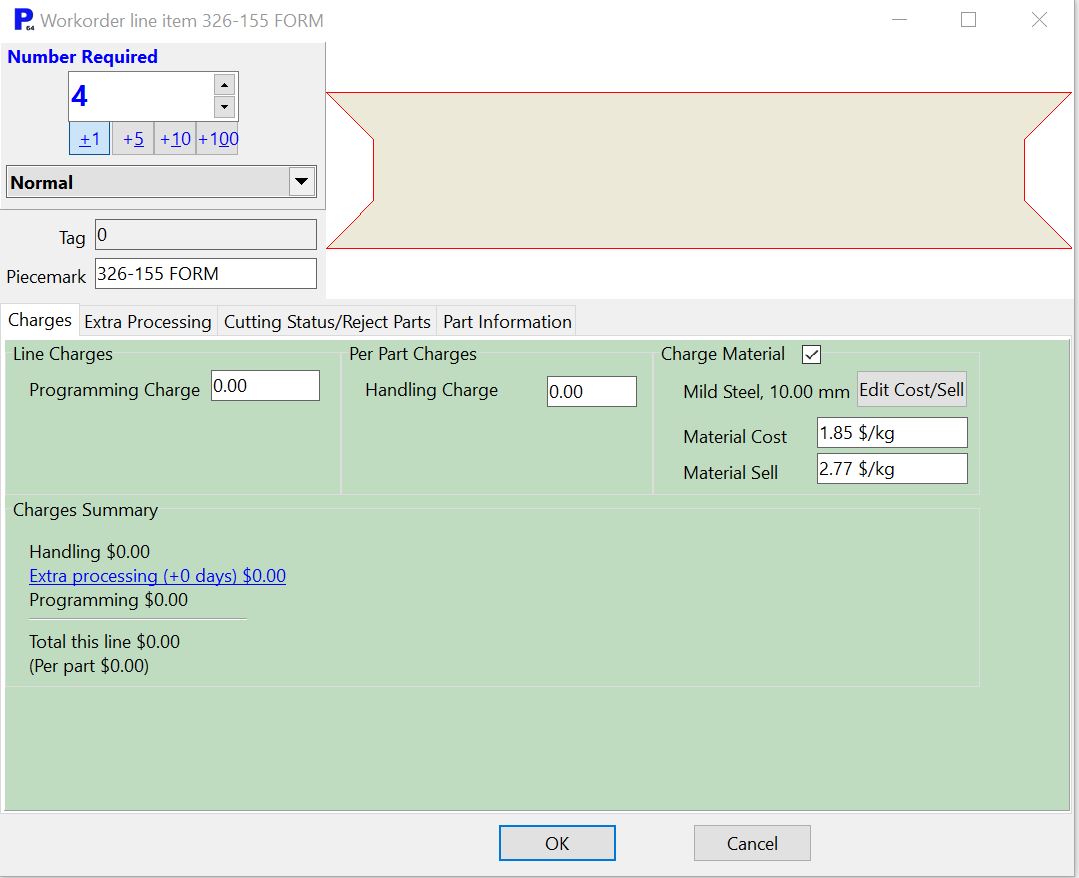
Double-click on the line items in the workorder editor. A dialog box should appear. In the Number Required field, in the top left corner of the dialog box, enter 4 for the 326-155 FORM and Click OK.
Similarly enter 25 parts required for each of the brace plate-2 and flange-1. Click OK.
6Set the Customer field to Tut Customer 1 and the Purchase order field to "Nesting Onto Multiple plates".
7Click Save All ![]() in the top left hand corner of the screen.
in the top left hand corner of the screen.
8As in the previous tutorials, right-Click our workorder from the workorder selector window, and select Open Workorder in Nesting. 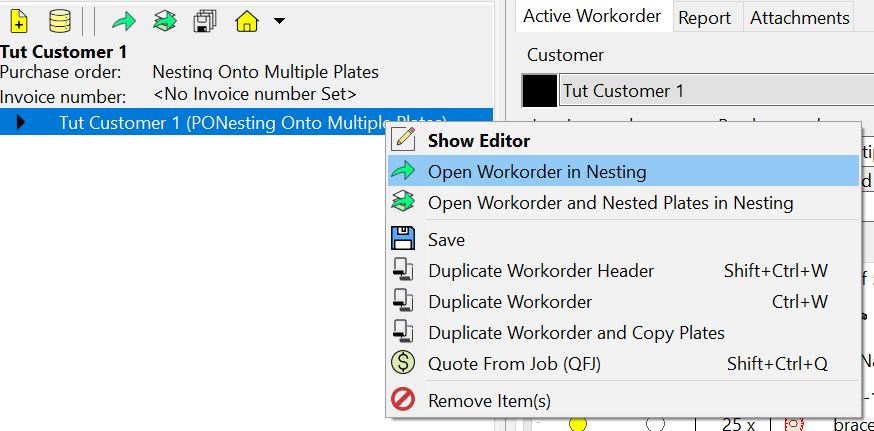
Now we are ready to nest onto multiple plates. We will open our plates list and use the automatic nester to nest our plates.
9Click the Open Plate button ![]() in the top left hand corner of the screen.
in the top left hand corner of the screen.
10Click Refresh to update the plates shown in the plates selector.
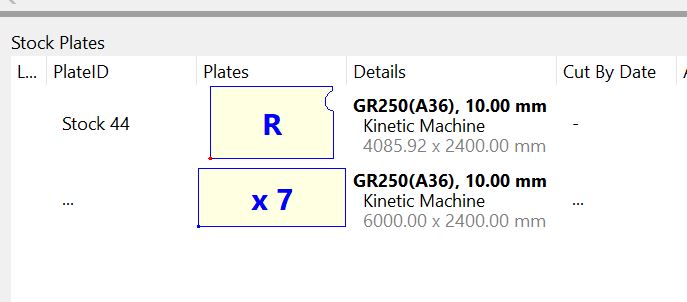
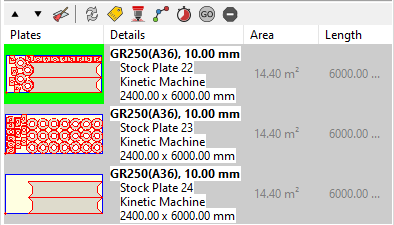
There should be the remnant plate (Shown by the R) from the previous tutorial in the list, with some whole 6x2.4m 10mm GR250(A36) plates following.
Note that this Auto Nest button is for nesting on multiple plates in stock at a time directly into the stock database. It uses plates in the order they are arranged in the plates selector. You can change this order by clicking Sort, or by using the arrow buttons next to the Sort button ![]() , with the plate to be moved selected in the selector window. It only brings plates into the workspace that it has nested parts onto.
, with the plate to be moved selected in the selector window. It only brings plates into the workspace that it has nested parts onto.
11Move the remnant plate to the bottom of the plate selector using the arrow buttons ![]() . Click the Auto Nest Button
. Click the Auto Nest Button ![]() in the bottom right corner of the screen.
in the bottom right corner of the screen.
12Hold down the CTRL key and select all the plates in the explorer window on the left.
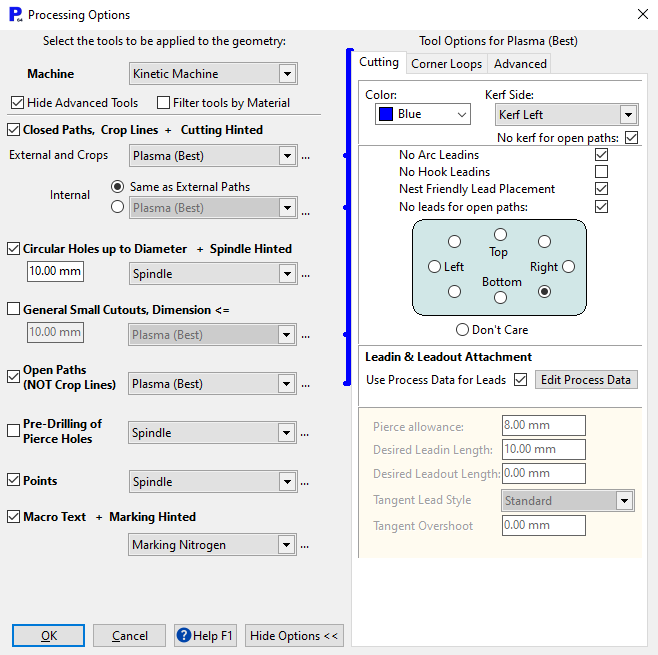
13Click the Processing button ![]() above the explorer. This button can be used to process multiple plates at a time. Select options as shown, and click OK.
above the explorer. This button can be used to process multiple plates at a time. Select options as shown, and click OK.
14Click the Schedule button ![]() above the explorer. This schedule button is used for scheduling multiple plates at once. In the dialog box that opens ensure Ask for Filenames is checked
above the explorer. This schedule button is used for scheduling multiple plates at once. In the dialog box that opens ensure Ask for Filenames is checked ![]() .
.
15Name the plate nc codes e.g. MultiPlateTut1.nc, MultiPlateTut2.nc etc. Click Save for each plate.
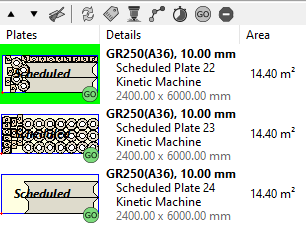
16The plates explorer window should now look like this.
17Close the mode, and save changes..
18Open the Planning mode from the start screen.
Click on one of the plates in the schedule of machine hours.
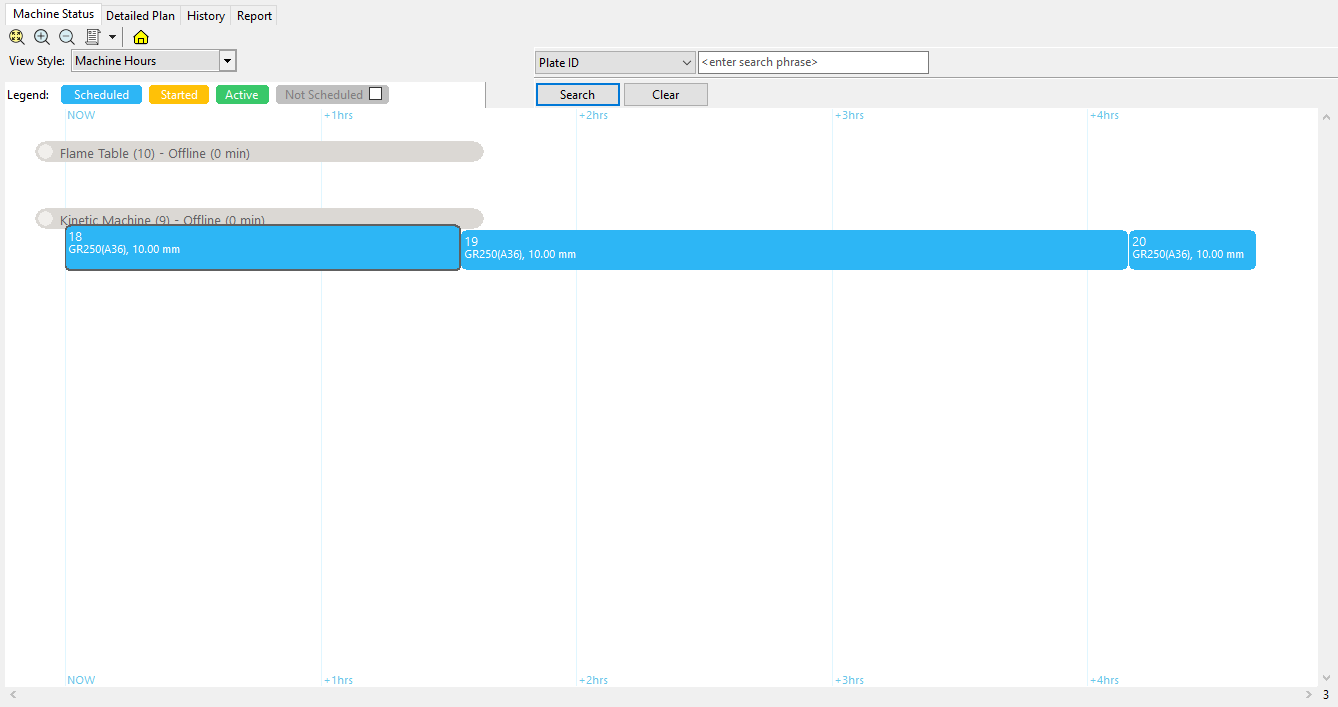
NOTE The scale across the screen shows the machine occupancy, so the length of the job bars indicates how long they are likely to occupy the machine for . This is based on the calculated program run time, plus allowances for plate loading and unloading and real world inefficiencies. Refer to the Planning Chapter in the PrimeCut NE Reference manual for more information.
Look through the information on the selected plate in the Scheduled Plate Explorer window at the bottom of the screen, by clicking on the Main, Parts, Remnants, and Tooling tabs.

19Home.
These plates in the schedule are referred to again in the next tutorial, so we won't reconcile them as having been cut yet.