This tutorial assumes the Basic Workflow Tutorial of has been completed, as it refers to and reuses its workorder.
This tutorial shows you how to:
▪Manually nest parts on a plate
▪Modify the cutting sequence
▪Create a cropped plate remnant for future use in the database
▪Schedule a plate to be processed on the machine
▪Reconcile a plate once it has been processed
▪Close a workorder once all plates have been reconciled
First we want to create a new workorder based on our workorder from the previous workorder.
1Open the Workorders mode. If you have recently completed the Basic Workflow Tutorial then the workorder we want is likely already showing in the selector due to the default 'Show My Recent' filter being set. Otherwise, in the search criterion click on the field that reads <Enter Purchase Order> and type 'Basic Workflow', to find the workorder you created in the Basic Workflow tutorial. Click Refresh. Double-click on one of the workorders that appear. (if the Basic Workflow tutorial has been done more than once, there will be more than one visible).
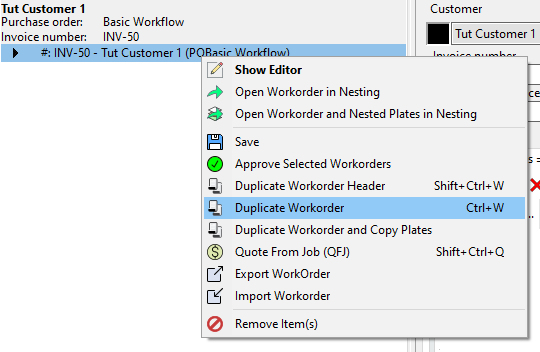
2In the workorder explorer on the left hand side, Right-click on our invoice and click Duplicate Workorder. Note that we can alternatively select Duplicate Workorder Header, which would copy the header information, such as the text in the Purchase Order field. In our case, we opt to only duplicate the workorder as we will give this PO a new name in step 6. By default this method will only increment the invoice number.
This creates a complete copy of the workorder, under a new invoice number.
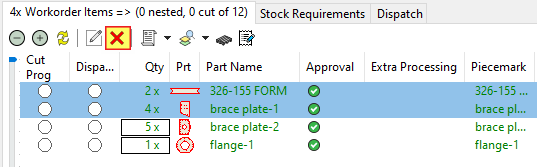
3Hold down the CTRL key and click on the 326-155 FORM and brace plate-1 parts, and Click the Delete button ![]() in the tool bar above the list of workorder items.
in the tool bar above the list of workorder items.
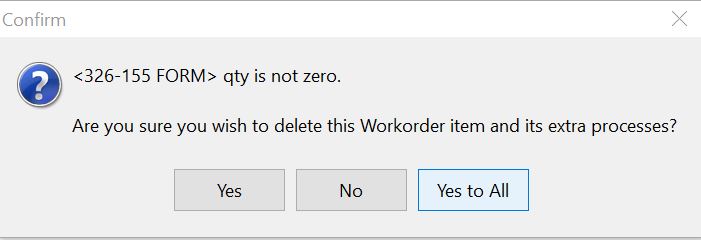
When the following box pops up, click Yes to All.
The 326-155 FORM and brace plate-1 parts will be struck out in red indicating they are marked for deletion.
4Press the save button ![]() at the top left of the screen.
at the top left of the screen.
Just two line items will remain, parts brace plate-2 and flange-1
5Double-Click on each of the remaining parts in main workorder line items window (the center window, not the parts list on the left). The following dialog should appear for each part.
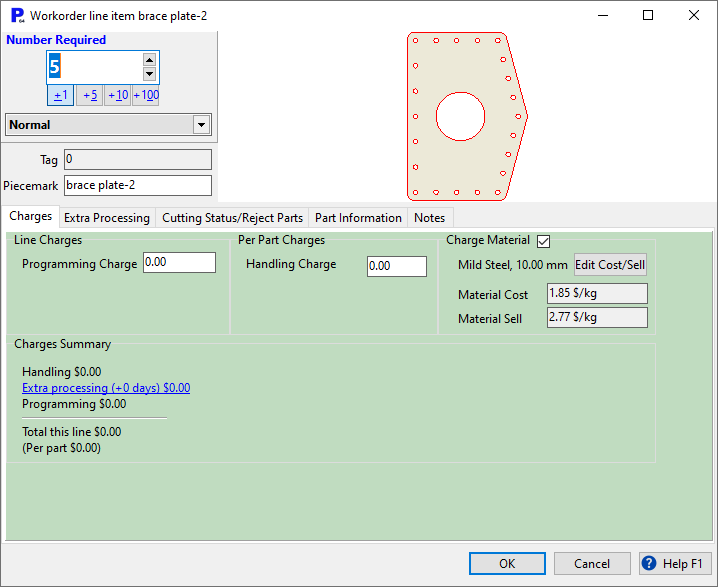
1.Set the Parts Required field to 15 for the brace plate-2. Click OK
2.Set the Parts Required field to 3 for the flange-1. Click OK
6Under the Purchase order field enter 'Remnant Workflow'
7Right-click on the workorder we are currently modifying in the upper left window and click Open Workorder in Nesting, as in the previous tutorial.
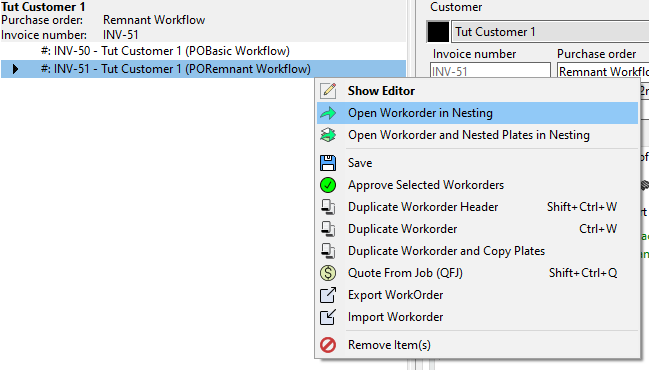
Click Yes when it asks if you would like to save.
8Click the Open Plate button, ![]() . Click Refresh at the top of the screen.
. Click Refresh at the top of the screen.
9Double-click on the 10mm thick GR250(A36) 2400mm x 6000mm plates that should be in stock to add them to our workspace.
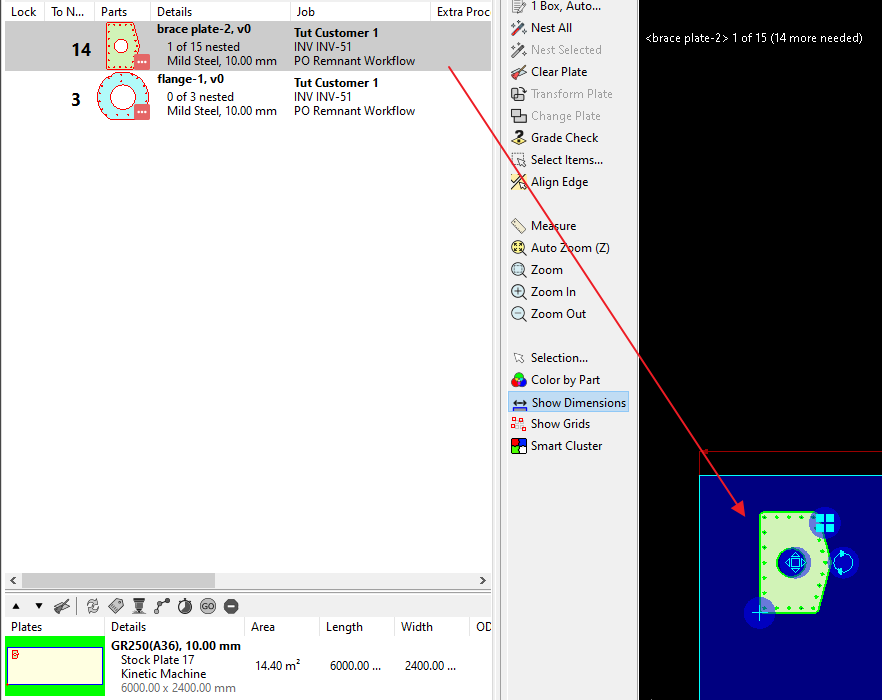
10Click and Drag the brace plate-2 part from the explorer window in the left, onto the plate in the editor window, as shown.
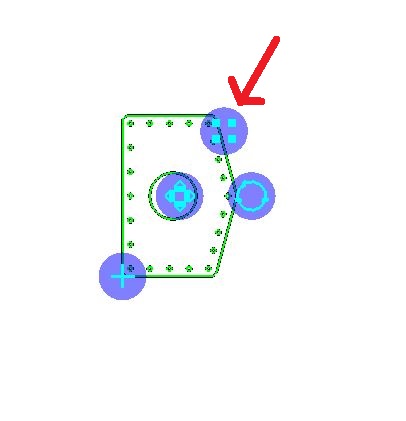
11Click and Drag the Array symbol ![]() in the top right corner of the part, to create a 3 x 5 array as shown. You may need to zoom into the array to see the array symbol more clearly. You may also find panning (hold the SHIFT key and click the right mouse button). useful.
in the top right corner of the part, to create a 3 x 5 array as shown. You may need to zoom into the array to see the array symbol more clearly. You may also find panning (hold the SHIFT key and click the right mouse button). useful.
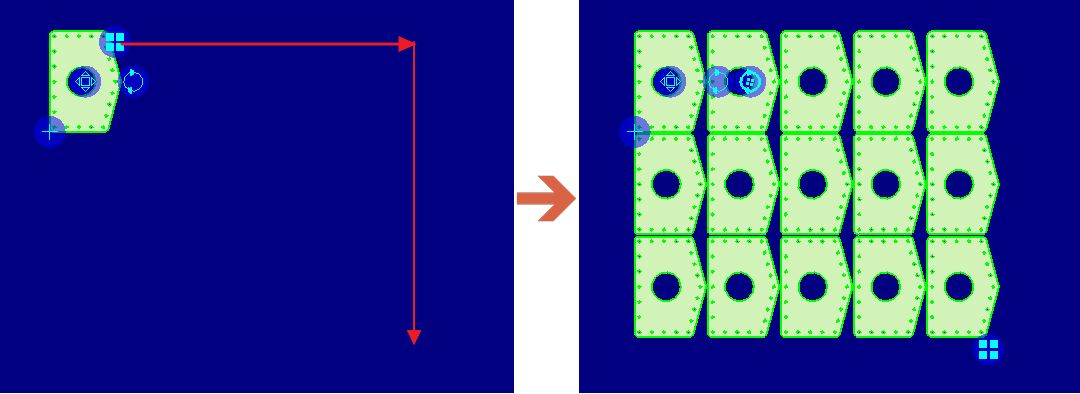
12Click to place the array.
13Click and Drag on the![]() or
or ![]() symbol to drag the array until it sits with its edges slightly overlapping with the plate edge, as shown below.
symbol to drag the array until it sits with its edges slightly overlapping with the plate edge, as shown below.
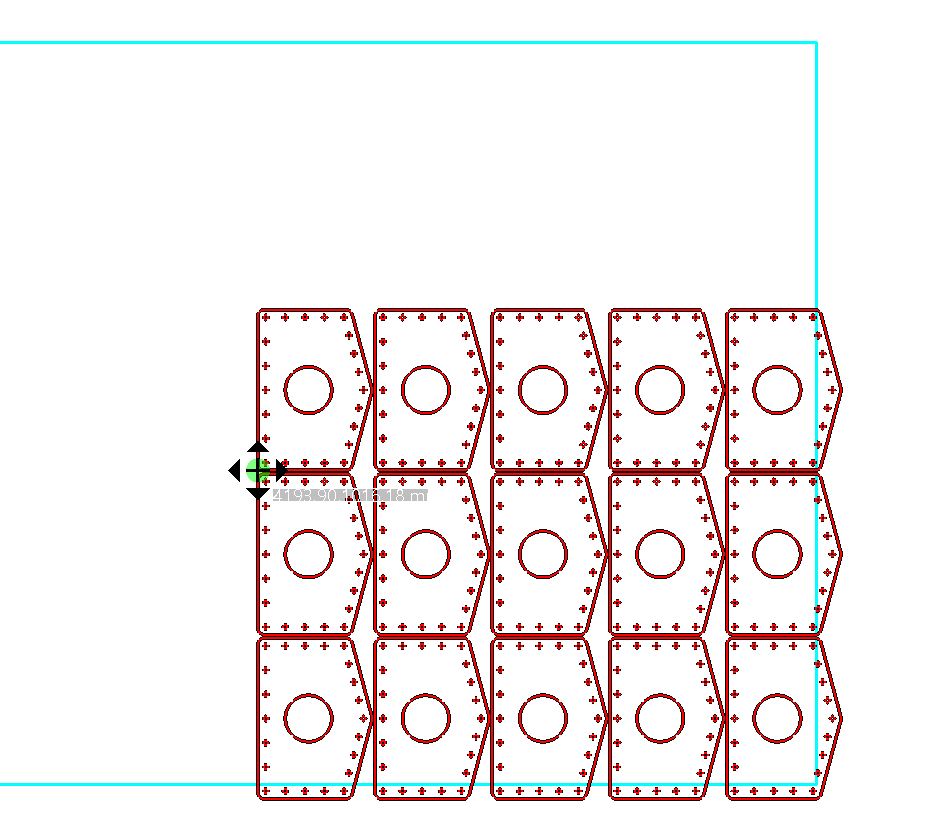
14 Release the mouse button to let the array 'bump' nest onto the plate as shown below.
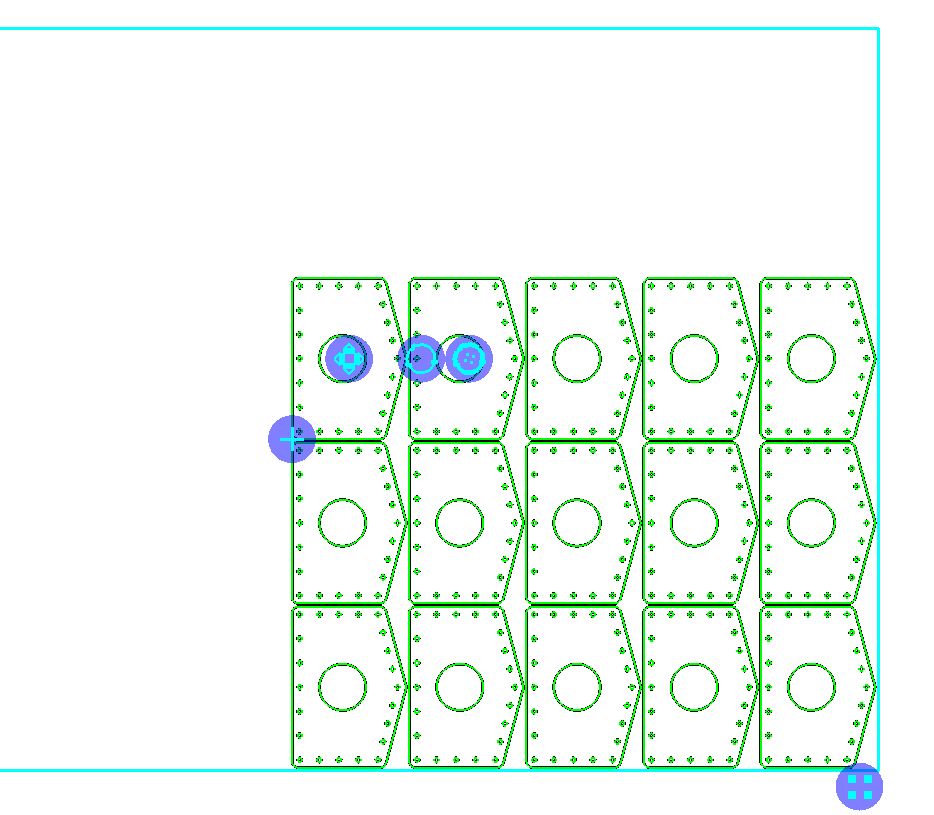
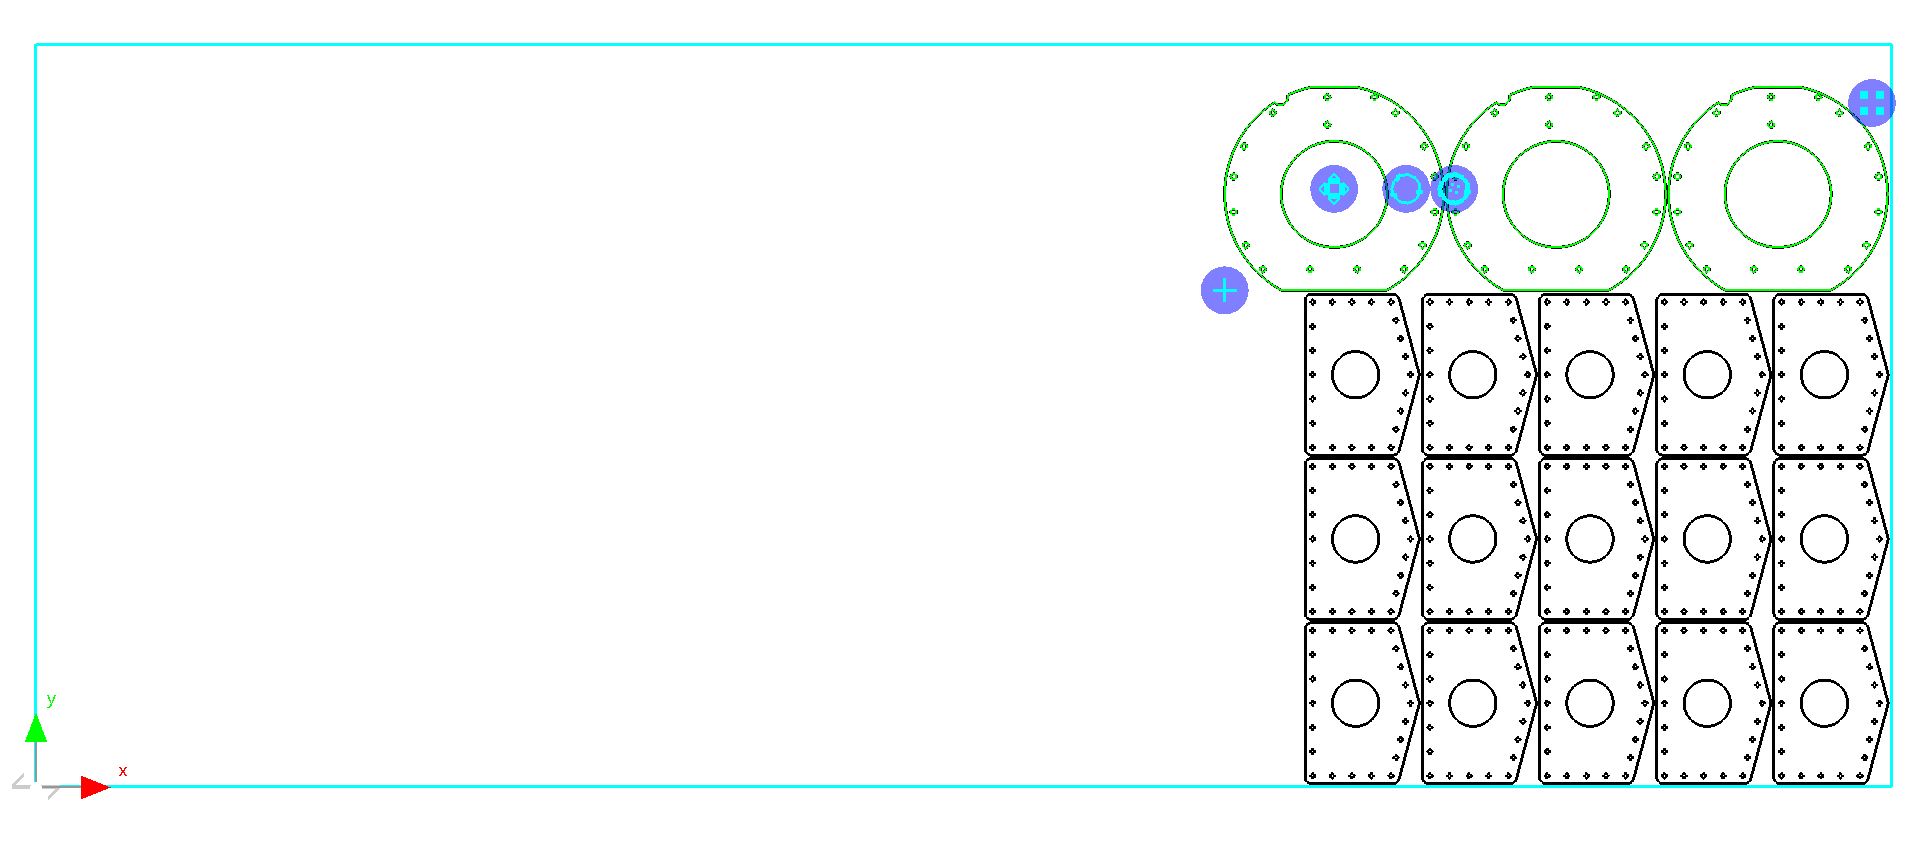
15In the same way you just created an array with the brace plate-1 part, create a 1x3 array of the flange-1 part.
16Click and Drag the flange-1 part array to slightly overlap with the first part array and edge of the plate as shown. Release to let the array be 'bump' nested on the plate.
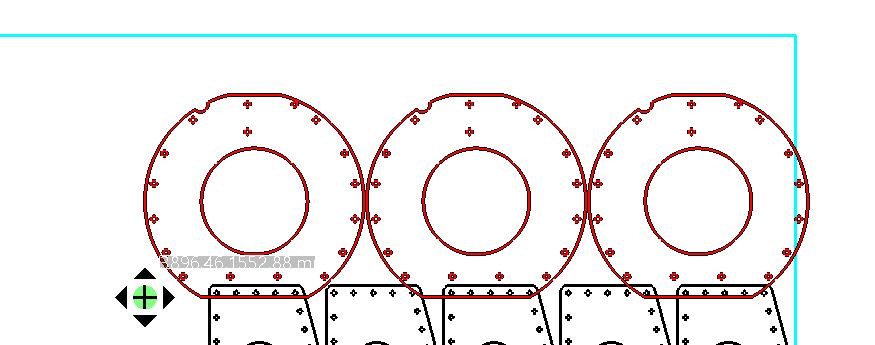
The plate should now look like this
17Click on the Processing tab at the top of the screen. Click the Process All button just beneath the tab.
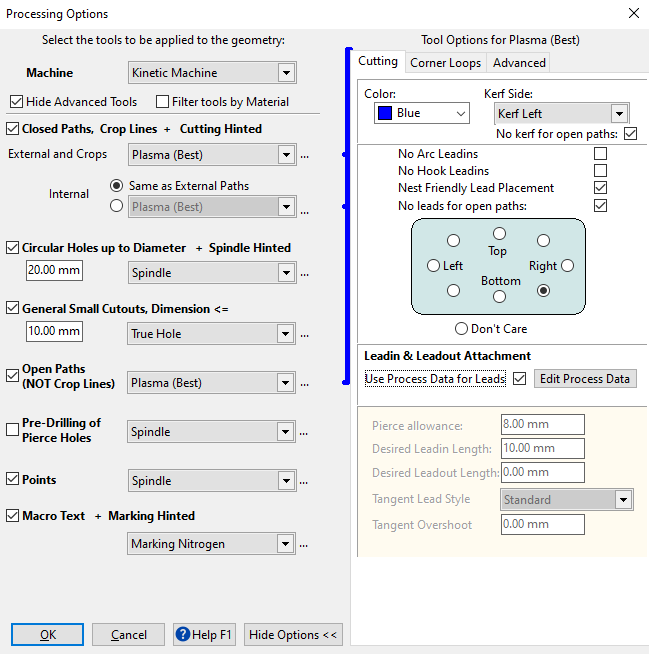
18Check that the settings matched those shown below. Hover your mouse over one of the dropdown boxes where you select cutting tools (in the in the processing options window). Notice how PrimeCut highlights in orange all of the paths affected by that setting. Click OK.
The colors in your PrimeCut may differ - this is purely aesthetic and can be ignored.
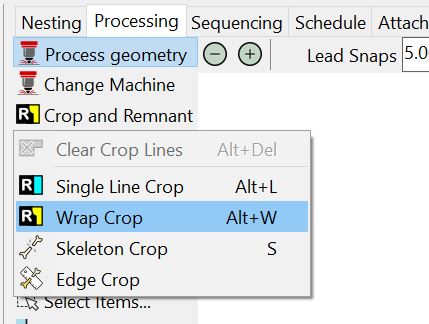
19Click on Crop and Remnant. Select Wrap Crop from the dropdown list.
20Drag the slider and observe the number of corners on the crop change.
Drag to select about 12 corners (subtle differences in nest might make 12 not be available) and click OK.
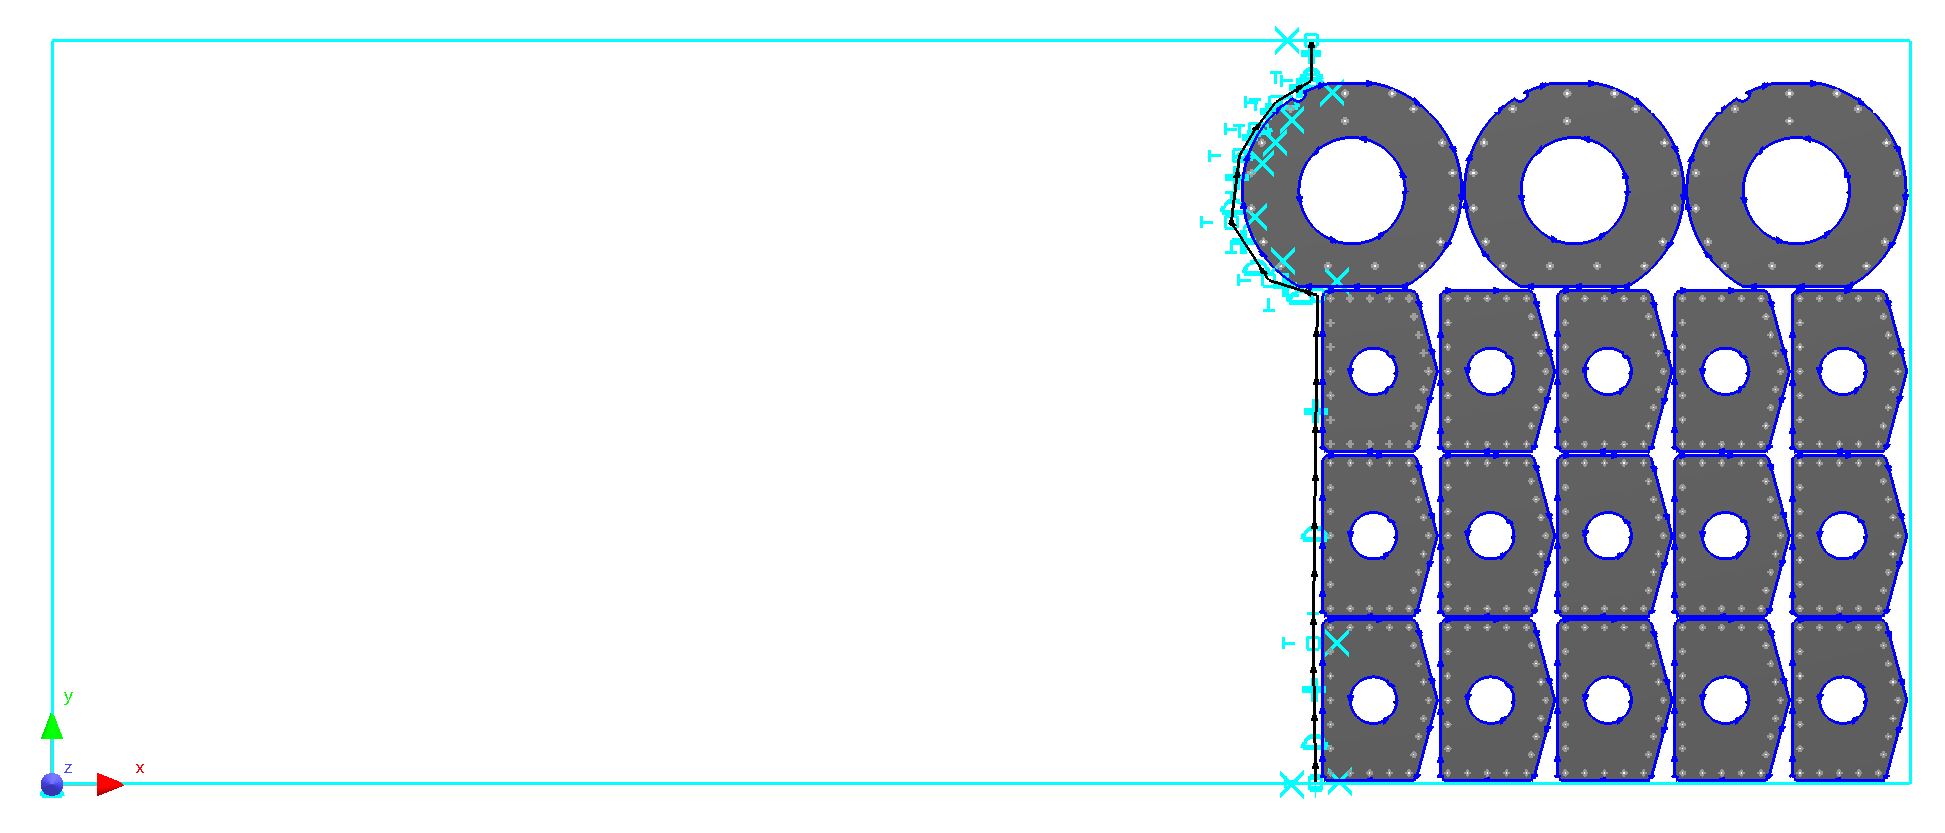
The handles you can click on to manually edit the crop line are shown below.
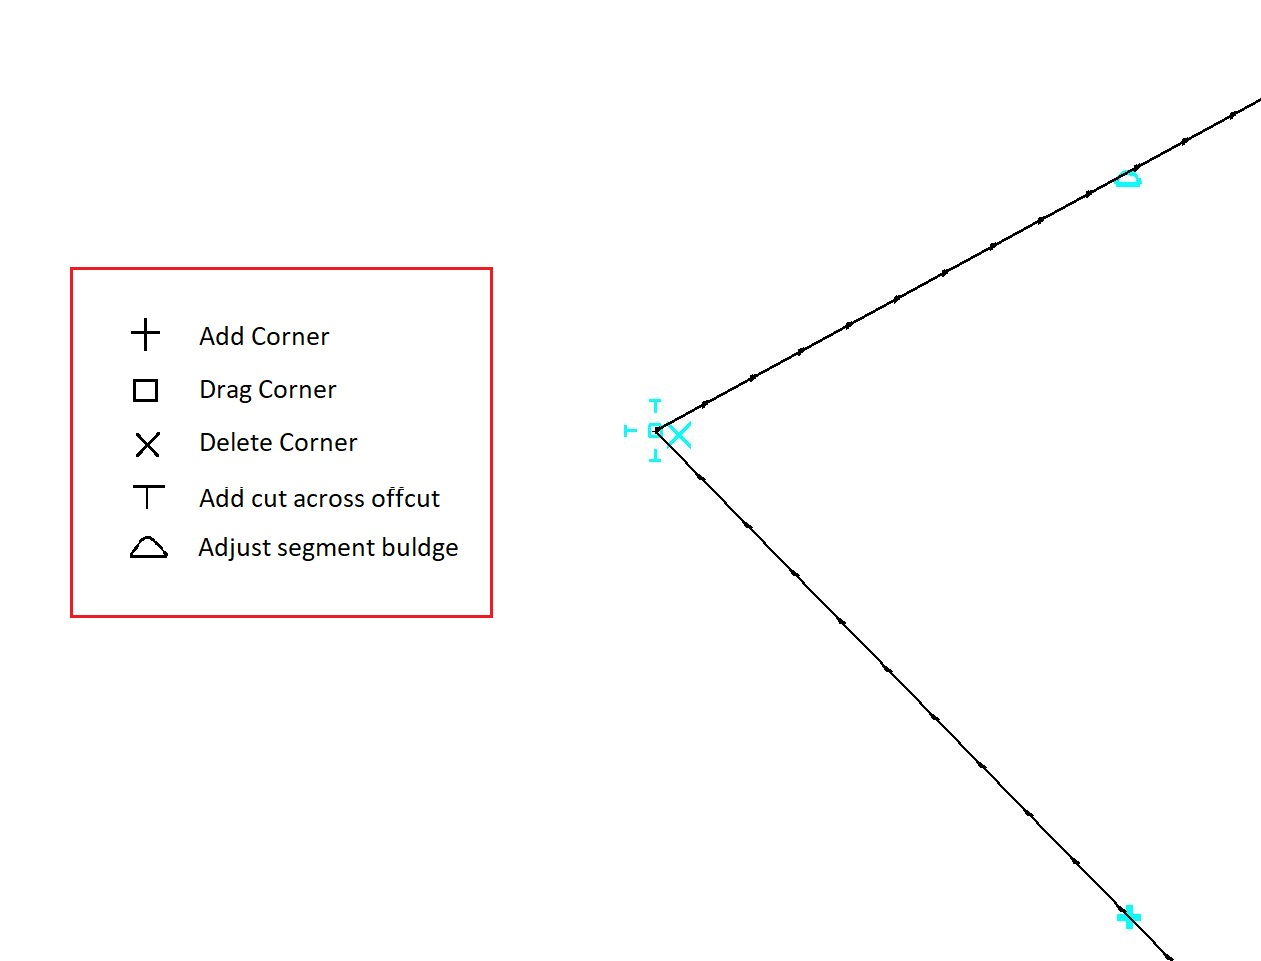
The T handle automatically extends the crop line in the direction it is facing to the end of the plate.
By default, PrimeCut will not allow us to place crop lines that intersect with the nested parts. We can override this by pressing the ALT key when dragging corners.
Moving points with the SHIFT key pressed will allow for orthogonal dragging of adjacent horizontal or vertical handles.
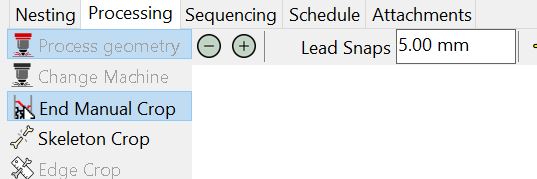
21 Click End Manual Crop, which is located where the old Crop and Remnant button was.
22Click Process. Click OK to process the crop with the same settings as before, using Plasma (Best) for the crop.
23Click the Sequencing Tab at the top of the screen.
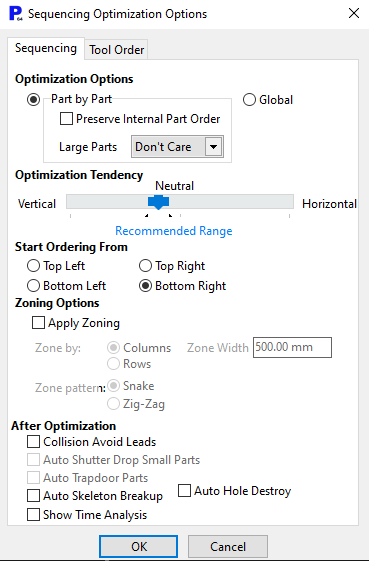
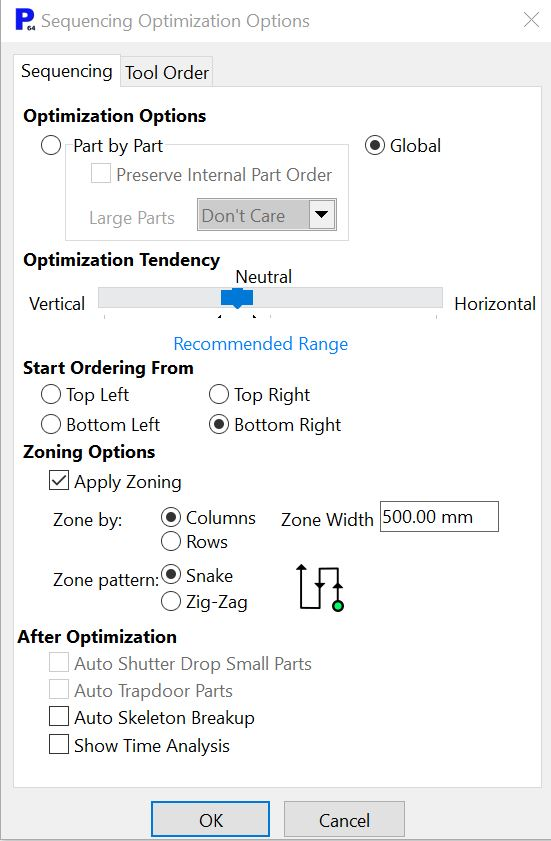
24Click Optimize Order. The following dialog box should appear. Check it matches the dialog shown. Click OK.
25Click on the Analysis button ![]() on the sidebar.
on the sidebar.
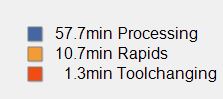
From the Analysis window that opens the following results (or very similar) should be visible.
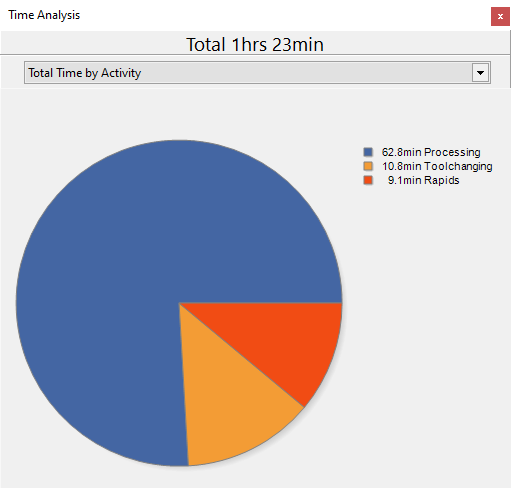
The large amount of time in toolchanging is common if part by part sequencing is used on multiprocessed (in this case cut and drilled) parts.
26Click Optimize Order again. Select Global. Click OK. Ensure Apply Zoning is NOT checked.
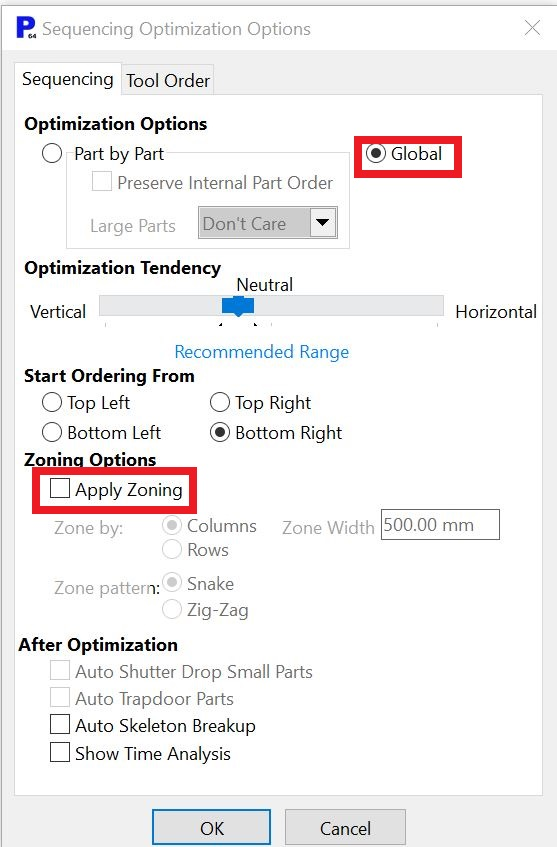
Global optimization is tool by tool, process by process, where internal cuts will still be cut before external cuts. It minimizes toolchanging time, as you can see.
This has a possible disadvantage. If the plate isn't sufficiently secured, the small movements caused by cutting or drilling can cumulatively cause the reference coordinate for the later processes on a part to be displaced beyond our acceptable level of tolerance from where the coordinate was for the earlier processes on the part, leading to deformed parts. This is often less of a problem when less drilling is required.
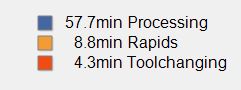
27Click on the Analysis Button on the sidebar, to find the following (or similar) results.
Note the reduction in Toolchanging time by not limiting the operation to Part by Part cutting.
28Click Optimize Order one more time. With Global still selected check Apply Zoning.
Zoning effectively divides the plate up into zones which must be processed in order, so just as we had a vertical optimization tendency when we were nesting on a plate that was horizontally reasonably long, now we are effectively considering a row of vertically long plates, and so a horizontal tendency is preferred. The tendency is the weighting which the sequence optimizer places on moving in each direction. It is best for it to tend to move on the plate's shorter axis, as it is likely to have less distance to move.
29Click on the Analysis Button on the sidebar, to find the following (or similar) results.
30Click the Schedule tab at the top of the screen.
31Click Schedule ![]() . Click Schedule again for the dialog box that opens.
. Click Schedule again for the dialog box that opens.
32Browse to where you want to save the NC code and click Save. The .nc file can be deleted later as we are not going to cut this nest on the machine.
33Click Home ![]() .
.
34Open the Reconciliation ![]() mode.
mode.
35Double-Click on our plate, which should be at the top of the list in the main window.
Optional:
36Double-click on the remnant at the bottom of screen and specify its location as Bin, location description as “5”, and click OK.
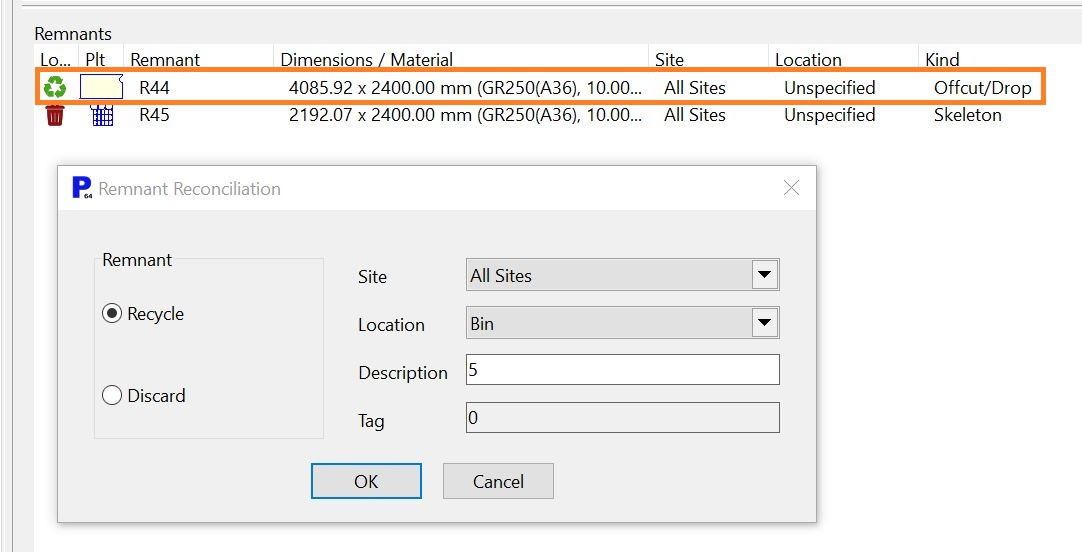
The skeleton is a potential remnant too, but is discarded by default - we can choose to keep (Recycle) the skeleton here too if we wish/the operator hasn't scrapped it.
37Enter a 6 digit heat number and serial number e.g. 198023 435872, and click Reconcile.
38Click Home ![]() .
.
39Open the Workorders ![]() mode. Click Show Active Cutting Completed
mode. Click Show Active Cutting Completed ![]() , and click Refresh.
, and click Refresh.
40Open our workorder (double-click or select and click Open), and change the State field in the top right hand corner to Closed, as in the previous tutorial.
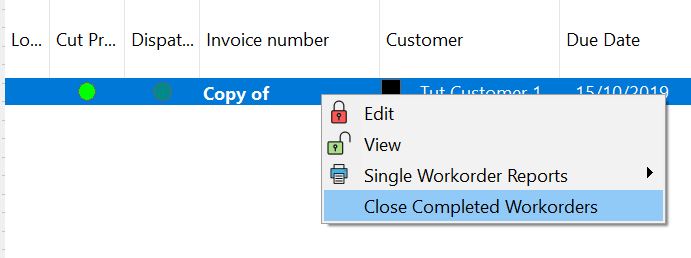
Alternatively right click on the workorder we wish to close and select Close Completed Workorders. Click YES and then open the workorder.
We want to check that our plate remnant has indeed been added to stock.
41Right-click our workorder from the workorder selector window and click Open Workorder in Nesting.
42Click on Open Plate ![]() .
.
43You should see the following remnant along with the rest of the plate stock. The plate denoted with an R is our recently generated remnant plate.
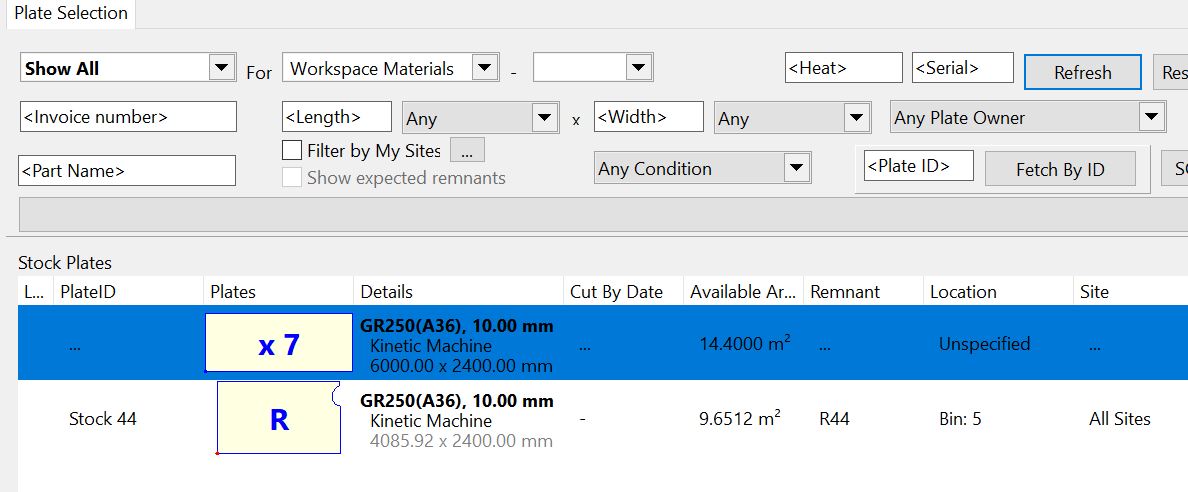
If All Available is not selected by default in the upper left dropdown box, you may have to set it to that and click Refresh.
44Return Home ![]() .
.
In this tutorial we have learned how to create arrays, use Bump Nesting to place them as close to edges as possible, apply a cropline, change the sequencing for different preferences, schedule a plate for processing and recycle a remnant piece of plate.