1Open the workorders mode
2Search for the Milling Tutorials Invoice Number workorder and open it.
3Double-click on the PlasmaRoughMillFinish part in the parts explorer to edit it.
4Click on the Processing tab at the top of the screen.
5Select the internal rectangle of the part and click Process button to display the Processing Options dialog and use the settings shown below.
We will use plasma to perform the roughing cut, then after the operator has removed the resulting blank we will clean up the face of the cut using a milling bit.
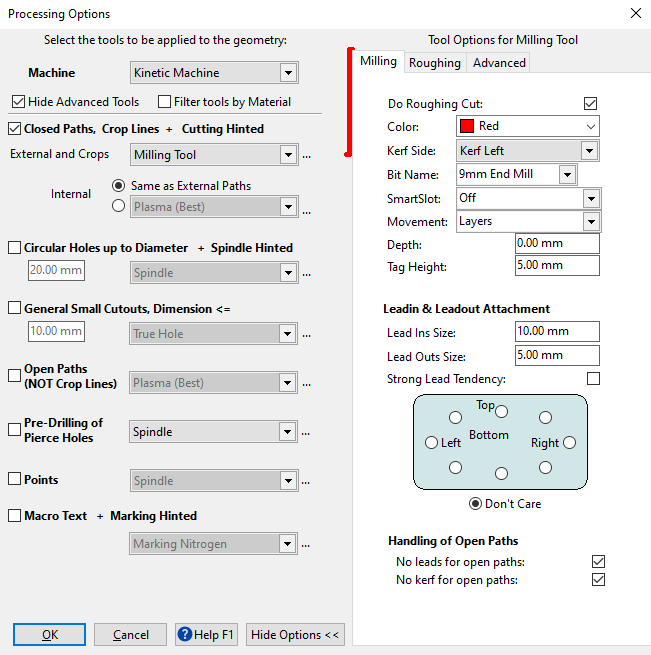
The following settings are important in this case:
Note you will need to have added the 9mm End Mill bit in the Adding a Milling Bit tutorial
▪Select the 9mm End Mill bit from the Bit Name drop down menu.
▪Specifying a reasonable leadin and leadout size.
▪Ticking the Do Roughing Cut check box.
▪Select the Roughing tab.
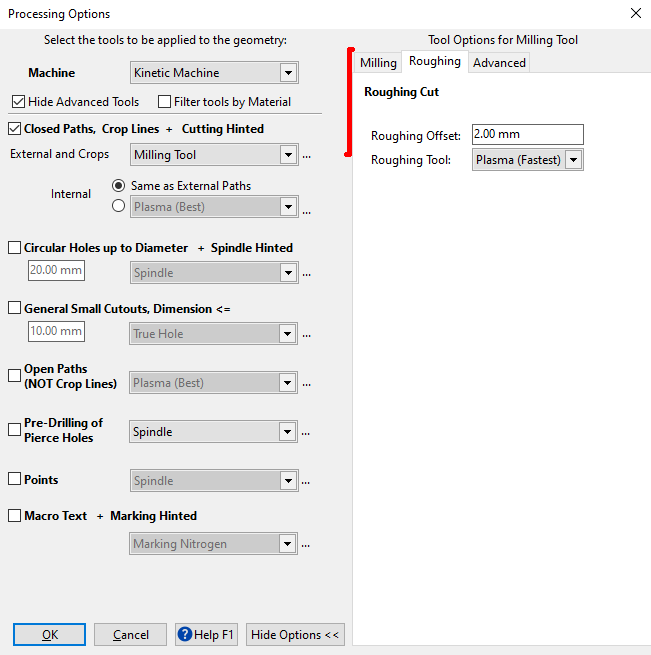
▪Specifying a reasonable Roughing Offset. This determines the amount of material left behind after the roughing cut. In this case, because we are using plasma for the roughing cut we need a larger offset to allow for any imperfections from the plasma process. If we were using a milling bit to perform the roughing cut, then we might use a 0.5mm offset instead.
▪Specify a plasma process for the Roughing Tool. Press OK. The rectangle will be processed.
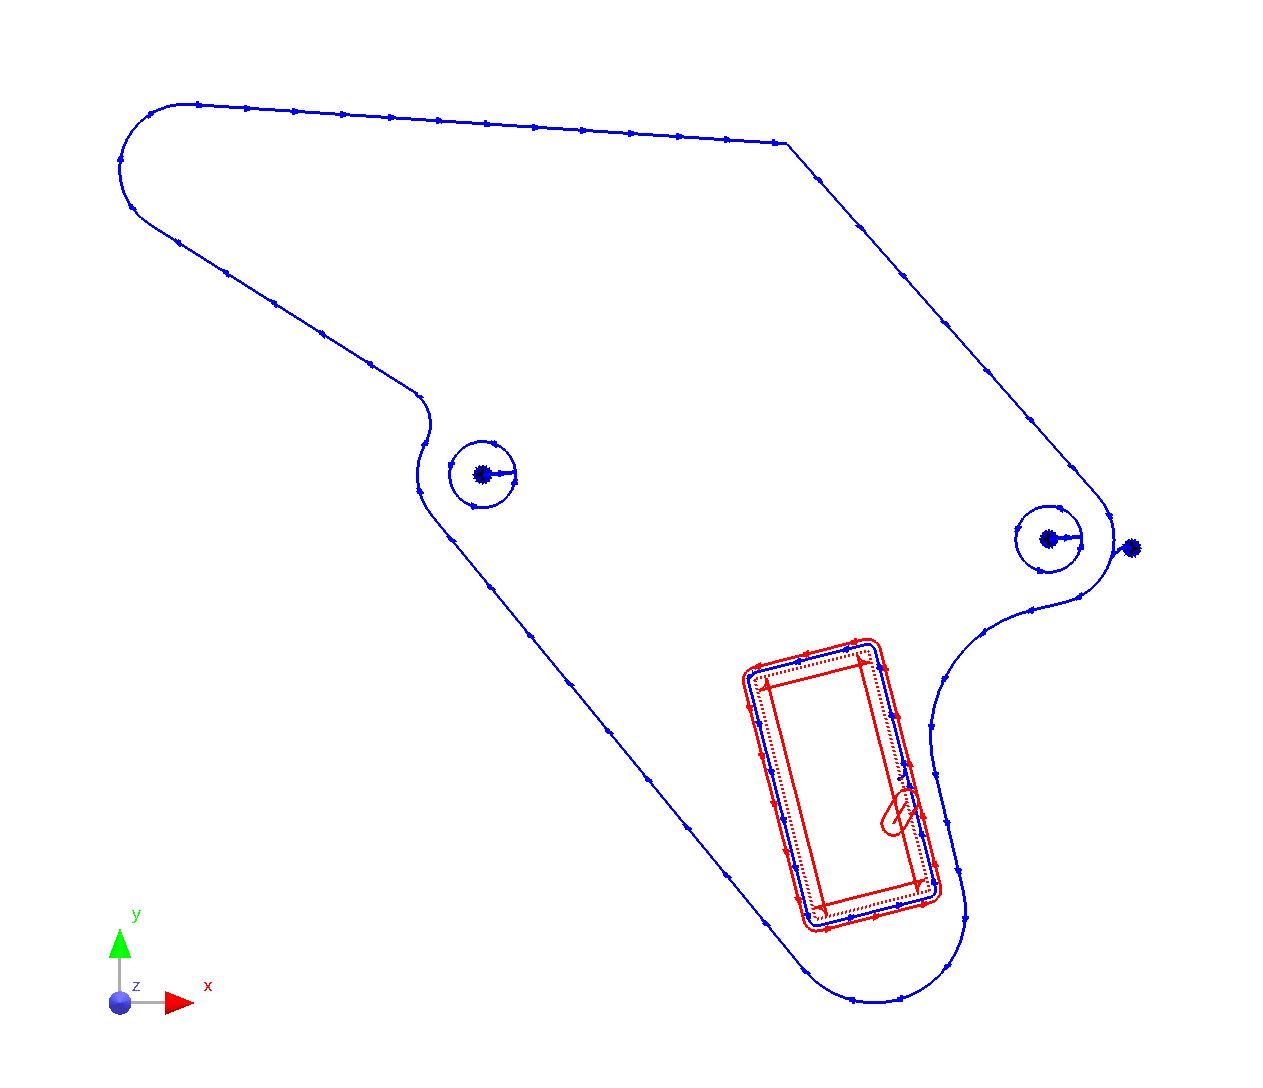
6With nothing selected on the screen,press the Process button again to process the rest of the part.
7Select Plasma (Best) as the closed path cutting tool so that it will be used for the holes and the outside path of the part. To visually match the example below, set the Plasma (Best) color to blue. Press OK.
Next we need to add a pause to the program so that the operator is prompted to remove the rectangular drop in preparation for the milling pass. If this is not done then the milling bit is likely to be broken by the piece rattling around in the hole.
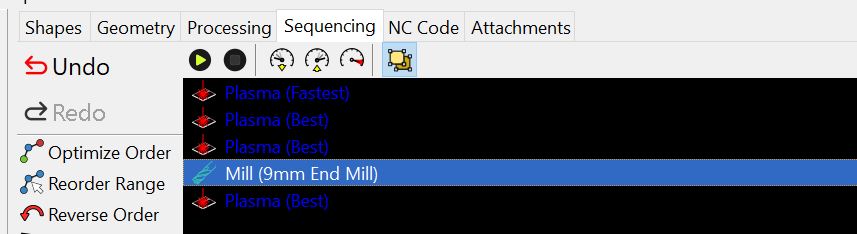
8Click on the Sequencing tab to open the sequencing editor.
9LEFT Click on the Mill process in the list, then right-click to display the context menu. Select Insert Pause Before from the menu, and add an appropriate comment that will prompt the operator to remove the blank that has just been cut with plasma. Press OK. The machine will pause when it reaches this point, and display the comment for the operator. The program will not continue until the operator clicks OK on the screen.

The part can now be nested on a plate and cut. You will probably want to do some tweaking if you are nesting more than one example of this part. For example, it will be more efficient if you clump the plasma roughing cuts together, then add a single pause, then perform the milling. Depending on the size of the plate you are likely to use zoning in which case you would have to create separate clumps for each zone.