Smart Slot Milling recognizes any shape with two semicircles connected by either one pair of arcs or one pair of lines as a slot, and sets a path for a mill of the same diameter to mill inside that slot. It also requires that the mill somewhere in the name has the word 'slot' (not case sensitive). This is a small safeguard against accidentally telling the machine to, for example, plunge an end mill bit and thereby destroy it.
1Open the Workorders mode and find the workorder with 'Milling Tutorials' as its invoice number.
2Double click on the Slots'n'Holes part to open it.
3Click on the Processing tab to open the processing editor.
4Select the two straight slots at the top.
5Click Process (P) . Set the processing as shown, then click OK.
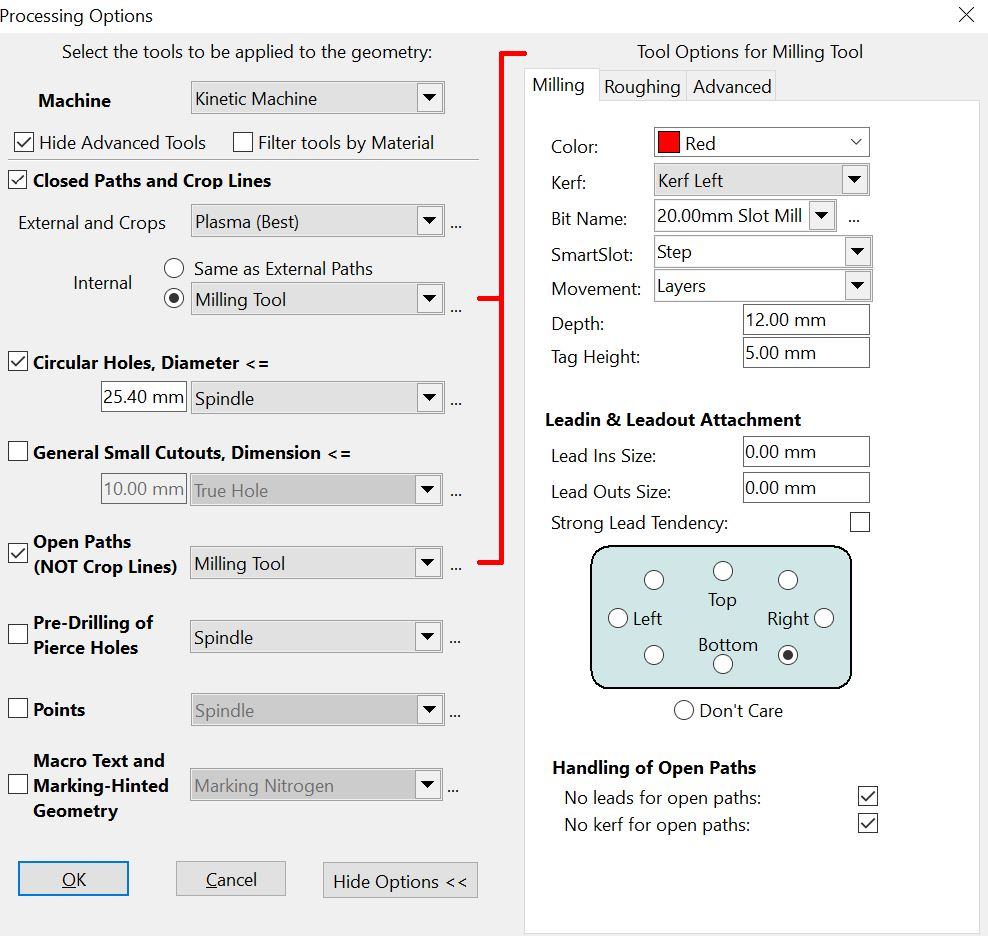
▪Only bits with the word "Slot" in their description can be used
▪We don't need or want a leadin when we are smart slotting, as there is no blowout for the milling tool.
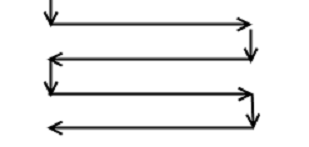
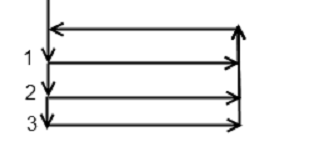
▪We have selected SmartSlot Step, which is the plunging and milling pattern the bit moves on. The three possible patterns are as follows
Step: Horizontal sweeps, vertical plunge |
|
Zig-Zag: Angled sweeps 1 way, Horizontal sweeps the other. |
|
Standard: Plunges in the same point, horizontal sweeps and returns |
|

6The following steps may be useful for a better understanding of how the NC code works. If you aren't interested, skip to step 9.
7Click on the NC Code tab at the top of the screen to see how our slot will be processed.
8The following is an excerpt of the NC Code (in relative mode)
T1(SM20) |
SM20 is the bit specifier |
G0X120.Y190. |
(x,y)=(120,190) are the start coordinates |
G40 |
The Code for no Kerf offset. |
M32D3. |
M32 Starts the Mill D3 plunges it 3mm (since we are in metric) |
G1Y30. |
G1 moves the mill in a line Y30 (Up the plate 30mm) |
G1D8. |
Plunges the mill to 8mm from the surface |
Y-30. |
Moves the mill down the plate 30mm (Planar movement is set by G1 two lines above) |
G1D12. |
Plunges the mill to 12mm from the surface |
Y30. |
Moves the mill down the plate 30mm (Planar movement is set by G1 four lines above) |
M3 |
Stops the Mill. |
9Close the mode without saving.