Once you have found a combination of shapes that will be useful for nesting you will probably want to copy it to use again. Here we will look at two simple way of doing this; 'copy and paste', and 'CTRL drag'.
Later we will look at a more sophisticated method for achieving this called 'Clustering'
First we will copy and paste the part.
1Select both parts and right-click to view the popup context menu:
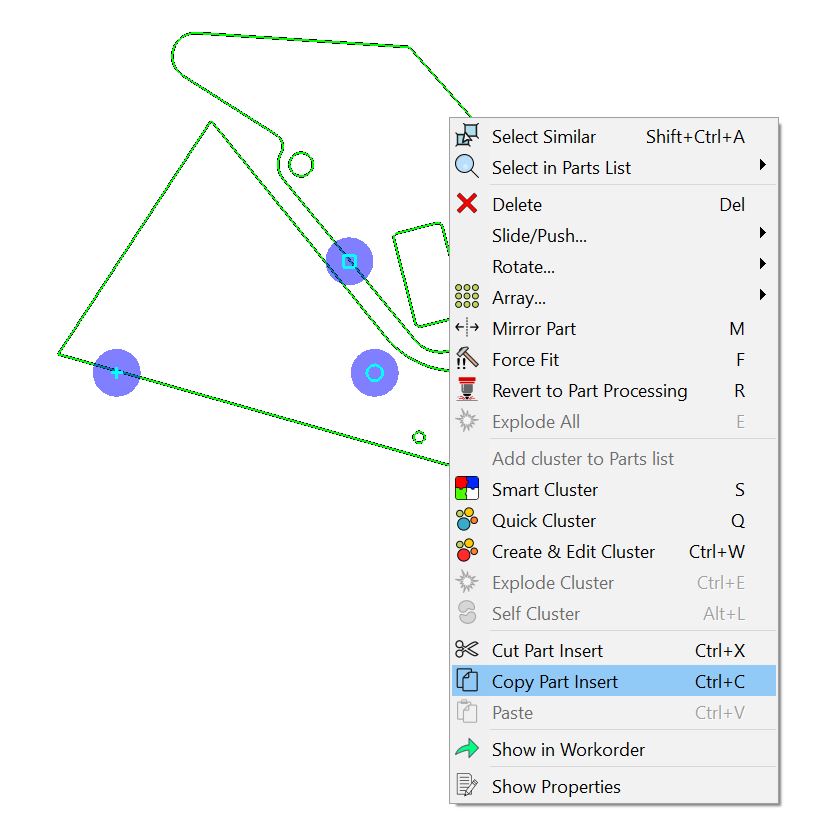
2Select Copy Part Insert. Note the hotkey for this operation listed to the right of it, as are most hotkeys.
3Right-click to select the popup context menu again. This time select Paste Part Insert. The copy will be pasted to the same X Y coordinates as the original, and will appear selected.
4Click on the square box and move the copy to a new location. You will see the original underneath.
5Double-click on the second plate in the navigator to load it into the nesting editor.
6Right-click on the new plate and select Paste Part Insert again. You can see that the copy has been pasted with the same coordinates again.
Individual part inserts, groups of part inserts, or even entire nests can be copied between plates using this method.
Now we will use CTRL drag to copy the parts. This is essentially the same action as moving the part using the 'move square'. The only difference is that by holding down the CTRL key we drag a copy and leave the original where it is.
7Select both parts at once (if they are not already).
8Hold down the CTRL key, and move the parts as you would normally. Notice that the original stays in place, while the copy is being dragged.
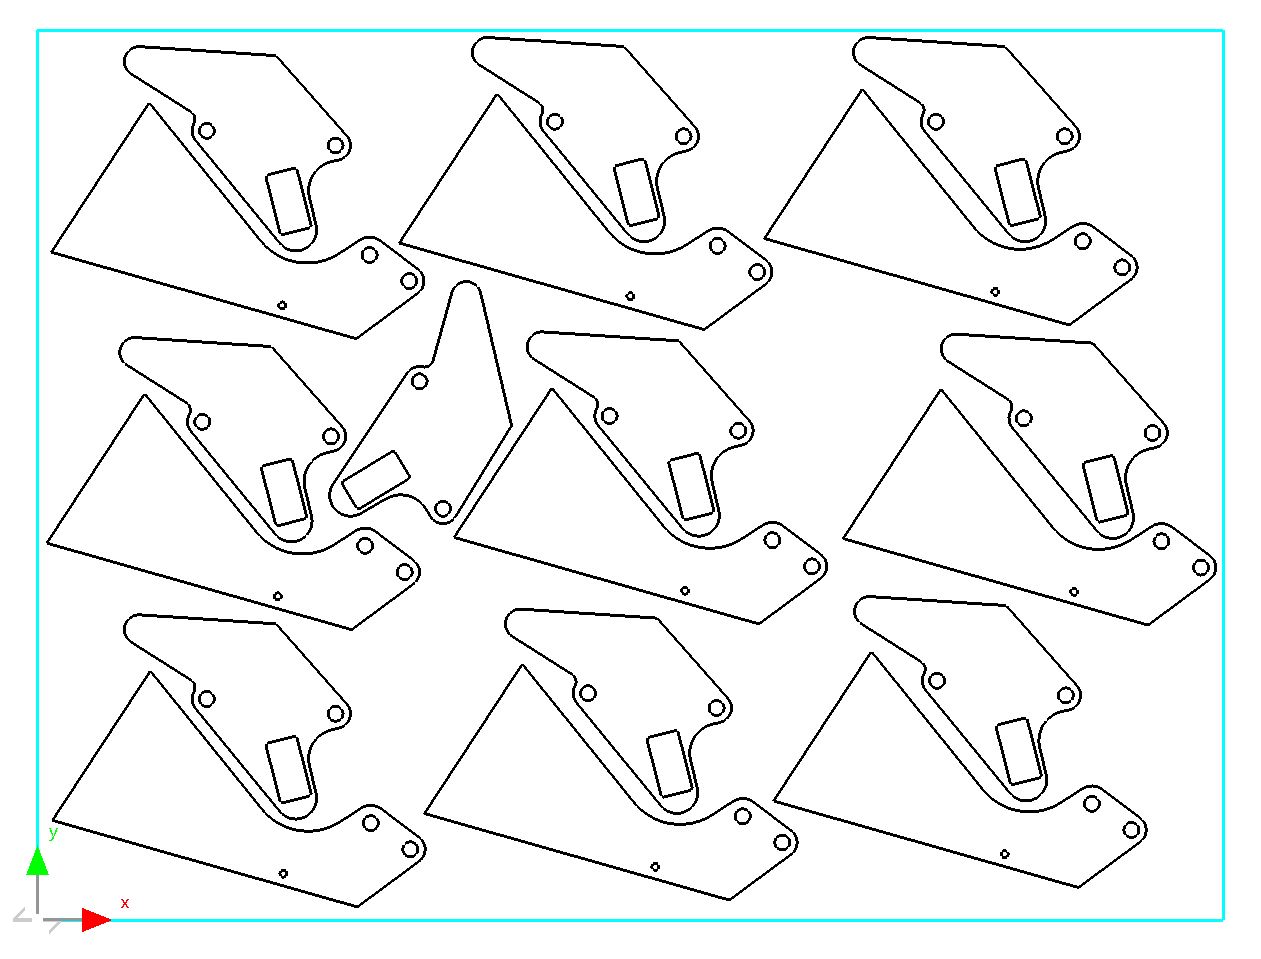
9Continue to copy, rotate and move parts until you have nested the whole plate and no space remains (don't worry about the quantities required for each part). This is an example of what your nest could look like: