The keyboard and mouse combinations, and on screen buttons 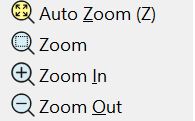 on the sidebar yield the following navigation results.
Resetting
Pressing the Z key returns the Editor display to its default position. So when you want to see the editors contents neatly in the window press Z.
Also, if you need an on screen button, AutoZoom does the same operation.
Panning
Panning (Changing the position of the display) can be performed by:
▪Clicking and Dragging with the middle mouse button/wheel.
▪Holding down SHIFT and clicking the Right-Mouse button.
Zooming
Zooming can be performed by
▪Scrolling the mouse wheel.
▪Holding down CTRL and right-clicking.
▪Clicking the Zoom, Zoom In and Zoom Out buttons
Rotating
Rotating can be performed in the Processing editor by
▪Holding down ALT and right-clicking.
1Click on the Processing tab at the top of the screen.
2If you have a mouse wheel, do the next 3 steps.
1.Scroll the mouse wheel to zoom in on the spur gears in the bottom right hand corner of the plate.
2.Direct select the Lead in and Lead out of one of the spurgears. Note how much easier this becomes when you have zoomed in.
3.Pan around the screen by clicking and dragging the middle mouse button, and select the other lead ins and lead outs.
3If you don't have a mouse wheel, do the next 4 steps
4.Pan around by pressing and holding SHIFT and right-clicking on the screen. Pan so that one of the spur gears is in the middle of the display.
5.Zoom into the display by holding down CTRL and right-clicking on the screen, moving the mouse away from the center of the display.
6.Direct select the Lead in and Lead out of one of the spurgears. Note how much easier this becomes when you have zoomed in.
7.Pan around the screen by pressing and holding SHIFT and right-clicking on the screen. Select some other lead-ins and lead-outs.
4Press ESC. Press Z (or Click on the Autozoom button) to reset the zoom to default.
5Click the Zoom button
6Drag a box around one of the parts on the left. Note how nicely centered it is now in the screen.
7Hold down ALT and right-click. Rotate around to see the 3D geometry of the beveling process applied to this part.
8Press Z (or Click on the Autozoom button) to reset the zoom to default.
9Try out regenerating the display as explained below, then Click Home without saving.
Polygonal Rendering of Arcs and Circles
When zoomed in arcs may appear polygonal, press F5 to regenerate the display at the zoomed in resolution, to return them to a more accurate rounded rendering.
There are also User Settings that control how arcs are rendered, see below. User settings are found under the tools dropdown in the top left corner of the screen. Reduce the Arc Display Tolerance to make circles appear smoother; may slow down screen drawing of complex geometry on older computers, especially if Hardware Graphics Acceleration is turned off.
