PrimeCut requires you to use a category of process selection, with an associated table of process selections for each material and thickness. We have already used the default categories that PrimeCut has in earlier tutorials, including Plasma (Best) and Plasma (Fastest), etc. These tables can be customized and new tables can be created. This tutorial shows how the system works and how to modify your tables.
1Open the Workorders mode and click New Workorder.
2In the Customer field click Tut Customer 1.
3Click the grey New 2D Shape button ![]() .
.
4Double-click the rectangle part, click Finish, click OK.
5Click on the part in the parts explorer and set the Material/Thickness to Mild Steel, 12.00 mm.
6Click on the Processing tab and click Process All.
7Tick Closed Paths, under External select Plasma (Best) in the dropdown box and click OK.
8Click the NC Code tab at the top of the screen.
9Note the line:
T2(130A O2 Air)
T2 by default is the Plasma torch, the rest is just naming convention.
By convention 130A is the current that the torch will be run at, O2 is the Plasma Gas, and Air is the Shielding Gas.
The machine has the name stored '130A O2 Air' for the process, and it may NOT be possible to change just one of the components of the name and expect the machine to recognize the name as a whole. Unless the name is stored in the cutting machine, it won't be recognized.
10Click on the part in the parts explorer and set the Material/Thickness to Mild Steel, 20.00 mm.
11Click on the Processing tab and click Process, click Yes to regenerate processing, click OK.
12Click the NC Code tab at the top of the screen.
13Note the line:
T2(260A O2 Air)
as being different from that of the previous part's NC code line.
14Click on the part in the parts explorer and set the Material/Thickness to Mild Steel, 58.00 mm.
15Click on the Processing tab and click Process , click Yes to regenerate processing, click OK.
16Click the NC Code tab at the top of the screen.
17Note that there is an error in the NC code:
Process data not found looking up PROCCODE2 for Cost ID 5000
This won't run on the machine.
18Close the mode without saving.
19Click on the Machines button on the start screen. The following window should open.

▪The top drop down box allows you to choose the machine for editing
▪![]() adds a machine to the list, with blank tables for entering
adds a machine to the list, with blank tables for entering
▪![]() makes the selected machine obsolete
makes the selected machine obsolete
▪Set Program Number allows you to change the current number suffix for the default name for saving NC code. This number increments with each NC code save.
▪Set as Default sets the current selected machine as the default machine for new parts and plates.
▪No Defaults means there is no default machine associated with new parts and plates.
▪Add Tool is for adding a tool
▪Del Tool is for deleting a tool
▪Import is for importing a set of tables for all machines. A Yes/No prompt box appears for each machine asking if you want to import that machine's details.
▪Export is for exporting a set of tables for all machines. Again a Yes/No prompt box appears asking if you want to export that machine's details.
▪Spindles is for editing the spindle table for the current machine. (note the table is the same as the one in the Processing- Drilling tutorial .
20Select the Kinetic Machine in the dropdown box at the top, and click the + sign by the cutting tool with value "Plasma (Best)"
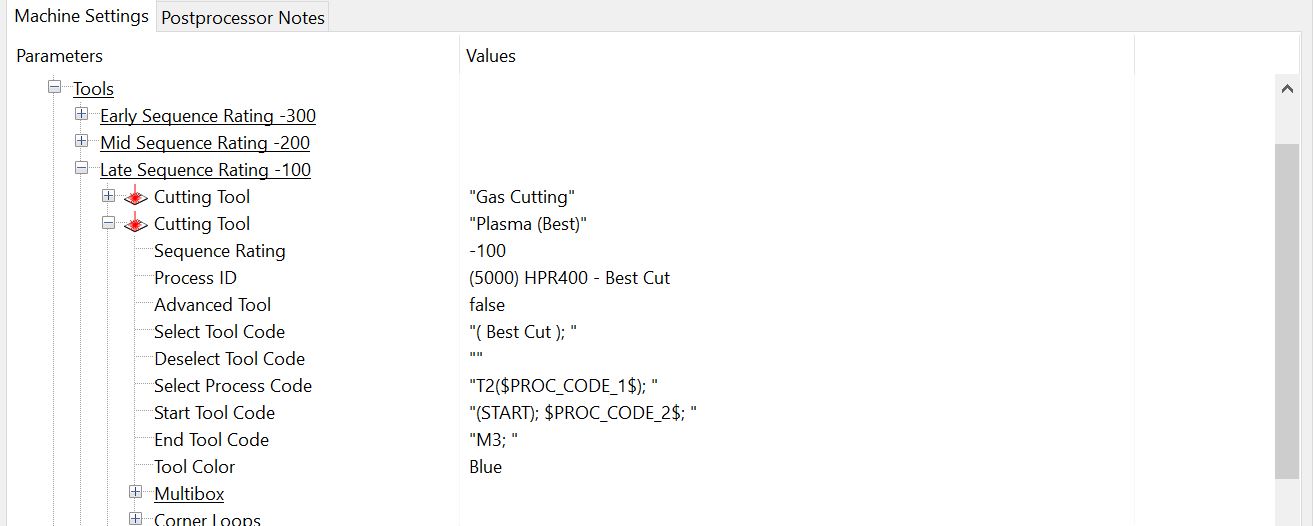
21Here under our 'Select Process Code' Parameter we recognize the line of NC that we have been seeing:
"( cutting; T2($PROC_CODE_1$);;;" as you can see, the $PROC_CODE_1$ is replaced by something when the NC code is generated. Semicolons also translate into new line spaces.
22Click Cancel to exit the Machines mode.
23Click on the Process Data button from the home screen.
24Click on the + sign next to the Kinetic Machine in the top left window to expand and view its contents.
25Click on the Plasma (Best) tool in the list that is now shown.
26Click on GR250(A36). A processing table should appear in the large window on the right.
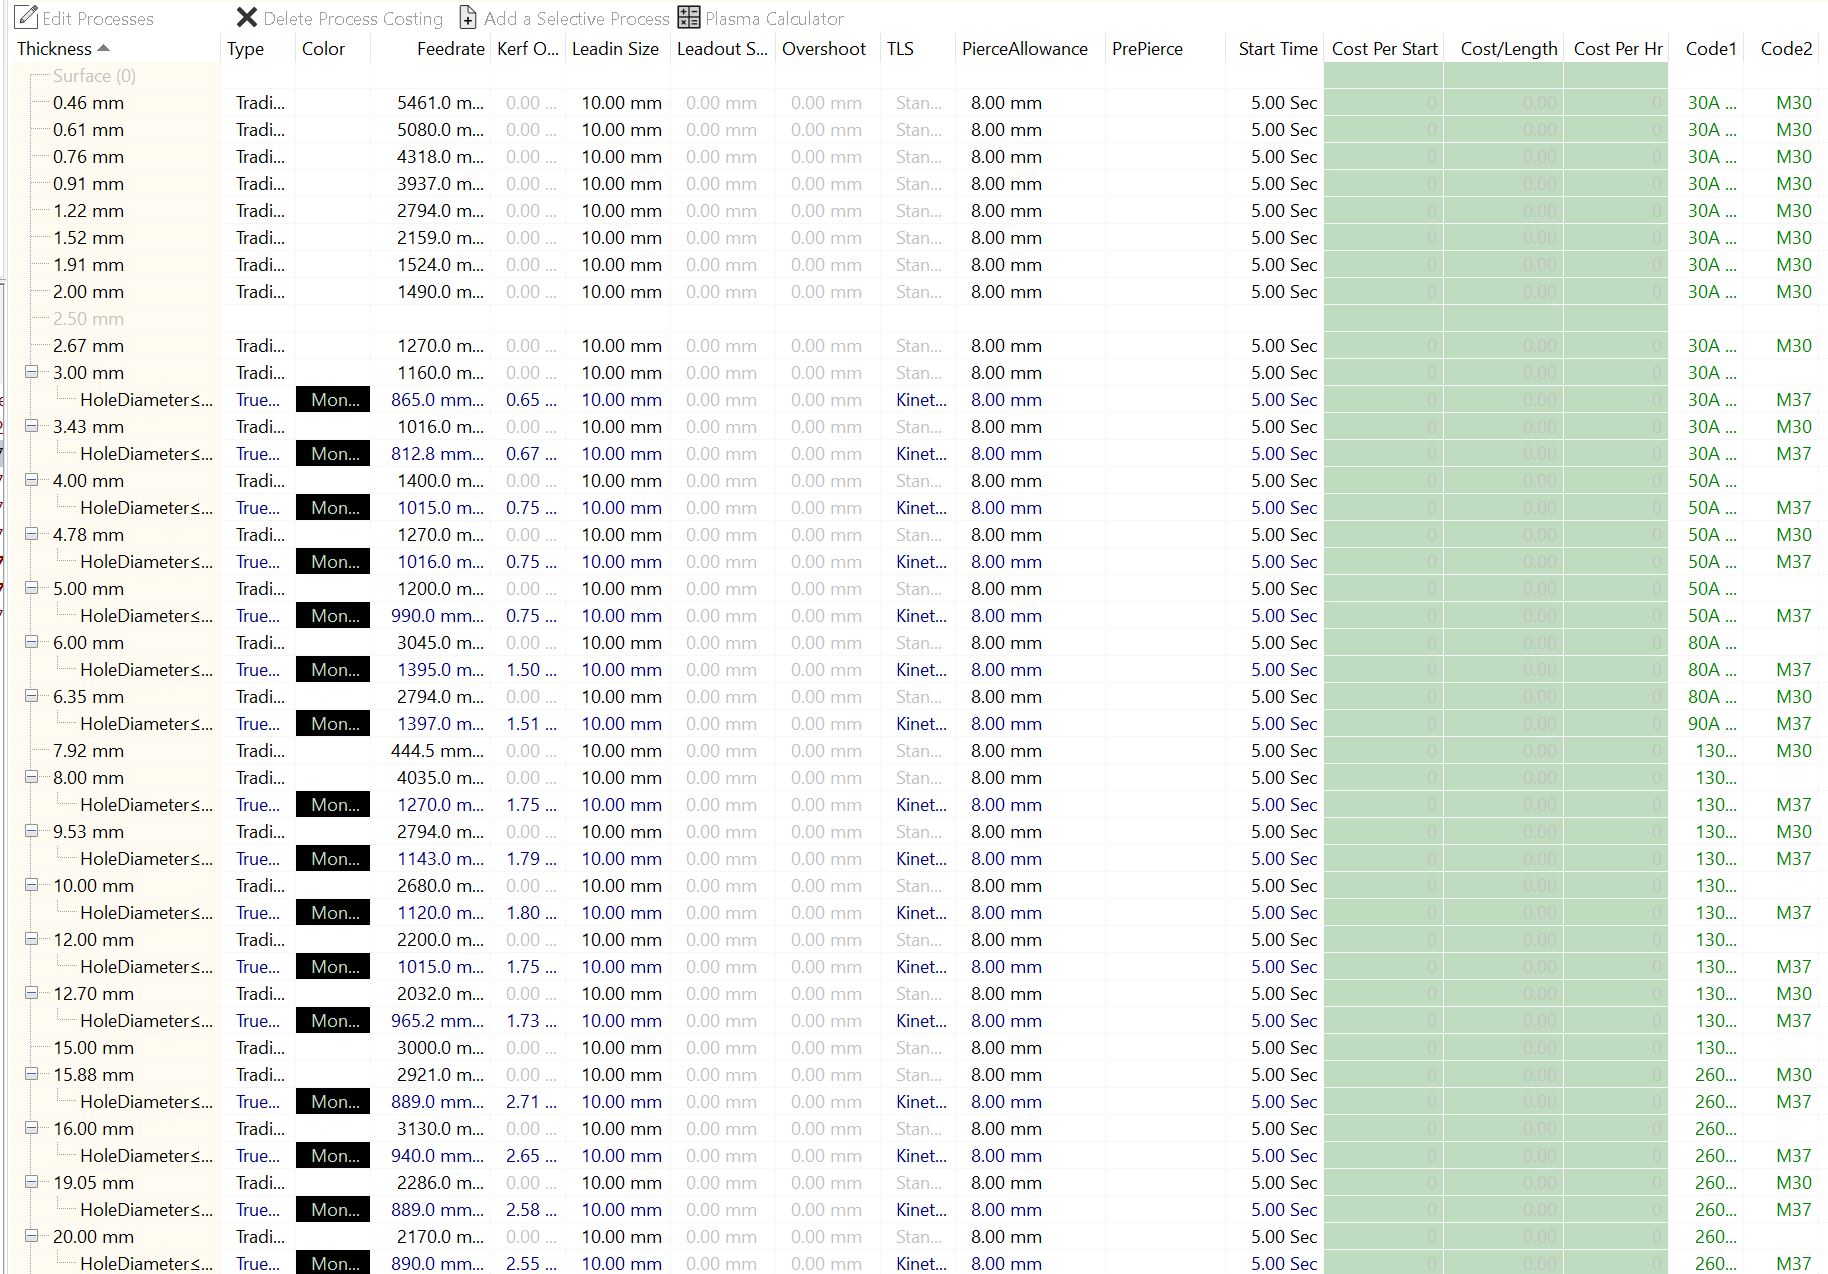
27For each thickness of plate, you can see we have a set of data for Feedrate, and Starttime, which are used in scheduling and NC code, as well as Cost per Start, Cost/Length, and Cost/Hour which are used in the Quoting mode.
28More significantly to us, we see that the Code 1 column contains what was substituted for $PROC_CODE_1$ into the Select Tool Code in Machines, which was then placed in the NC code we saw before.
29Note
▪the 12mm and 20mm Code 1 matches what we saw earlier.
▪the 58mm Code 1 entry does not exist, and therefore produced an error.
Now you know how information for each tool, material and thickness is stored. The remaining blank columns (Code 1, Code2, etc) are there if you want to insert some code specific to certain tooling, material and thickness combinations, and can be referred to in machines as you might expect with $PROC_CODE_2$, $PROC_CODE_3$ etc.