Here are some examples for you to try and emulate
Easy
1Easy Flange
Use the Flange shape from the shape library, and add the dimensions. Look at the Full Page Schematic part report to confirm your dimensions will appear.
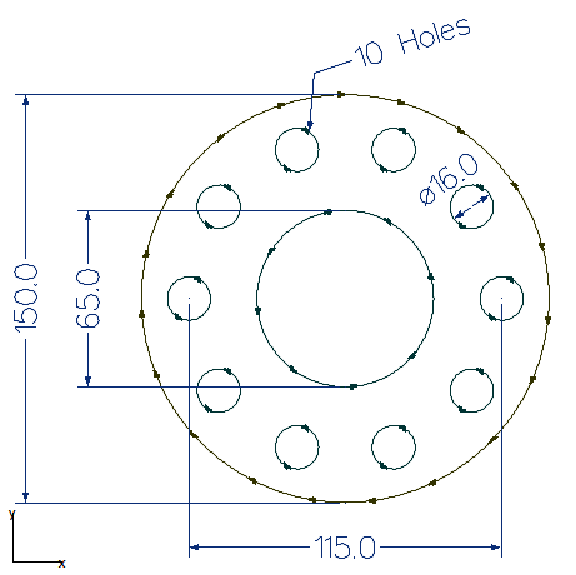
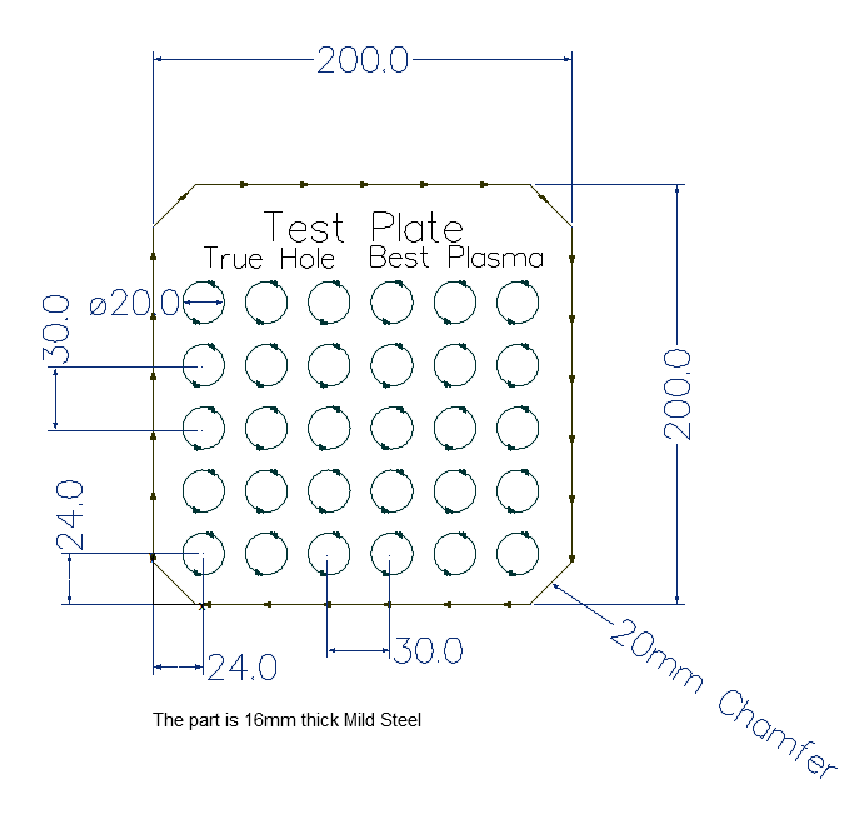
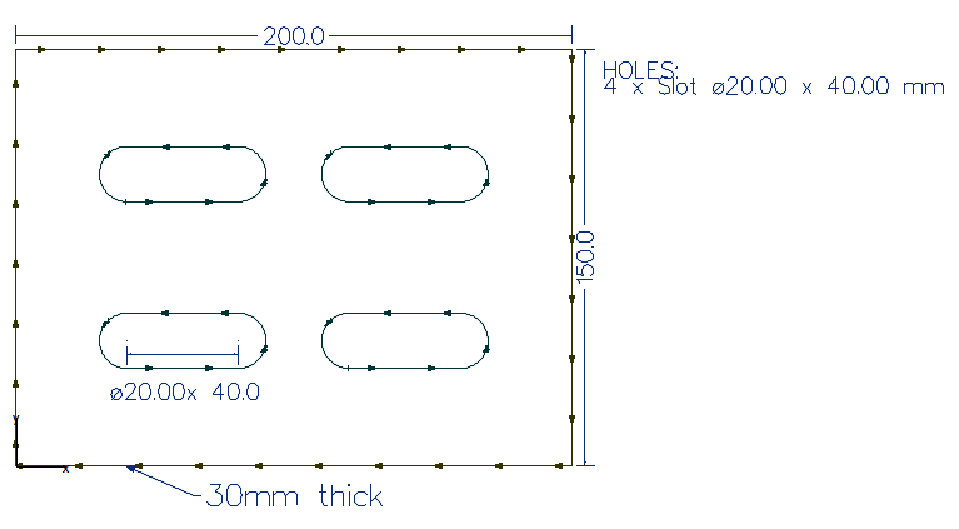
2Holed Plate
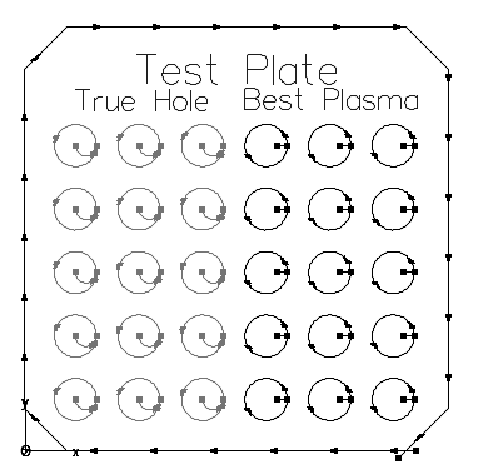
Create and process the plate as shown
Note that the text is to be marked onto the part.
Hint: There is an Array tool and a Fillet/Chamfer/Notch tool.
Medium
3Pointed Comb Nest
Hint: Remember to use Array and Cluster tools, to save time. (Try without using this 2D shape)
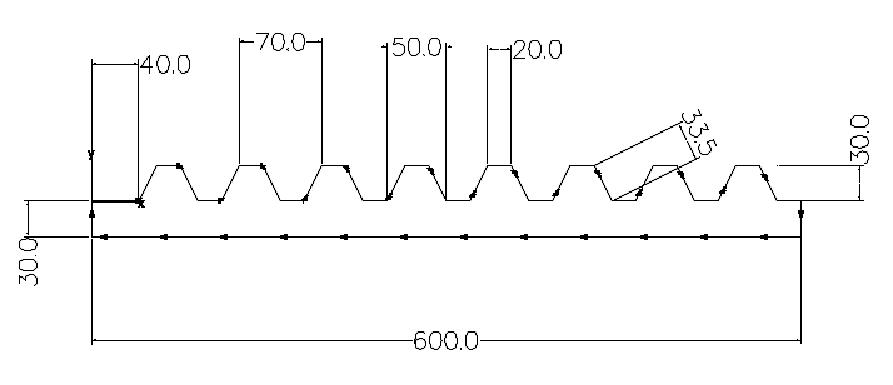
(note we have shown more dimensions than are needed to fully describe the part)
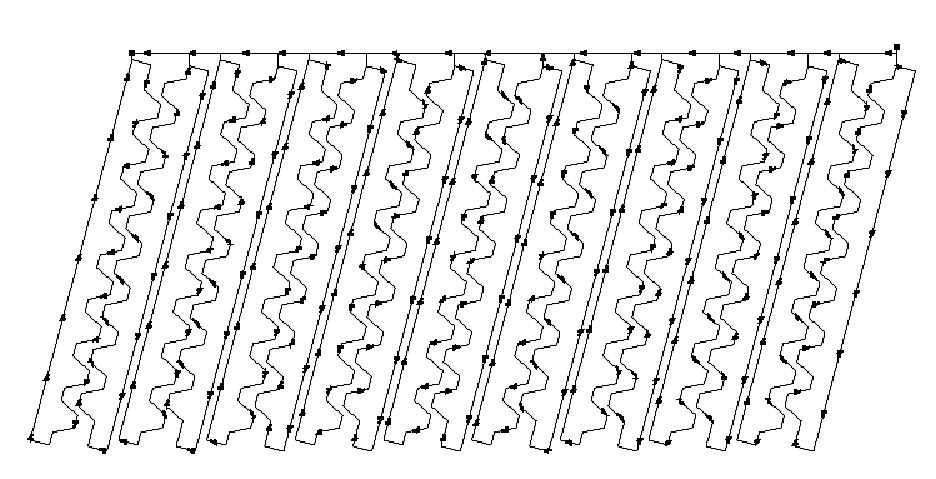
(the above picture is from the processing editor (Nesting mode), but bridges are created in the nesting editor, by opening a cluster for editing)
4Milling Part
Use the default 2D shapes geometry.
Use a Zigzag smart slot tool when milling the slots (see Smart Slot Milling of Slots (and NC code)).
Since we want to nest this on a 32mm plate, create an open path in geometry for the 62mm Rose face mill to mill, as in the Face Milling tutorial .
Join the path and process with the face mill.
Hard
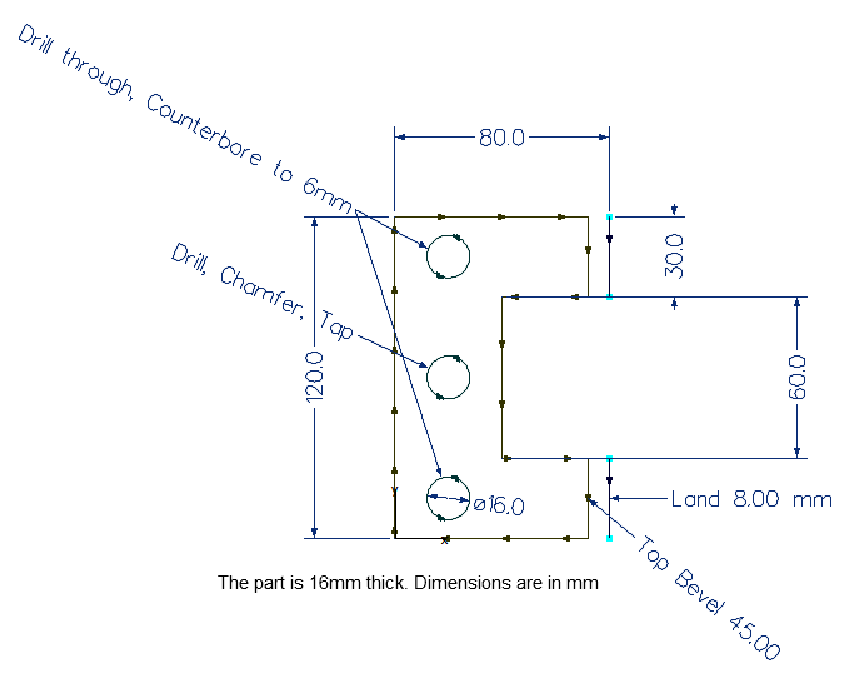
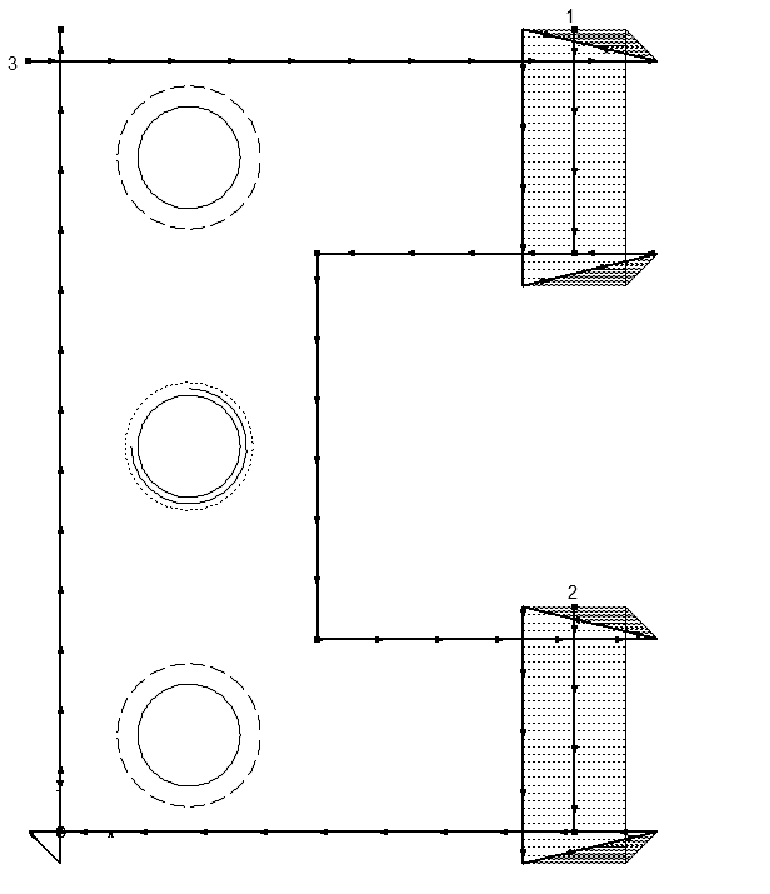
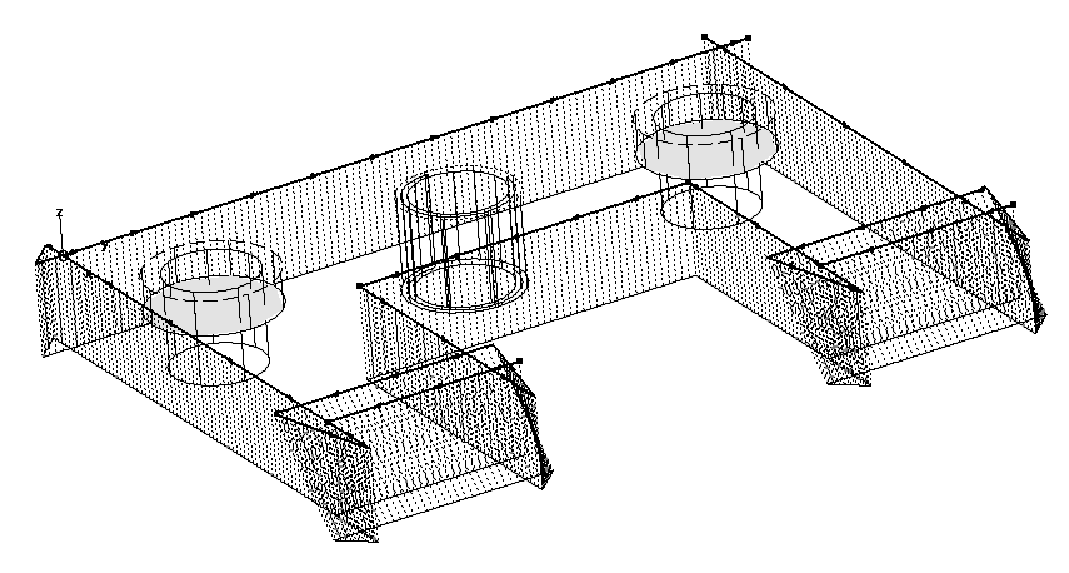
5Multi operation part
Hint:
Remember the Create Bevel Geometry wizard from the right-click menu. Tick the Geometry Defines Top Path button. The Hints this creates should override the bevel options in processing. The geometry may need editing to get the sequence you need for the external paths (Shown with numbers in pic 2).