Pierce Centrally On Small Holes
Nest Friendly Leadin Placement
Thermal Lock Leadins and Leadin Chaining
When cutting a part, the tool moves around the parts boundary paths. However to get the best quality part, we often require the addition of additional path segments to the start and end of the cut. Collectively these are called Leads.
Having appropriate leads is a key factor determining cut quality.
At the start, a leadin is a small segment that "leads into" the cut. It provides the following benefits:
•The pierce point is away from the part- Piercing can be messy and usually creates a hole of diameter greater than the kerf, thus would gouge the part if piecing on the part .
•A leadin allows height control to settle before cutting the part boundary.
A leadout can be used to ensure the cut completely severs the part, especially when cutting with a process with significant lag such as plasma.
Lead Attachment
Leads attach to their parent cutting process at a point called the attachment point. The lead may attach tangentially (attachment angle zero) or at an angle. Usually tangentially is preferred. PrimeCut automatically places leads based on some inetrnal heuristics as well as partamemetrs supplied by the user and/or the costing data. Normally PrimeCut will try to attach leads to convex corners, but failing this will attempt a tangential placement.
Adding a Lead to a Cut that doesn't have one
This is done via the cut's properties. For example, to add a leadin:
1.Select the cut (or cuts).
2.In Properties, check the Leadin box and apply
3.You cvan then press ALT-I to select all the newly created Leadins. (or ALT-O if you added Leadouts)
Simply select the leads and press the DEL key. You can also select their parent cutting processes and uncheck the Leadin or Leadout boxes in the Properties Window.
Once you have processed a part or plate you may wish to change the leads that have been used by PrimeCut.
If you want to make the same change to a number of similar parts that are nested on the same plate you can change one of them and use the Copy to Similar function.
There are two ways you can change the location of leads in regards to the path.
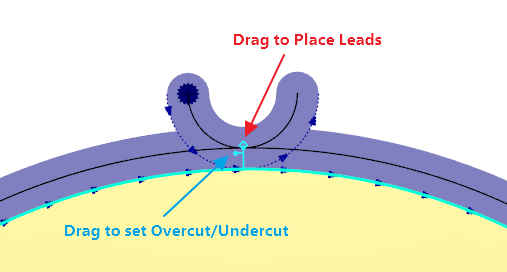
▪The Place Leads toolbar button allows you to click on the path to select where you would like the leads to appear.
▪If you select a path (and no other items) you can place the leads by dragging the Lead Placement Handle. Just click on the larger handle and drag to where you would like the leads placed.
Once you have moved the leads you may need to change their size or the angle at which the approach the path. There are two techniques for changing the characteristics of a lead.
▪Select only the lead you want to change, either the leadin or the leadout but not both at once.You can select the leadin of a selected process with ALT-I (I for "In"), or the leadout with ALT-O (O for "Out").
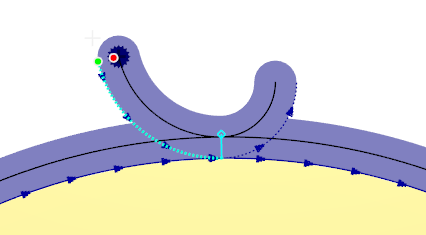
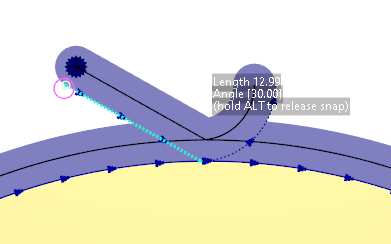
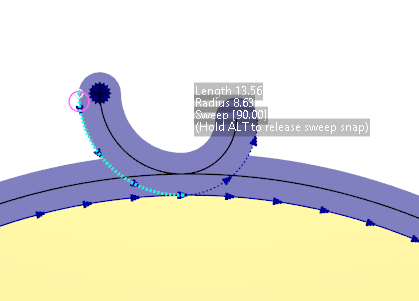
▪You can then drag the lead endpoint. You will see attachment angle snaps as you do so, hold down ALT to ignore these.
You can click on the red handle to switch between an arc or a line leadin.
With line leads the angle snap is snapping the attachment angle, whereas with arc leads it is snapping the swept angle, as arc leads are usually tangential (attachment angle 0).
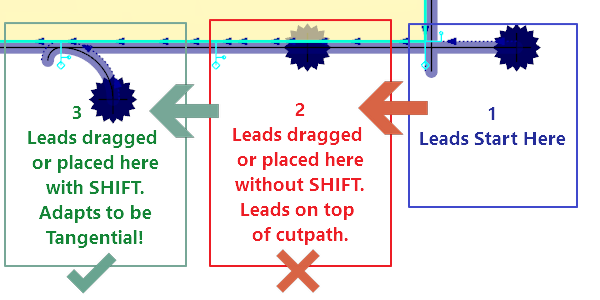
Auto Adapting Leads to their Location
When moving leads, either by dragging the lead placement handle, or by using the Place Leads mode, you can make the leads "adapt" to their new location by holding down the SHIFT key as you drop the lead in place. Especially when moving from a corner to an edge, or vice versa.