As with single line crops, the purpose of a Wrap Crop is to cut away the used section of plate in order to leave a usable remnant plate.
Wrap Crop will create a crop after (i.e. to the right, if that is your nesting direction) the currently nested parts, but the path consists of a number of lines and will 'wrap' itself around the parts in order to minimize material wastage. A dialog box will appear that allows you to control just how many lines segments will be used:
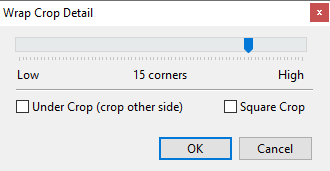
Use the slider to adjust how many points are in the cropline- more points usually means the crop will follow the nest more closely. The crop will adjust dynamically as you move the slider.
A Square Crop checkbox forces the wrap crop to only exist in the X and Y direction with crop lines joining at right angles, Ie rectilinear.
An Under Crop checkbox specifies that the wrap crop created will be an undercrop, ie on the other side of the nest to a normal crop.
The disadvantage of an irregular wrap crop is that it creates an unwieldy remnant plate which the operator must be careful to place the 'correct' side up when it is time to use it again.
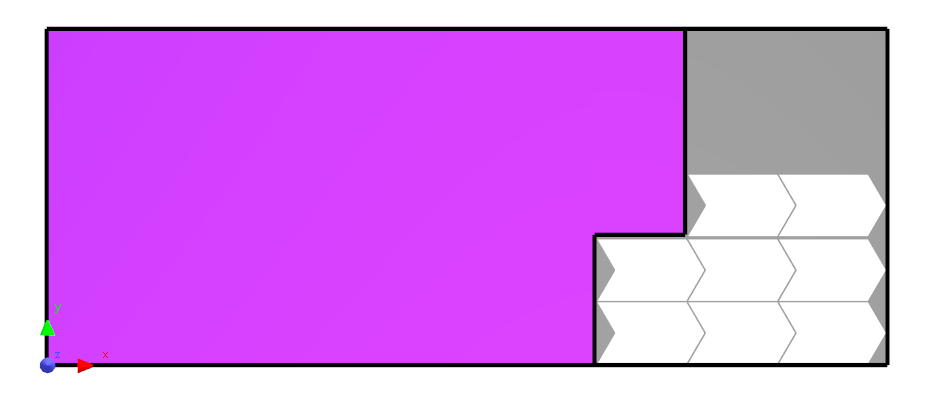
Example with Square Crop checked (Note Corner Crop does a better job in case where the nest occupies a corner of the plate)
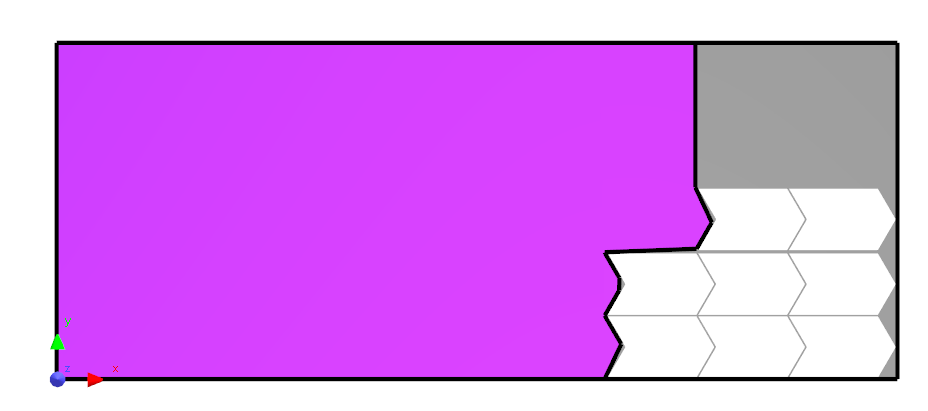
Example with Square Crop Unchecked
See also
Defining Offcuts with Crop Lines
Requirements for a Crop to Define an Offcut
Crop Editing: Moving Crop Nodes
Crop Editing: Splitting Offcuts using Tee Handles