PART BASED AREA CALCULATION METHODS
PART BASED AREA CALCULATION METHODS
- Requires PrimecutNE version 4.5.389 or later
- These calculations do not affect nest based quoting.
Previously PrimeCut NE had a fixed calculation method when calculating material usage in Part Based quotes, namely the “Gap Expanded Enclosing Rectangle” would be used to allocate some representative minimum material usage, then the “Nest Efficiency” multiplier would be applied to get a (generally slightly larger) amount of material to allocate to allow for nesting inefficiencies- 100% nest efficiency is rarely achievable in the real world.
Sometimes however the Nest Efficiency multiplier might have to be set to a value less than 100% to get a more realistic idea of material consumption for certain shapes. For example right-triangles might use a 60% nest efficiency multiplier as they can be nested in pairs without greatly exceeding the enclosing rectangle footprint of a single triangle. Large rings or parts with large cutouts or “L” shaped parts may also require adjustments. It has been recognized that applying these adjustments on a part by part basis can be difficult, and it is often hard to visualize the nett effect of the nest efficiency and gap expanded rectangle estimation.
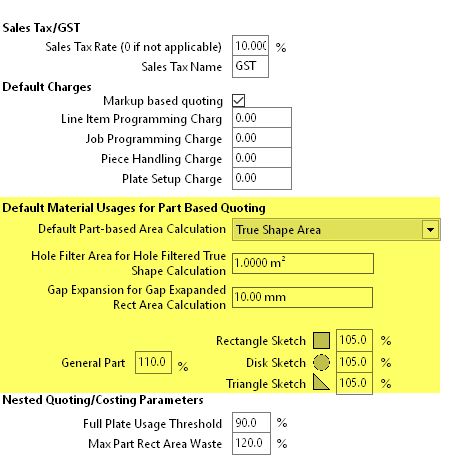
Primecut now supports a part based setting: Area Calculated By. A global default setting has been created to apply to all new parts entered into the system. All parts loaded before version 4.5.389 will be set to use the original Gap expanded enclosing rectangle.
VISUALIZING THE CHARGED AREA
A new option as been added to the part geometry editor to allow visualization of the part-based chargeable area as a green semi-transparent region. This is used below in the examples to demonstrate the effect of the different calculations. It can be turned on and off from the Area Layer toolbar button, Show Part-Based Chargeable Area option. This setting is remembered per-user, so sales staff doing primarily quoting may like to leave this one, while programmers may prefer it left off.

CALCULATION METHODS AND EXAMPLES
Here follow descriptions of the 5 methods available. They are ordered from “most conservative” (most area allocated) to “least conservative” (least area allocated). Note also that the True Shape Area and Ship Weight are also available in the properties window now.
GAP EXPANDED ENCLOSING RECTANGLE
This is the legacy estimation and will still be preferred by many customers. An extents rectangle is generated around the part, its width and height are then expanded by the “Gap”, a global setting (see below) typically representative of the gap placed between parts when nesting. Though this may vary from thickness to thickness the gap for costing purposes is a simple global constant and should be set conservatively high if a range a gaps are used.
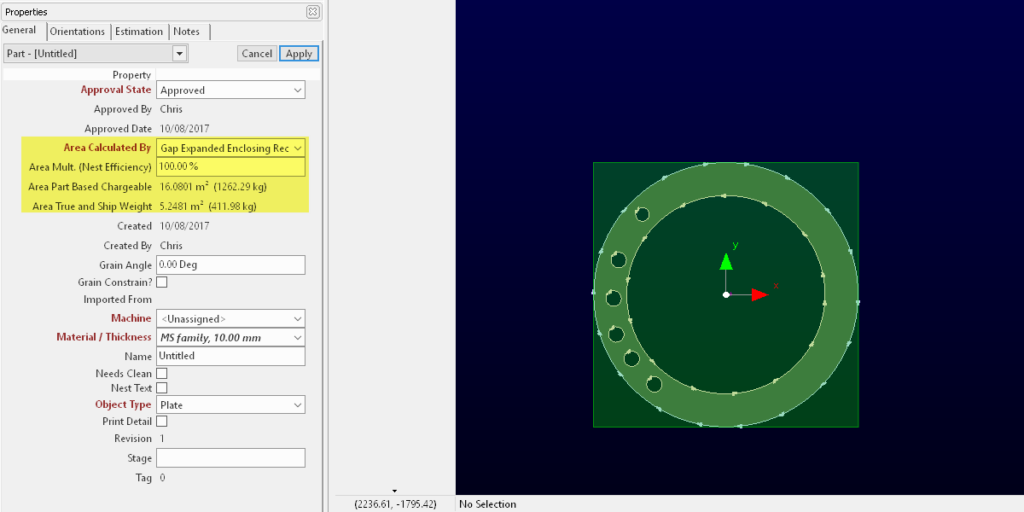
The green filled regions indicate the area charged. in this case the part is large compared to the gap (10mm) however if zoomed in we can see that rectangular region has been expanded by 5mm on all four edges, resulting in a net gain of 10mm to its width and height. The Nest Efficiency is set to 100% to show the pre-multiplied calculation. Note we are charging for 16.08 sqm of plate, while the true shape area from which the ship weight is calculated is just 5.25 sqm.
Nest efficiency multipliers may need to be set greater than or less than 100% depending on the shape geometry for this calculation method.
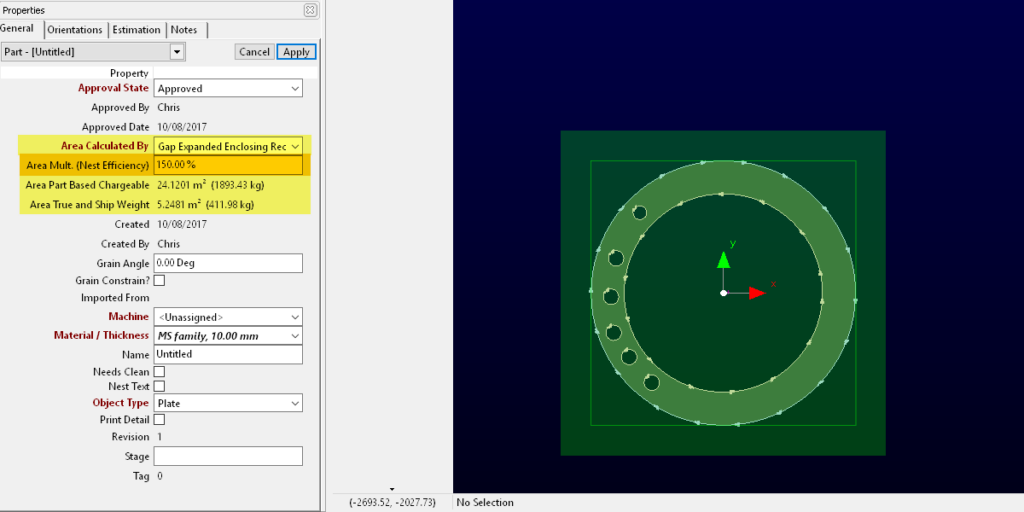
With a 150% Nest efficiency the effective charged area becomes 24.12sqm. This is a case where a nest efficiency multiplier less than 100% should perhaps be used if the quote is to be reasonable and competitive.
ENCLOSING RECTANGLE
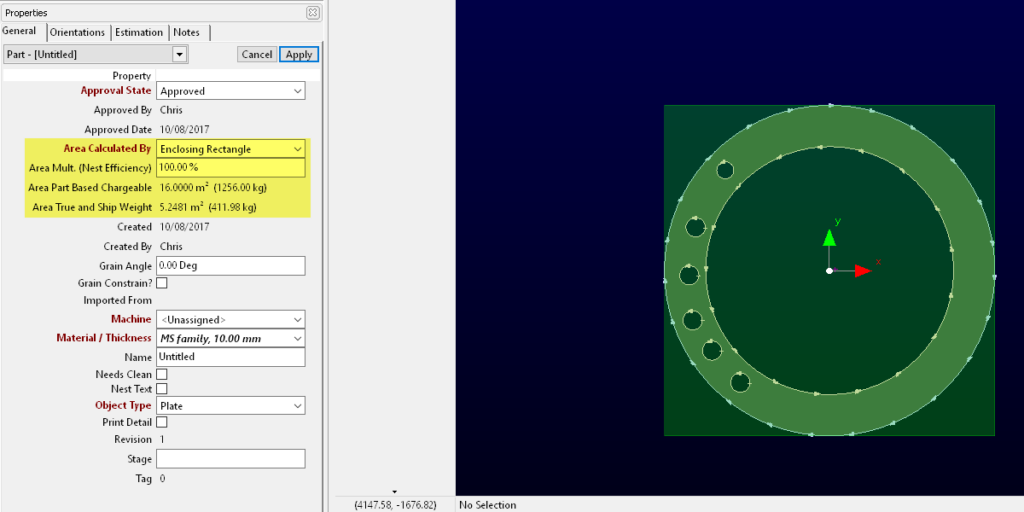
This is similar to the above but the gap expansion is not applied. At 100% nest efficiency, 16 sqm are charged. Nest efficiency multipliers may need to be set greater than or less than 100% depending on the shape geometry for this calculation method.
ENCLOSING PATH AREA
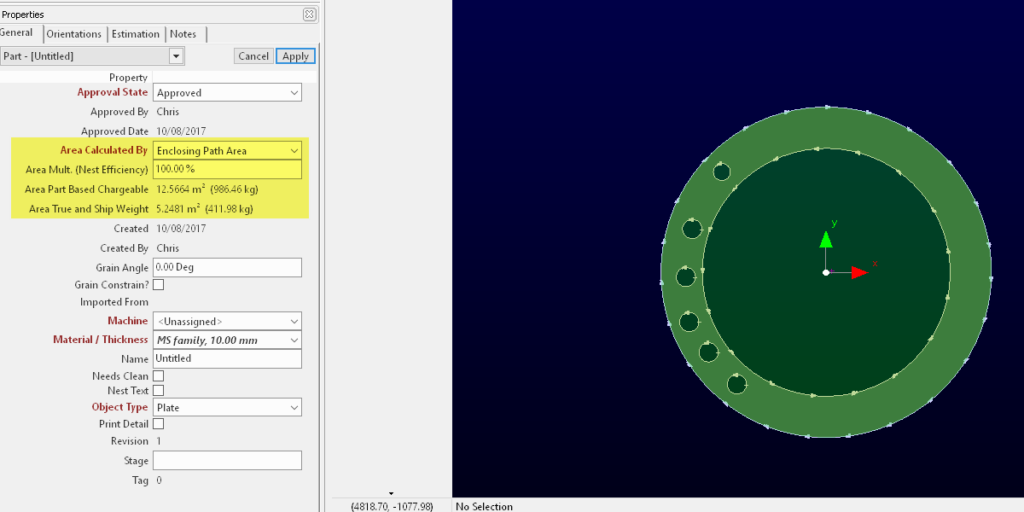
This method takes the largest external closed path and uses its area, in this case 12.57 sqm at 100% nest efficiency. The customer thus benefits from the ability for us to nest other parts near the edges of the outer disk, but is charged for the all the cutouts within the part. Note if there are multiple outer paths, this method will only charge under the largest of them, i.e. it does not suit “composite paths” composed of several separate pieces. Nest efficiency multipliers may need to be set greater than or less than 100% depending on the shape geometry for this calculation method.
HOLE FILTERED TRUE SHAPE AREA
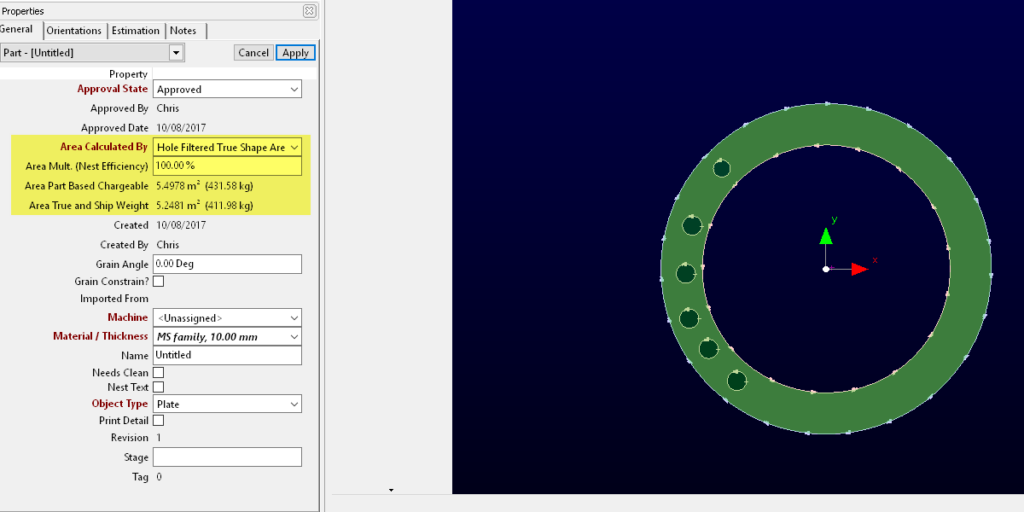
This is perhaps the most generally reasonable of the calculation methods, especially when combined with a Nest efficiency multiplier. Here again the nest efficiency is set to 100% so we can see the raw allocated area. In this case the customer is not being charged for the large internal cutout, as it exceeds the global setting for Hole Filter Area (see below), and the implicit assumption is that we expect to either nest other parts inside the ring when we cut it or we will return the circular drop to stock as a remnant and will cut parts from it at some later date. The smaller holes however are being charged, nothing can be nested inside these. The result is an allocated area of 5.5sqm, just a little more than the True Shape Area of 5.24 sqm. A nest efficiency multiplier greater than 100% should generally be used with this method, regardless of the shape geometry, and a constant nest efficiency across all shapes may work well.
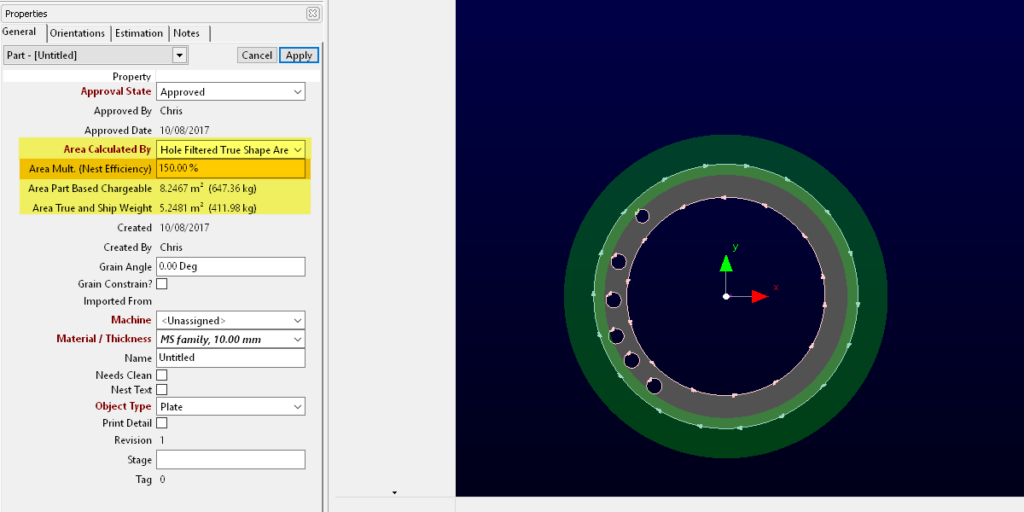
This example shows Hole Filtered True Shape area with a Nest Efficiency of 150%, resulting in 8.25sqm of plate being charged. The green area is enlarged about the extents midpoint as a visualization aid.
TRUE SHAPE AREA
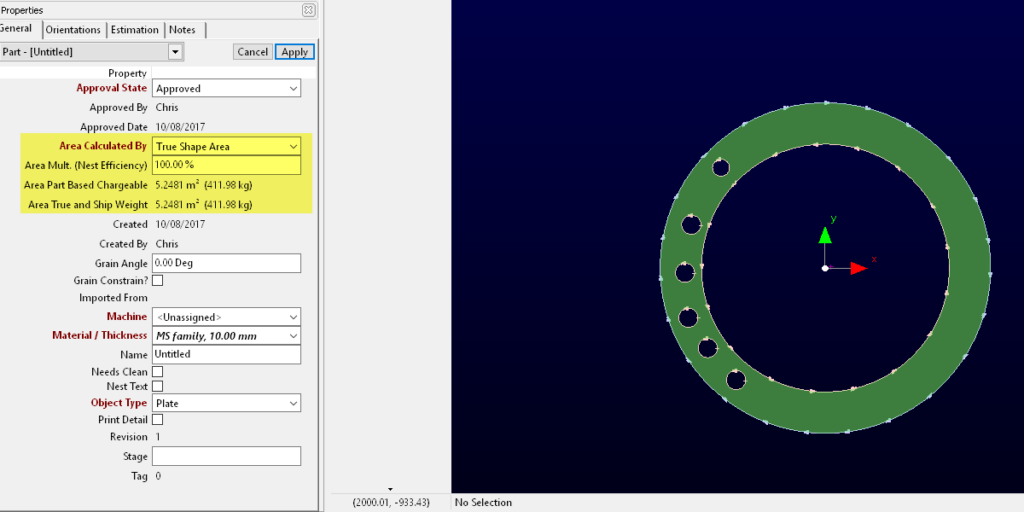
This method charges the customer the True Shape Area, ie the customer pays for the Ship Weight of the part, in this case 5.25sqm, if 100% nest efficiency is used. This is great for the customer but the cutter will be losing money on all holes in the part- the cutter should always use a Nest efficiency substantially greater than 100% with this method. While we might be able to nest parts into the large ID hole, the smaller holes (possibly drilled) the customer gets for free.
GLOBAL SETTINGS
In the Global Settings section, on the Quote tab, you can set defaults for new parts, as well as the Gap expansion for the gap expanded Enclosing Rectangle calculation and the Hole Filter Area.
